My Trip to Maker Faire


Getting ready for the earth oven workshop this weekend meant that I never got around to reporting on my trip to Maker Faire up in San Mateo on the 19th. I spoke in the low-tech “Homegrown” shed far away from the high powered tesla coil displays happening elsewhere. To add to the low tech/high tech irony, I was not able to use my PowerPoint and had to speak extemporaneously. This worked out for the better, as I was able to pull up a member of the audience to demonstrate her solar cooker–much more fun than showing pictures of solar cookers. And, after all, maybe it’s time we retire PowerPoint.

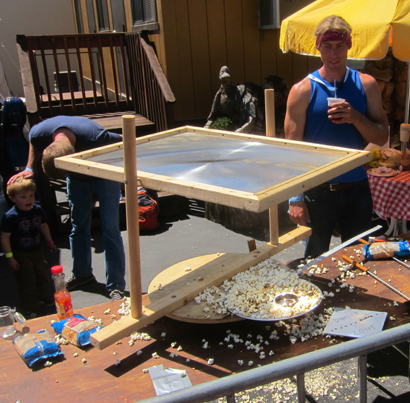
Some of the things I spotted at Maker Faire:

Long lines for the tiny house. I’ll review Lloyd Kahn’s awesome tiny house book later this week (he gave a talk just before me). Not sure what’s up with the white robe outfit in the foreground.

Also spotted: bamboo bikes!

Cornelia Hoskin, who curated the Homegrown Village part of Maker Faire, her husband and new bambino. Cornelia also runs homegrown.org.

Yes, there were paintings done by snails.

Solar popped popcorn.
A rep from Sweet Maria’s Coffee gave a great demo on all the ways you can roast your own coffee.

Expensive AK-47 toting garden gnomes.

And solar powered bikes. Not sure how this would work out on an LA street.

Someone in the Homegrown area was processing greywater in bulk containers planted with bamboo.

Overall I had a great time. It was a wee bit heavy on the robots and 3d printer gadgets but that’s to be expected. At least there were a few chickens present to balance out the proceedings. However, next year I’m coming with an overhead projector:

Our New Earth Oven and How We Built It

Untitled
The almost completed horno–waiting for its final plaster coat in a few weeks.

Kurt Gardella and Ben Loescher taught an amazing earth oven workshop at our house this weekend. Keep your eye out for classes these guys offer if you are interested in earth ovens, adobe houses or earth plasters and finishes. Contact information is below. Here I thought I’d briefly describe the process with a few pictures.

One of the nice things about this oven is that it was almost free. The only two expenses were for sand and some bags of gravel. The clay we mined from the backyard and almost everything else was scavenged. Total cost was less than $200 and most of that was the delivery charge on the sand. If I’d had a pickup truck I could have loaded the sand myself for much less.

In our backyard the ground beneath the top level of organic matter is almost pure clay. I found that a 50/50 sand/mined clay mix with just a bit of chopped straw thrown in for stability seemed to be about right for making adobe bricks. There’s no recipe for building with earth. You have to get to know the clay content of the soil you’re working with and test how much sand to add to it to make a solid brick. Ben and I made quite a few test bricks to come to this formula. Then I made 100 adobe bricks using just a simple wooden frame as a mold.

Untitled
A simple gravel pad.

To build the horno we started with a gravel foundation held within a border of treated wood. The base of the oven was made from adobe bricks that I made over the past few months and cured in the sun. I’m a big believer in adobe. Making so many bricks familiarized me with the soil I was working with and put me in touch with the original building material of the American Southwest.Though we only used half of those bricks, I’m happy to have some left over for other projects in the backyard I’d like to try. Also, after all of our lead trauma, its great to put the soil from our yard to good use. This was a healing project in some ways.

Untitled
Base nearing completion.
Untitled
Bottles acting as an insulation layer. We should have had Sierra Nevada sponsor this oven!

Once the base was built we filled it with leftover gravel and adobe bricks. The top layer of the base is a mix of clay, straw and beer bottles. This acts as an insulation layer to keep the base from soaking up the heat of the oven.

Untitled
Laying the oven floor.

The floor of the oven is made of standard red bricks set in a thin layer of sand. Fire brick is recommended for this application, but in Kurt’s experience it’s not really necessary. Plus fire bricks are expensive and we had a lot of red bricks laying around that we wanted to use. Again, we wanted to build this oven without having to buy a lot of materials.

Next we sculpted the shape of the oven in wet sand. This form will allow us to shape the clay dome and will be scooped out later.

Untitled
Kurt points at the completed sand form.
Untitled
Packing on the thermal layer.

With the base completed, on day two, we started to work on the dome. We packed a four inch thermal layer of more clay, sand and straw over the sand. Next came a insulation layer with yet more clay, sand and a lot more straw. The dome layers are cob–stiff and very difficult to mix. I think if I were building a house I’d use adobe bricks which can be made with a concrete mixer. At the end of the day we scored the dome to fit the door.

Untitled
Carefully cutting open the door. This is the completed thermal layer. The scratches in the clay will help the next layer adhere.
Untitled
Starting the insulation layer over the thermal layer.
Untitled
Stinky fermented cactus juice is added to give strength to the final plaster coat.

On the third day Kurt cut open the door hole and carefully removed some of the sand from the dome. In a dry climate all the sand might have come out on that day, but we decided that the dome was still soft and decided to leave most of the sand in for another week, just to be extra safe.

Next we mixed a coat of earth plaster–again, basically the same ratio of sand, clay and straw we used for the adobe bricks–with the addition of two stabilizers to help repel water: fermented prickly pear juice and wheat paste. The prickly pear juice we made by chopping up some cactus pads from our front yard, adding water and letting it sit in a five gallon bucket. The finished material is lurid green, slimy, and stinks to high heaven. The wheat paste is just flour and water.

We’re going to let the oven dry for a few weeks before applying the final earth plaster layer. That one will be as smooth as we can make it. And we’ll need to sand the dome opening to fit the door. Once that is done, we wait some more. The oven can’t be used until it is completely dry, which should take about a month.

Untitled
Applying the first of three earth plaster coats.

I find earth building, while labor intensive, very satisfying and meditative. It’s also something that is much better to do in a group. So thanks again to all who helped helped: Kurt, Ben, Brian, Jenny, Connie, Laurie and Leslie. We’ll post some more pictures when the oven gets its final coat of plaster.

For more resources and classes on how to build with earth see:

Three Days of Earth Oven Building Compressed Into a Short Video

We just finished a three day earth oven workshop taught by Kurt Gardella and Ben Loescher. Many thanks to all who participated: Laurie, Brian, Leslie, Jenny and Connie.We’ve got to let the oven dry for a few weeks before we put on the final coat. But it’s basically finished. The base is made with traditional adobe bricks and the dome is cob.

Don’t worry, we’ll explain the process in future blog posts. Right now we’re too exhausted to write about it. In the meantime, please enjoy our highly compressed video version of the past three days.

Saturday Linkages: Improvised Motocycles, Permaculture, Bear Attacks Man In Outhouse, Unicorn Poop Cookies–Yes, It’s a Strange World We Live In

Stuck in an African desert, a man improvises a motorcycle out of his Citroen with no tools. You can’t get more bad-ass than that!

Homemade motorcycle improvised out of a Citroen 2CV in the middle of the desert: http://boingboing.net/2012/05/23/homemade-motorcycled-improvise.html

Geoff Lawton on the Future of Permaculture | The Survival Podcast http://bit.ly/JRtgEb

Outhouse bear attack survivor was grabbed from ‘throne’ http://soc.li/u7Qdapb

3D printed Yogurt Cup SIPs from Carlyn up on Thingiverse – thanks to @rootsimple for the inspiration! http://bit.ly/JzNbXX

HOWTO make unicorn poop cookies: http://boingboing.net/2012/05/23/howto-make-unicorn-poop-cookie.html

West Coast Women’s Permaculture Gathering: http://westcoastwomenspc.weebly.com

Functional Coat Hooks Made of Unlikely Upcycled Material | Designs & Ideas on Dornob http://dornob.com/functional-coat-hooks-made-of-unlikely-upcycled-material/

Art from plastic waste in Kenya: http://www.afrigadget.com/2012/05/20/the-women-of-minyore/

No need to rewash pre-washed leafy greens barfblog: http://bit.ly/JnUIbv

Limiting barf in bike races | barfblog: http://bit.ly/JuTUCP

Imidacloprid bee study appears flawed: http://scientificbeekeeping.com

Follow the Root Simple twitter feed for more linkages.