I’m on the always inspiring Garden Fork podcast this week talking with “East Coast Eric” about my adventures in 3D printing, woodworking disasters, and a really useful note taking program called Obsidian. If you subscribe to Eric’s podcast you get to hear an update on my Little Free Blockbuster Library.
Design
I’ve Turned Into a 3D Printing Nerd
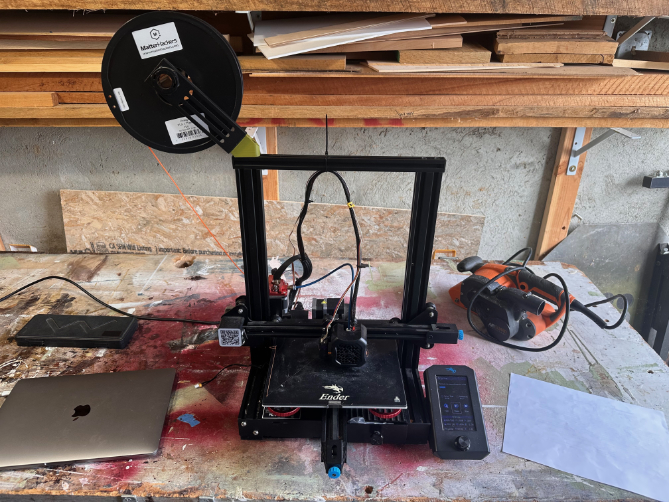
I never thought I’d want or need a 3D printer but, somewhat impulsively, I picked one up on a buy nothing group I belong to. It’s a Creality Ender 3 V2, a budget printer that’s been around for many years. You can certainly get a much better printer, but this thing works perfectly for what I use it for: boring projects around the woodshop. Here’s some of those dull, but useful, projects:
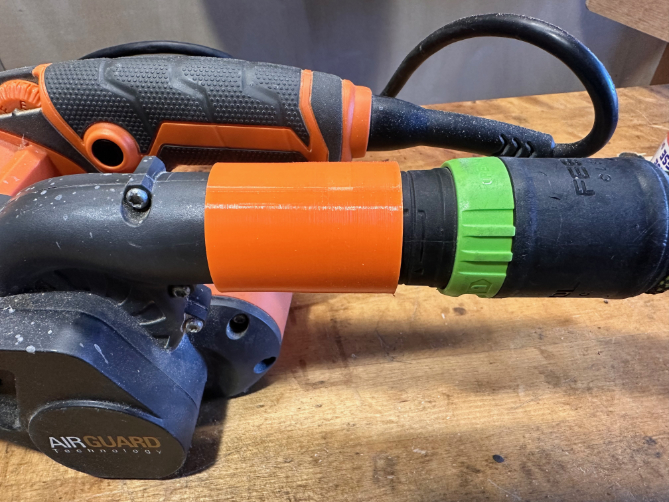
An adapter to connect a belt sander to a Festool vacuum hose.
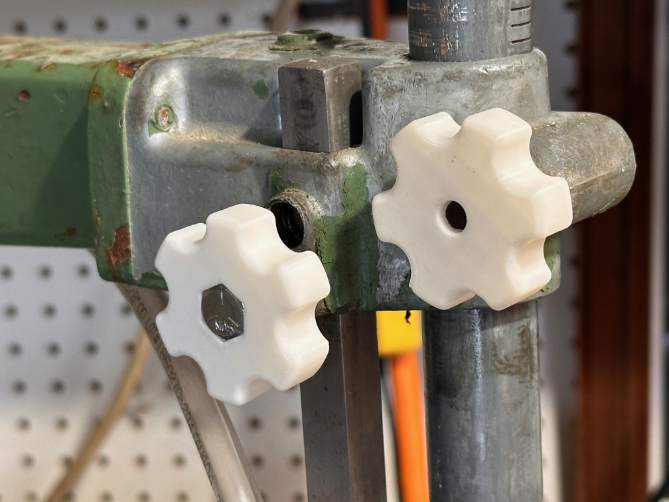
Knobs for the massive 1950s era scroll saw I found on the street.
A template for that troubled chair project I’m still working on.
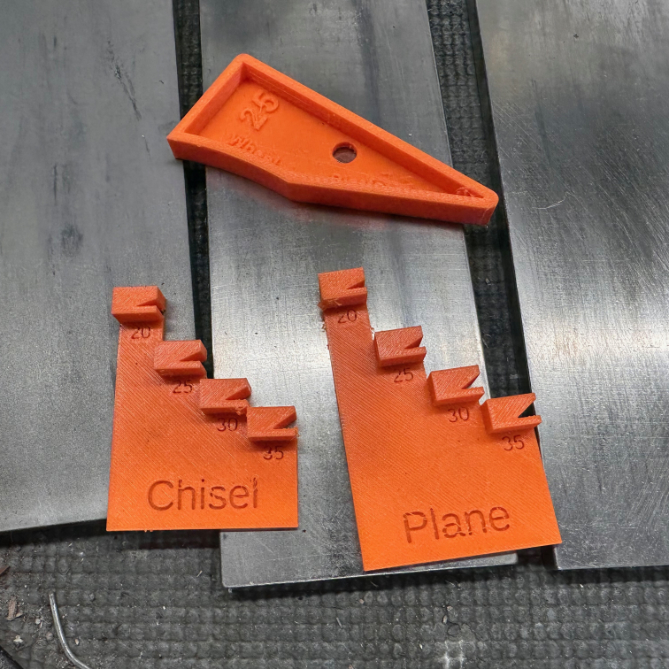
Sharpening guides.
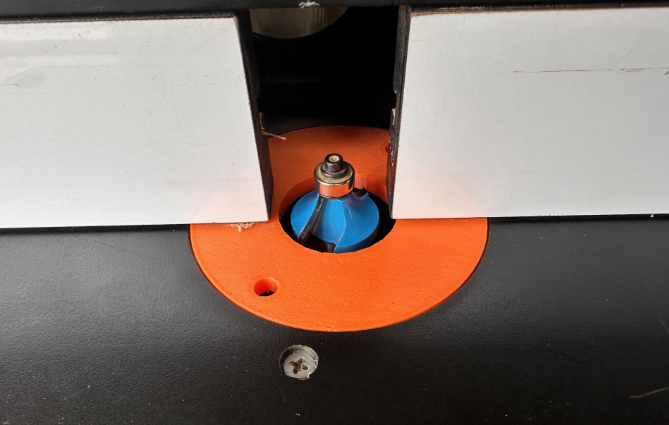
A custom router table plate.

And, while not boring, a project I wish didn’t have to happen: whistles to hand out to neighbors to warn about ICE raids.

The humor in this post hints at the sometimes difficult to justify niche that 3D printing occupies. Not everyone needs one but I have to admit the thing is kind of fun and can have useful applications. I’ve seen some really nice whistles designed by folks who know their way around the design programs much better than I do and also know the nuances of the printer’s many settings.
Most of the objects I’ve printed were designed by other people and downloaded from Thingiverse. A few of them I designed in the free version of Autodesk Fusion, which has a steep learning curve. I use Bambu Studio to turn the files into something the printer can understand. I was also guided by a Fine Woodworking 3D printing class I took online.
Like most inexpensive tools, you get what you pay for. The Creality Ender took a lot of tinkering to get going and I think I’d look for a better printer if I were buying one new. But don’t say no to a free one.
Chair Troubles

My main DIY task for the past few months has been the unexpectedly fraught process of choosing and making a set of dining room chairs. Chairs are one of the more difficult woodworking projects. The main challenge comes in the design phase, in determining details such as: How much the back should tilt? How high should the seat be? How much should the seat slope? How wide should the chair be? How much of a curve on the back? The standards for these measurements come in a range that you have to refine. These details then enter into a challenging comfort vs. aesthetics dialectic. Even though I’m making a reproduction I still have to consider and modify all of these details since I’m working from photographs, not physical measurements of antiques.

Just choosing a chair was an excruciating process. After drawing up plans for potential chairs in Sketchup, I made full size models out of scrap wood. My first scrap wood model was a three legged Art Nouveau throne that you can see in San Francisco’s de Young museum. I quickly learned why the workers at the Frank Lloyd Wright designed Johnson Wax Company headquarters complained about his attempt at a three legged chair. As the V&A Museum notes, there was a reason behind Wright’s three legged madness,
The chair has only three legs and was designed to promote good posture in the sitter. If the sitter adopted any other position rather than one with two feet on the ground with weight evenly distributed, the chair would become unstable.
The model I built definitely had this posture-policing quality. Sit in it like a slob and you’ll topple over. Lean back and the chair will break. The chair’s curves and elegant inlay work asked you to up your drip game. I imagined something like this:

Jean Delville, Portrait of the Grand Master of the Rosicrucians in Choir Dress, Joséphin Péladan (Portrait du Grand Maître de la Rose+Croix en habit de chœur, Joséphin Péladan), 1895.

Alas, I built two more full scale models of different chairs only to discover that they were way too big for our modest bungalow.

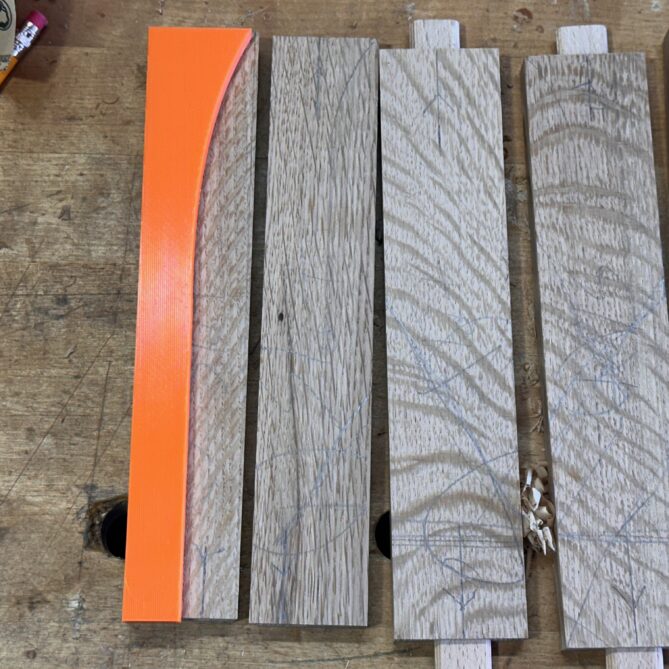
Final chair on left, model on right.
At last I found a much more modest chair with a cottagecore vibe that I was pretty sure would work, an obscure Gustav Stickley design from 1902. I built a full scale model and went through a long series of adjustments (I hinged the back so that I could get the optimal angle for comfort). I made adjustments to the plan in Sketchup and commenced building the final chair (shown at the top of this post) with some quatersawn white oak that I had laying around.

Someone gave me a 3D printer and I used it to generate router templates for the curves in the back slats and to make gauges for the compound angles of the side rails. I never thought I’d ever use a 3D printer but it’s actually proved useful and I’ll blog about it in another post.
Mistakes happened as they always do. I cut the front legs too short but figured out a way to add on some wood to hide the mistake. I pre-finshed the wood before assembly but in the process of gluing it together somehow managed to not apply enough glue to the side rails.
Once I finally got the chair assembled I struggled over stain color. Ironically, I’m in a philosophy class this month where the subject of color came up, as it also did in a previous philosophy class I took last year. I’ll spare you the details but let’s just say that Plato, Henri Bergson and Gilles Deleuze all struggled over what the f*** color is. If you really think about color you’ll come to see that the paint sample chips at the paint store lie to us with their certainty and granular specificity. Color perception in a piece of furniture can shift depending on the time of day, the initial color of the wood you’re working with and your mood. I was happy with the color but Kelly was skeptical and she’s the one with the art degree so I’ve learned to respect her expertise.

Then came the final rush chair seat weaving step. I’ve done this once before but this new chair was more challenging than that previous one and this time it the weaving process really didn’t go well. I probably had five or six false starts, getting about a quarter of the way in only to see the strands drift off course and then having to completely unweave and reweave. On one of the first weaving attempts I noticed a lack of glue in the side rails and I had to stop, reglue and reclamp.
I finally finished weaving the seat, was not happy with the results, and the rails came loose again. I think the chair is too low, the slope front to back too dramatic and the color wrong. I’m definitely going to have to cut apart my mediocre weaving job, bang the chair apart and hope I can fix the bad glue joints. I’ll probably have to sand it down to bare wood again and restain. It might look okay in the picture but you’ll have to believe me when I say it’s getting as close to firewood as any project I’ve ever done. I’m considering making a second one with the lessons I’ve learned and later attempting to fix this wonky first attempt.
In woodworking, after an initial period of enthusiasm about beginning a new project, there’s always a phase of imposter syndrome. That’s a good thing because you have to stay humble when working with natural materials and manage both expectations about how long it takes to build something as well as realism about your skill levels. Sometimes things go smoothly, but most of the time they don’t. I’ve come to believe that in woodworking you never reach “mastery” you only get slightly better at recovering from mistakes. The paradox is that you make more mistakes because you’re always trying to strive for something slightly out of the reach of your skills. In short, it’s always just plain hard.
Always Be Modeling

One of the many benefits of woodworking as a hobby is the privilege of customizing furniture to fit your house. You can make a unique piece to fit a unique room. See also Gesamtkunstwerk, of which I’m an adherent, somewhat to the annoyance of my forgiving spouse.
Most, but not all, of my furniture pieces are reproductions often extracted from auction photos. I spotted the Stickley chair with inlay, designed by Harvey Ellis, at the top of this post and immediately wanted to make a copy. I suspect this chair was a one of a kind prototype that I thought would make a good dining room chair to replace the thrift store chairs that offend my vision every single day.
To do all this pretentious Gesamtkunstwerking takes forethought. Wagner didn’t toss off those operas in an hour, after all. As a wise shop teacher once said, “always have a plan.”

Towards that end I recently spent a few days reviewing the finer points of the 3D modeling program Sketchup. I’ve used it for years but it really helps to know, in detail, what all the tools do and also to commit to memory the many keyboard shortcuts. FYI: the Los Angeles Public Library, like many other libraries around the U.S., offers free digital resources including Linkedin Learning (formally Lynda), which has a great Sketchup class.

Note–the chair rails would have curves that I did not cut in the model.
Chairs, even rectilinear examples like this one, are complicated objects with many oddball angles. They also are subject to more stress than most furniture as we haul our heavy asses up and down out of them many times a day. Due to all these angles, the 3D model took longer than usual. That this chair also has intricate inlay work means a big commitment and I wanted to make doubly sure that the chair would work in our house so I also took the step of making a full scale model out of scrap wood.

Cat for scale, but the photo does not do justice to how ridiculously oversized this chair seems in our tiny house.
I’m very thankfully I made this janky model as it became immediately apparent that the chair would be way too big for the room. It’s like something for your Edwardian era baronial dining room, not a scrappy Los Anglees bungalow. I’m a lowly blogger, after all, not a captain of industry.
While I’m disappointed the chair won’t work, I’m happy I didn’t waste wood and a lot of time. Thankfully I spotted a very strange chair from the same period in the De Young Museum in San Francisco and I think I might draw up a model of this chair. Story to be continued . . .
Reviving an Ancient iMac

I’ve discovered, as an Apple cult member since the 1980s, that their devices tend to last. But after a number of years Apple effectively makes them obsolete by no longer allowing you to update the system and then they end up in the landfill.
A few years ago I tackled the arduous process of installing a solid state drive in a 2010 iMac, thus giving it a new lease on life. Unfortunately, it could only run a very old operating system making many of the applications I use unavailable. Just last week I discovered OpenCore Legacy Patcher, a free means of loading more recent operating systems on old Macs and other hardware devices. There’s a helpful YouTube tutorial if you want to give this a try:
Installing OpenCore was far easier to do than replacing the drive. Just make sure you’ve backed up everything and are prepared to wipe the drive. The old iMac now runs 2023’s Sonoma Operating system and it’s a bit slow but perfectly usable for most applications. I don’t think I’d use it for more intensive stuff like video editing.
I’m attempting to get to know how these machines work as part of an ongoing project to use computers rather than letting them use us. More to come . . .