Salvia Means Salvation: White Sage

Salvia apiana, photo by Stan Shebs

Mrs. Homegrown here:

Today I was lucky enough to be able to take part one of a two part class taught by Cecilia Garcia and James Adams, Jr., authors of Healing with Western Plants at the Theodore Payne Foundation. I’ve blogged about their book before, and was thrilled to be able to see them in person.

Cecilia is a Chumash healer. James is a professor of pharmacology and a botanist. In both the book and in person they do a wonderful tag-team act, delivering both the Chumash message and the Western scientific take on various plants. Not that they’re doing a Scully and Mulder. James is very taken with the gentleness and efficacy of these plants and repeatedly said he wished western medicine would reconsider their value.

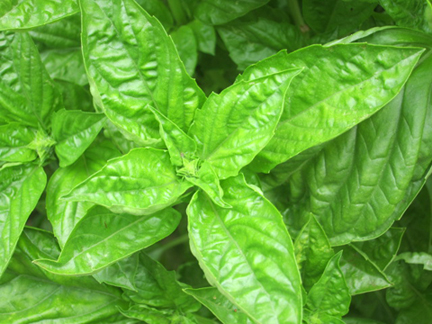
I thought I’d give you a taste of today’s lessons by telling you a bit of what I learned about white sage, Salivia apiana, we’wey (waykway) in Chumash. The most fragrant and beautiful of all Salvias.

Flower of Salvia apiana, photo by Stan Shebs

White sage is a native Californian plant which is grown in many places, as long as it can grown in dry conditions (overwatering will kill it quick) and the winter temps aren’t too cold. See Plants for a Future Database for details. It has beautiful soft silvery foliage and white to pale purple flowers that bees adore. We’ve got two planted and are looking forward to having our own homegrown supply. After today, I want to find a place for another plant.

Even if you think you don’t know this plant, you do. This is the stuff that New Age types like to burn in their smudge sticks–because it smells good, and has a sort of fuzzy reputation as being sacred or protective or cleansing. This, unfortunately, has led to over-harvesting in the wild to meet the demand. Cecilia had a long, funny rant about smudge sticks. Suffice it to say she does not like them, because, at very least, they are wasteful. They’ve been getting larger and larger, as if bigger = more mojo. All a big smudge stick does is keep more precious white sage leaves unavailable for any purpose other than burning.

She said that if you felt the need for the smoke, you should burn a single leaf, and pray while you do it. She said that white sage should never be burned thoughtlessly, like incense, because it is their most sacred plant.

A better use for white sage is in your water bottle. 

Cecilia recommended that we (the class, aka people with interest in plant healing) drop a single white sage leaf (dry or fresh) into our water bottles and so drink a bit of its essence every day. She uses does this herself and takes it further, keeping a leaf in the 1 gallon bottles she uses for cooking, as well as in her water bottle, so she is ingesting a tiny bit of her most sacred plant on a daily basis.

Why? To keep you calm, to repair your soul.  As she says in the book:

It is our everyday plant. It is a spirit plant. If you don’t have it, everything is going to bother you. You drink it by putting a leaf in cool water every day. You are going to be calm enough to be rational. It will enhance any medicine you take and protect you from the toxicity of medicines. It tickles your spirit, your conscience, and helps you keep your integrity. If you drink it every day, you won’t’ get as many colds.

 Does it work? Well, I’m willing to try it, because I love sages and have a deep affinity for them, and trust my experience with garden sage and colds enough to believe in the medicinal qualities of any Salvia. I’ve been sipping my sage enhanced water bottle all day.  Don’t know if it’s making me calmer, but it does lend a pleasant taste to the water.

As to the mental/spiritual effects, I cannot speak with any authority. James does note that it contains a compound called miltirone which may act like Valium to relieve anxiety. My purpose here is not to convince skeptics, nor to get all “woo-woo” on you, but to present traditional wisdom as it has been told to me.

White sage has a multitude of medicinal uses*, which you can read about in their book, or elsewhere. But I will share with you is Cecilia’s advice on using it as a hot tea, as her instructions were quite specific. White sage is very powerful, so if you wish to brew a hot cup of tea to address a cold or other illness, you should prepare it this way:

Put one leaf in one cup of cold water. Bring the water (and the leaf) to a gentle simmer.

• Do not let it reach a full boil.
• Do not sweeten the tea with anything.
• Only drink this tea at night, before bed, never during the day.
• Do not drink more than one cup a night.

Oh, one last note of interest. She firmly believes that essential oil of white sage is dangerous and discourages its use strongly–not only for internal use, but external use as well, even mixed into massage oil. This is holds for any of the native plants. They are powerful on their own–their properties do not need to be consolidated. As she and James say, for her, the standard dosage is 1 leaf per day. Think about how essential oil is made: a huge armload of foliage (or more) will yield a teeny tiny bottle of oil. Each drop of that stuff equals god knows how many leaves. She made this point many times during the class, so I’m passing it on.

—-

* ETA: After some comments have come in, I’m thinking I should clarify something here. Salvia apiana is very powerful stuff. Many sources say it should not be used medicinally. Obviously the Chumash disagree. But you can see from the very strict guidelines around the tea recipe that Cecilia takes its strength seriously.

All salvias have medicinal qualities. Plain old culinary sage can make fantastic medicine and is much safer to play with, especially if you’re just starting out with herbs. If you have access to white sage, I’d encourage you to try the white sage leaf in the water bottle–just to experience where that sort of relationship with a plant might lead you. But for other purposes I’d recommend you stick to culinary sage, unless you’ve studied this plant, maybe have Cecilia and James’ book, and are clear on what you’re doing.

Here’s a quick overview of the medicinal properties of regular sage from herbalist Susun Weed: http://www.susunweed.com/Article_Sage-the-Savior.htm

Bolloso Napoletano Basil

Another winner from Franchi, Italy’s oldest seed company: Bolloso Napoletano basil. It has been slow to go to flower, pest resistant, prodigious and flavorful. The huge leaves are the size of iPhones but make much better pesto (iPesto?).


As usual, I can’t find much information on this variety in English. Someone correct me if I’m wrong but I believe the name translates roughly as “blistered Neapolitan” a reference, most likely, to the wrinkled leaves. Bolloso Napoletano will be the official Root Simple compound basil from now on out.

Making Salves, Lip Balms & etc.: Close of the Calendula Series

My calendula after-bath salve. The camera refuses to capture the deep butter yellow color

On Saturday, as a part of this long series on Calendula (here, here and here), I posted about infusing oil with herbs.

If you’ve got some herb infused oil, you can make that into a medicinal salve or balm. Salve is nothing but oil thickened by the addition of wax. I prefer beeswax salves, though there are vegan alternatives, like candelilla wax. They are used similarly.

Of course, you don’t have to make salves with infused oils. Plain olive oil and beeswax are a powerful healing combination on their own, great for a no-nonsense lip balm or hand treatment. You can also use essential oils to bring herbal essences into a plain salve.

Once you know how to make salve, you can not only make skin salves, you can make lip balm and headache balm and stick deodorant and homemade cosmetics. It’s a simple technique, but it opens a lot of possibilities.

My favorite herbal salve is made out of a mix of equal parts Calendula (pot marigold), chickweed (Stellaria media) and plantain (Plantago major) oils. These three work together to make an all purpose salve that is as good for gardener’s hands as it is for diaper rash or skin scrapes or bug bites or dry cuticles or badly chapped lips or mild sunburn or whatever. I always have a jar on hand and I give jars to friends and family.

Yesterday I made a batch of pure Calendula salve, a big jar of after-bath moisturizer. Like body oil, salve works best as a moisturizer if applied to wet skin. Calendula extracts are found in a lot of high end cosmetics because it’s a mild but effective skin herb. It’s anti-inflammatory, anti-bacterial, soothing, and helps skin regenerate. I love smoothing it from my cat-scratched ankles and my mosquito-bit knees up to my sun-baked face and arms.

How-to after the jump.

The Secret of Salve

The only secret to salve is that it is so darned easy to make.

The only equipment you need is some kind of double boiler situation: a true double boiler, a heat proof bowl balanced over a sauce pan, etc. What I usually do is put a Pyrex liquid measuring cup into a small pan of water. I set the burner on to medium heat and bring the water to a very gentle simmer. Thus the oil heats without overheating or burning.

To the oil I add a little bit of organic beeswax, and continue to heat and stir until the beeswax dissolves. That’s all there is to it, really, but I’ll explain the details.

First, let’s take a moment to talk about beeswax:

Where do you get the beeswax?  You can order it online, just search “organic beeswax”. I wouldn’t buy it in craft or hardware stores unless it’s marked as organic. Beeswax holds on to chemicals, so if the bees were working fields which were sprayed, traces of those chemicals could end up in your balm. Same goes for cannibalizing beeswax candles. I hope to get some nice clean wax from our hive soon, but in the meanwhile I buy my wax from Mountain Rose Herbs. It comes in both pellets and blocks. Pellets are a lot easier to work with.

Good organic beeswax smells heavenly, by the way, and that scent carries into the finished salve.

How much beeswax do you use?  Making salves is all about simple proportions–the ratio of oil to wax. 4 parts oil to 1 part wax yields a firm salve. You’d want this sort of proportion for roll up lip balm tubes or roll up deodorants, cases where firmness is a virtue.

If you don’t necessarily need a firm salve, you have a lot more latitude. 6 parts oil to 1 part wax makes a soft salve, better for scooping up with the fingers.

To tell the truth, even small amounts of wax will firm oil up to a sort of loose ointment consistency. For this Calendula bath salve I just made, I didn’t bother to  measure. I just added a heaping teaspoon of wax to my oil. The ratio must have been 10 or 12 to 1. I wanted something very soft.

So does this make sense? For instance, say I want to fill a particular tin with my skin healing salve. I measure the volume of the tin first, by spooning water into it. Say it holds six tablespoons. The easy math on this one would be to warm 5 tablespoons of oil plus 1 tablespoon of wax (5:1). That would work without resorting to teaspoons and fractions, but if I wanted a looser salve, I might short the wax measure.

Keep in mind it’s very easy to repair a too-hard or too-soft salve. Just reheat it and add more wax or more oil as needed. You can get some sense of how a salve is going to harden up by dropping the hot liquid onto a cold plate–just like jam.

Measuring beeswax: Because salve measurements don’t have to be precise, there’s a few ways to measure out wax. Measuring by the spoonful is easiest–spoonful of oil to spoonful of wax. If you have wax in the pellet form, just measure the pellets by the spoonful. If you have a block of wax, shave the wax and press the gratings into a spoon.

Alternatively, you could measure wax by displacement: pour oils into a measuring cup, then drop in pieces of wax until the liquid level meets the desired measure. For example, for a 6:1 ratio, fill a clear measuring cup to 6 oz. and then add wax chunks until the volume rises to 7 oz.  That equals 6 oz. of oil and 1 oz. wax.

Back to the melting:

Okay, so you’re warming your combined oil and beeswax in a double boiler-type situation, as described above. Once the wax has warmed enough in to dissolve and vanish into the oil, take the oil off the heat.When using herb infused oils, you want to treat them gently and heat them as little as possible.

Add essential oils:

If you want to add any scent, or if you’re into the healing properties of essential oils, this is the time to stir them in–right after you take the mix off the heat, but before you pour it.

For lip balms, I’ll add a few drops of peppermint essential oil. Do be careful with peppermint oil, though–too much will make your lips burn. Think something along the lines of 2 drops of of peppermint essential oil per small tin of lip balm. It’s easy to warm it again and add more if you want it stronger. Same goes for scents. Use a light hand. A few drops will do it in most cases.

Also, I should add that you can infuse oils with scented herbs, like dried lavender buds or rose geranium leaves or chamomile flowers. They’re not as strong as essential oils, but very nice in salves. And a lot cheaper. 

Here’s a hint regarding essential oils: For inspiration regarding what kind of essential oils might go into different types of salves, check out the product line at Badger Balm.

Pour into jars:

Once you’ve stirred in the essential oils, pour the liquid salve into clean, dry jars or tins. Make sure your containers are dry and clean. Dirt or water could lead to contamination and mold.

Pour it fast, before the mix starts to cool. I find that the lip of a liquid measuring cup gives enough control to fill even those fiddly little plastic lip balm tubes.

Let the containers sit, open, until they are completely cool. Then lid them and label them.

Clean up:

The best way I’ve found to deal with the waxy grease residue (since I stopped using paper towels) is to shake a generous amount of baking soda into the dish and then rub it around. The soda lifts and traps the grease. It works like a charm.

Shelf life:

To be honest, I’m not sure what the expiry date is on these things. I’ve never had a salve go bad, but they do lose potency and scent. Also, a salve or lip balm that’s being used is exposed to a lot more bacteria than one which is unopened. I’d say the unopened ones could last 6 months to a year, but once you open a tin or jar and start sticking your fingers in it, you should use it up in a few months.

 Self promotional note: We cover all this stuff in much more detail in Making It: salves, lip balm, deodorant, etc. –with proper measurements and everything!

How to make a Calendula oil infusion

Love that golden orange color. It’s prettier in real life.
So finally I get around to finishing off this mini series on Calendula (pot marigold). This post will be on infusing oil, and next week we’ll have the one on salves.
We’ve already covered the growing and drying Calendula:
Oil infusion is as simple as can be.  Oil infusion is soaking. Think of it like making sun tea. You take a nice clean jar with a good lid, and fill that about half way full of dried herb, top it off with oil, and let that sit in the sun.
The resulting oil is medicinal. It can be used straight on the skin, or fashioned into salves and balms. I’m particularly fond of Calendula. As a skin treatment it displays regenerative properties, making it really helpful for healing dry, scraped up, or otherwise damaged skin.
 But lets step backwards a bit and talk about materials. 


Materials

Your herb–Calendula or anything else– should be dry when you start this. It should crumble between your fingers. If there’s any flexibility to leaf or flower, that means there’s still water in there.  The reason you don’t want water in there is that spoilage in oil infusions usually comes about because of the presence of water in the plant material. Spoilage can result in anything from off smells to mold to–worst case scenario–botulinum toxin in the oil. 
Now, to be sure, I know folks who infuse fresh herbs in oil, and they’re not all dropping dead. This is like the prohibition against infusing oil with fresh garlic cloves. Garlic oil tastes really good, and lots of people have done it for a very long time, but, theoretically, bad things can happen because of the water in the garlic (i.e. botulism), so it’s not recommended by the Powers that Be. So it’s up to you–I’m just not going to encourage it.
Regarding Calendula specifically, you can soak either the petals alone, or the whole flower heads. Either way is fine. Just make sure the green part of the heads is truly dry.
Your oil doesn’t have to be super high grade. I use un-virgin olive oil–not the lowest, motor-oil sort of grade–just something a little more experienced than extra virgin. This is also a matter of preference. You can use organic, cold pressed, locally sourced extra, extra virgin oil, for sure. It’s just an expensive proposition. Since I make these oils in quantity, I use the less expensive oil and save the good oil for salads. 
It doesn’t have to be olive oil, either, but it should be something good for the skin, like jojoba oil or grapeseed oil. I don’t recommend common cooking oils, like corn or canola. Some people infuse into petroleum jelly (making insta-balm), but that makes me shudder. I’ve not tried infusing coconut oil, but I imagine it would work great. 
The Soaking
All you have to do is fill a very clean jar with a good lid about half way full of dried herb,  then top it off with oil.

If the herb you’re using is very fluffy, and as a result has a lot of air around it–imagine a jar of dry chamomile buds, for instance–you can fill the jar almost to the top with dried matter.

This not an exact science, so don’t get worked up about exact quantities. The only thing you should keep in mind in terms of measurement is that you’ll get less oil out than you put in. The herbs soak up a good bit of the oil, and don’t give it all back. Also keep in mind that you don’t need to make a ton of this stuff unless you’re planning on selling it, or doing a big Christmas project. Salve stretches a long way. A jam jar–the kind that holds 1 cup–is not too small for an experimental go at this.

Now wait
Cap the jar tight and let the plant matter infuse in oil for about a month. The best place is in a sunny window, where it gets some heat and light. Very gentle warming is the idea. You can take your jars outside when the weather is good. When the sun is hiding, I’ll put my jars on the stove top, where there’s constant warmth from the pilot light. 
Give the jar a shake every now and then.
There are other ways to do this. Some people simmer on the herbs and oil on the stove top. I avoid this because plant essences are so delicate and heat sensitive. A crock pot is more controlled, but I don’t have one of those. In Making It I wrote about a technique involving alcohol, the blender, and the stove. It’s tricky, but it will yield finished oil fast. But here at home, I like the simplicity of the long soak. It doesn’t take any energy, and hardly any attention.  
Harvest
Above I said about a month–that’s loose, because again, it’s an inexact science. I’m sure you’d have something useable in a couple of weeks, and I will confess I’ve often forgotten about my oils and left them more than a month with no ill effects. 3 to 4 weeks is ballpark. 
Strain the oil from the dried matter. I used to do this very, very carefully with a tea strainer or with a muslin bag. Now I have the blessed canning funnel.  I line that with various strainers, depending on how clean I want the oil. I have a fairly loose strainer that’s good for big stuff, like Calendula blossoms. Tea baskets fit in there as well. And for very fine straining I can line the strainer with cheese cloth or muslin.
Strain the oil into a fresh, clean jar. Pour off the oil first, then press the dried matter to squeeze out the remaining oil as best you can. You’ll never get it all back.
Label it 
Make sure you label it with the type of oil and the date it was made. Believe me, even if you only make one jar, you’ll forget what it is and when you made it, and a year later you’ll be standing at your cupboard, puzzling over it.

Store

Store the oil in a dark place. Use it up within a year, the sooner the better, to take advantage of the Magick Herb Power.

Of course you should not use oil that smells rancid or looks funny. Smell your herbs and oils as you’re working with them! If you’re familiar with them, you’ll know easily that they’ve gone off.

Don’t throw away old or even rancid oil, by the way. Burn it in oil lamps. That’s a whole ‘nother project that we should cover here. It’s the first project in Making It.