Return of Recipe Friday! Carrot Soup

We had a party at our house last week and lots of people brought baby carrots. And no one took their baby carrots home with them when they left. So I took the pile of baby carrots and made a pureed carrot soup with them–one of my all-time favorite soups, in fact. Working with baby carrots was kind of fantastic. No chopping! No peeling!

Doing this reminded me that I haven’t shared this recipe on the blog, so I dug up the original recipe card. This is one of the oldest recipes I have. It sort of taught me the basics of soup making. I no longer refer to the recipe when I cook, but it was good to go back and see the original instructions. This soup is just about an ideal soup. It’s fast and flexible, doesn’t require many ingredients and seems to please everyone. At heart it’s vegan, but can be made more decadent by adding dairy. I wish I could credit it properly, but it’s something I copied from a magazine onto a card fifteen years ago or so.

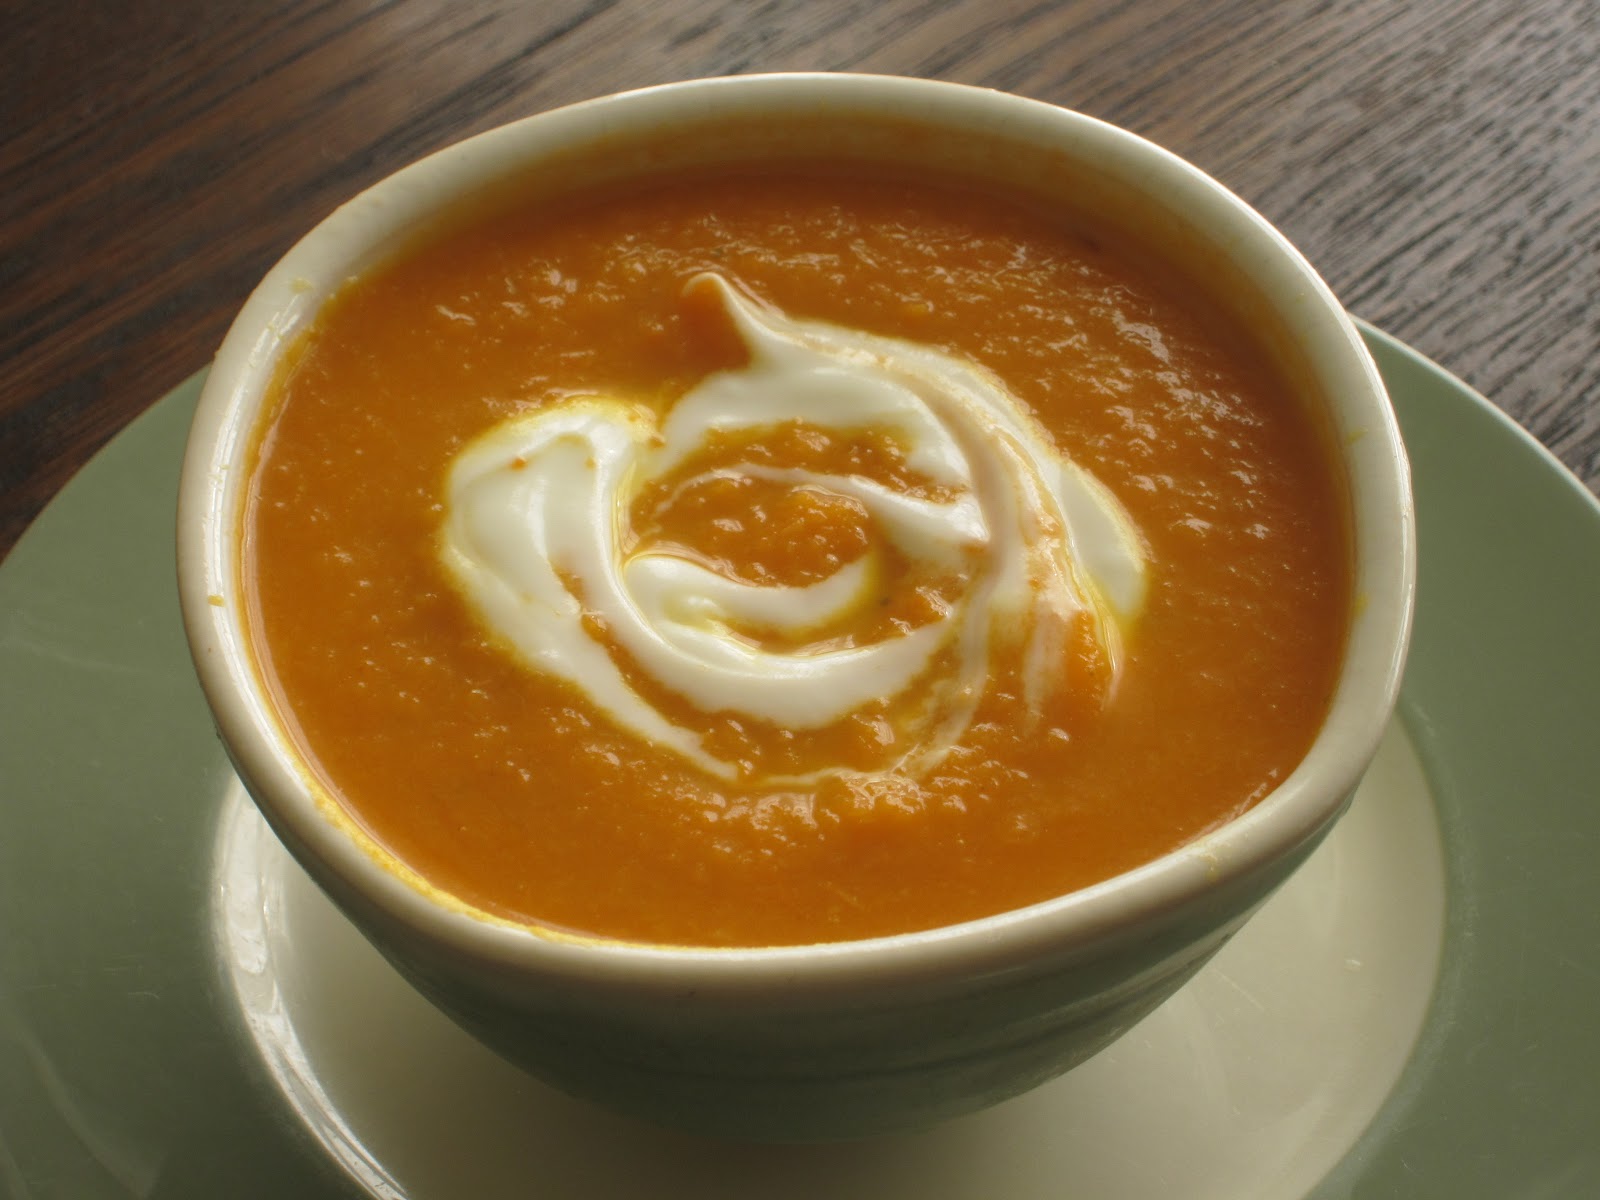
It’s amazing how such a simple soup can have so much flavor. The sweet-spicy flavor and bright orange color also make it an ideal dish for this time of year. Each time I eat it I feel like I’m doing something really good for my body.

Carrot Soup

  • 2 tablespoons olive oil or butter
  • About 2 pounds of carrots, peeled and sliced into chunks* (Peeling is optional but the soup tends to be sweeter/less earthy if you peel. To tell the truth. I never weigh my carrots–I use as many carrots as I have. If it looks like a whole lot, I’ll add more onion to balance it out. If I don’t have a lot of carrots, I still follow the recipe as is–it works, you just have less soup.)
  • 1 large onion chopped
  • 6 garlic cloves peeled
  • 3-5 whole spice cloves (not absolutely necessary but very nice)
  • A little bit of salt. It doesn’t need lots. Start with 1/2 teaspoon or less and add more later if it’s needed.
  • About 4 cups of water or vegetable broth. Broth makes it extra rich, but I usually use water.
  • Fresh lemon juice, about one tablespoon. Best just to have a lemon on hand.
  • Pinch of sugar
  • Optional: yogurt or sour cream or heavy cream for topping

Heat oil in a a large heavy bottomed pot or saucepan. It should have a lid. Add the carrots, onion, garlic and cloves and saute until the onion is translucent. Then add the water or broth and salt. It should just cover the carrots. Cover the pot and simmer until the carrots are tender–maybe 30 minutes.

Fish out the spice cloves and discard. Puree the soup until smooth, either with a stick blender or a countertop blender or a food mill. If you use a countertop blender, do it in small batches instead of filling up the blender so you don’t get the exploding volcano effect, i.e. hot carrot soup launching from your blender. Believe me, I’ve been there.

Do a final adjustment of seasoning after it’s blended (put it back in the pot if you used the blender). At this point add the lemon juice, which is the magic trick of this recipe. I don’t consider this ingredient optional. The recipe calls for one tablespoon of lemon juice but I usually add more. If it seems right, a bit of sugar. Just a pinch or two. Sugar really helps if the carrots aren’t sweet. Then polish it up with salt and pepper to taste. You can add more hot water or broth to thin it if it seems too thick.

If you wish, serve it with a swirl of yogurt or cream on top, and maybe a sprinkle of chives for fancy.

It keeps well overnight, improves, even.

Changing it up:

I often add different herbs and spices at the beginning. For instance, I think thyme and carrots like each other, so I’ll often throw some sprigs of thyme in at the beginning, to be sauteed with the onions. Same goes for sage. Sometimes I’ll add a bit of cumin. Or cinnamon. Or cayenne. Or ginger. It’s up to you if you want to push the soup toward more of an herbal/lemony flavor or more toward spicy/exotic or toward a sweet pumpkin pie profile. It’s endlessly flexible.

You can also make this same soup with sweet potatoes instead of carrots. Sometimes I mix the two.

*A reader points out that she grates her carrots when she makes carrot soup. Good point! The smaller your veggies, the faster they’ll soften up. Dinner will be on the table sooner–and she thinks it may make better tasting soup, too. But if you don’t have the energy to grate, big chunks will soften up just fine. It’s all good.

One way to salvage stale bread

Mrs. Homegrown here:

So I bought a baguette this week, which caused Mr. Homegrown to grumble with hurt indignation. His homemade bread is better than any store bought, it’s true–but he hadn’t baked in a few days, and I wanted to make caprese sandwiches. However, my plans went awry and the baguette went stale.  Oh, the shame on my head! Just where did we put out our supply of sackcloth and ashes?

However, tonight I salvaged the bread by making it into Melba toast (?) or rusks, maybe (?).  I have a fondness for hard, blandish cracker breads like this. You can pile an amazing amount of dip-like-substances on them, and as I’ve said, I could live on chips and dips.

I have to admit that for anyone who’s ever made croutons, this recipe is a little “Well, duh”– but, nonetheless:

All you have to do is slice the stale bread up into reasonably thin slices. Lord knows my slices vary in thickness quite a bit. Thinner is easier on the teeth.Very thin would be exquisitely crunchy, but mine are never very thin because I am both uncoordinated and lazy. Baguettes make perfect rounds, but you could chop up larger loaves into bite size squares.

 I like to make these out of bread so far gone it could not be sliced the next day. You know that thin line between salvageable and brick? That’s what this recipe is for. I think there are better things to do with only slightly dry bread–like making bread salad, for instance. See below.

Then I use a garlic press to add garlic juice to some olive oil–maybe one or two cloves to 1/3 cup? It doesn’t really matter, because this is a very loose process. I put the bread slices in a big bowl and drizzle the garlic oil over them and toss them about until it looks like all the slices have been well greased. This usually means I add some more olive oil. I like lots of oil, but I’m sure it would work fine with less. It would also work fine with no garlic.

Finally, I toss the greasy bread with lots of salt and pepper. And yes, of course, you could use all sorts of herbs and spices at this point. Whatever takes your fancy.

The bread goes on a cookie sheet into a 350 degree oven for about 20 minutes to a half hour. I’m not sure about the timing because I just check until they look done. “Done” means they’re brown, but not black, and have gone dry and hard as rocks.  Timing will vary by how stale the bread is when you begin, fresher bread taking longer. Thinner slices dry out faster than thicker ones.

Not so wild about melba toast? I don’t have tested recipes on hand, but google up “bread salad” or “panzanella.” This is basically just pieces of stale bread tossed with basil and tomatoes, lots of olive oil and a touch of vinegar. It can be jazzed up with cucumbers or olives or hard boiled eggs or whatever is on hand.

Also, I just saw this recipe for cold bread and tomato soup at the Awl. Haven’t tried it, but it looks interesting.

What do you do with your stale bread?

Cornmeal Zucchini Pancakes

More things to do with zucchini!

Many of you know Rosalind Creasy, Queen of the Edible Landscape. If you don’t, look her up. She wrote Edible Landscaping, among others. It turns out that she’s not only an amazing gardener, one who makes colors and textures sing, who makes edible gardens more beautiful than any ornamental garden I’ve ever seen, but she cooks, too.  Darn her and her…her…competence!!!

Erik found her Recipes from the Garden at the library and brought it home. This is the first thing we’ve cooked from it, but we liked it a lot. These are savory pancakes that suit for breakfast, brunch, or even dinner. I imagine if you made them without the onions they could be served sweet, with syrup or jam, as a veggie-infused breakfast pancake.

>Note: She calls for yellow zucchini or summer squash, but we used green zucchini.

Cornmeal Zucchini Pancakes
1 1/4 cup cornmeal
3/4 cup all purpose flour
2 1/2 teaspoons baking powder
1 tablespoon of sugar
3/4 teaspoon salt
1 egg
1 cup of milk
2 tablespoons of vegetable oil
1 cup of grated zucchini, yellow or green, or yellow summer squash
3 tablespoons yellow bell pepper, diced fine (we skipped this)
3 tablespoons finely chopped onion
Salsa for serving, homemade or store-bought, optional.
(We just chopped up some red onion and cherry tomatoes and called it salsa, but I think a fruity salsa (e.g. mango) would be really good with this.)
In a big bowl fork together the dry ingredients (the first list). In a smaller bowl mix the wet ingredients (the second list). Dump wet ingredients on top of the dry and mix just until incorporated–Creasy says “until barely moist.”
Cook these like any pancake: in a greased skillet over medium heat until they’re golden brown and the sides are firm. Keep the finished ones warm in the oven while you cook the rest.
They keep well in the fridge. I just ate one for breakfast after rewarming it in frying pan. Still tasty after 3 days!

Easy to Make & Delicious Fermented Veggies

Inspiration hit at Camp Ramshackle and I finally made fermented vegetables. I loosely followed the Golden recipe from The Versatile Vegetable by Miranda Barrett and Colleen Pollard with cabbage, golden beets, carrots, celery, ginger, lemon and garlic. I omitted the Granny Smith apple because every person/book I consulted said use only the freshest apples and my stash had been sitting for quite some time.
I made a stop at Culture Club in Pasadena and spoke with super helpful Elaina who set me up with a Pickl-It jar, some Caldwell’s Vegetable Starter Culture and some guidance (reiterating to use only the freshest apple).
I shredded up the vegetables, stirred in the starter and left the vegetables to ferment for ten days. When I pulled the jar out and popped the lid, I had a brief flash from the Monty Python’s The Meaning of Life when the Grim Reaper visits the farm house to inform the dinner guests that they died from the salmon mousse. I told my family I loved them and took a forkful. A delicious forkful and then other. I live to tell the tale.
I am enjoying the last of my first batch and plan on starting another. I even brought some for a camping dinner for friends on Santa Cruz Island. I’m happy to say not only did all the dinner guests survive, they also thought it was delicious.

Our favorite way to cook zucchini

It’s that time of year again.

Put aside those zucchini bread recipes and try this instead.

This recipe–or technique, rather– sounds too simple to be good, but it really works. As one friend said of the dish, “It tastes like there’s a lot going on, but there’s not.”

All you’ve got to do is shred your zucchini up on the large holes of your kitchen grater. Saute the shreds in an uncovered skillet with lots of olive oil and some chopped up garlic, until there’s no water in the pan, and the volume of the zucchini is reduced by about half.

This transforms the zukes into a savory, glossy, succulent mush. Maybe that’s not the most elegant way to phrase it, but it’s the best I can do. Yes, it does have a baby food texture, but it’s really, really good, so you don’t care.

I can’t begin to tell you quantities–we’ve never measured. Just guesstimate. It will work. The one rule of thumb I can offer you is that you will lose about half the volume of the zucchini through cooking, so grate up more than you think you can eat.

The central idea here is to cook off all that water. This can’t be emphasized enough. That’s what makes this dish taste good. The zucchini will release a lot of water as it cooks–at least ours does, because it’s very fresh. Older zucchini may be more dry. So keep it simmering at a good clip, stirring occasionally, until the water bubbles off.

Saute until there’s no water pooling at the bottom of the pan. Until you start to run the risk of browning the zucchini. Then take it off the stove. Add salt and pepper to taste.

How long will this take? It varies by how much zucchini you’re cooking, and how wet it is, how deep the pan is, etc., but for a general guideline, when we shred up one big boy, enough to fill a 11″ skillet, it takes 20-30 minutes to cook it down.

Starting out…
Reducing…
Done.

Note: This year we’re growing a type of zucchini called Albarello di Sarzana (Little Tree of Sarzana) from…as usual…Franchi. We’re really liking it. It’s a pretty, light green, spotted squash, and the leaves have silver patterning on them. But more important that looks, it’s tasty, and seems to be resistant to powdery mildew.

ETA: Love all the recipe suggestions we’re getting in the comments! Please do tell us how you like to cook zucchini.