Harvesting and Drying Calendula

Mrs. Homegrown here:

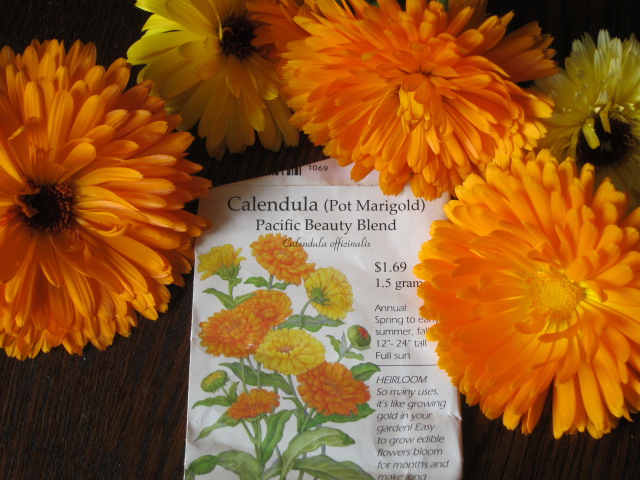
Okay, so in a previous post I talked about growing Calendula. This post I’m going to talk about harvesting and drying it. The next post I’ll do on the topic will be about making a skin-healing salve from the dried petals, olive oil and beeswax.

When to harvest: 
Start harvesting your Calendula as soon as the first flush of flowers is in full bloom. Don’t try to “save” the flowers. The more you harvest, the more flowers each plant will put out.  After the first cutting, you can probably return to harvest more every 3 days or so.
The ideal time to harvest is in the morning, before it gets warm, but after the dew dries. You want them all fresh and perky and at their peak. This is traditional wisdom. However, I believe it’s better to harvest when you can than not at all, so I harvest at all times of day.
A side note regarding seeds:
If you don’t harvest the heads, they die back on their own, and then they’ll go to seed fast. If you don’t like the idea of Calendula volunteering all over your yard the following year, you’ll want to collect all the heads before they die back. However, you may also want to monitor them carefully and collect ripe seed for planting the next year (you want to collect the seed when it’s brown, not green).  And if you want to keep track of such things, if you make a point of saving seed only from the plants with the best blooms, your favorite colors, etc., over generations you can breed your own line of Calendula.
Alien beauty. A seed head in its early stages. The seeds are the green things that look like bugs.
What parts to harvest:
I harvest the flower heads only, though I understand that the foliage has much the same properties as the flowers. If I were short on plants, and knew I’d get few flowers, I’d harvest and dry the leaves to make up that lack. Given a choice, though, I prefer the flowers, just because they’re good for cooking and decoration as well as my salves. People used to eat Calendula leaves (they’re known as “pot marigolds” because they used to go into the cooking pot), but I’ve tasted them, and I don’t think I’ll be making them part of my diet unless I have to.
To harvest, I either pinch off the heads or cut off the heads with scissors. This often leaves a long, beheaded stem behind. That stem can be trimmed back to the first set of leaves, for the sake of aesthetics. Or not. (ETA: A commenter recommends that you always cut the stem back to the first set of leaves, so the stem does not become a conduit for rot. Makes sense.)
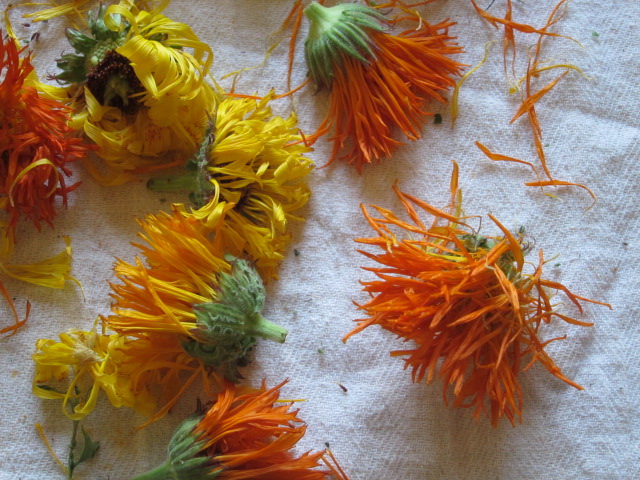
How to dry:
Bring the flower heads indoors, into an area out of direct sunlight. Don’t wash the heads.

Spread the heads out face down on a dishtowel or a sheet or newspaper or for fancy, an old window screen stretched between two chairs. I find laying out the heads an oddly satisfying activity.
Of course, if you have a dehydrator you could use one of those. Calendula should never be subjected to high heat, so oven drying is out of the question. Set your dehydrator to 90-95 degrees F.  
If you’re air drying, turn the flowers over every so often. Keep them out of direct sunlight.
They’ll shrink quite a bit as they dry, so you’ll have room to keep adding fresh specimens as they come in.
When are they dry enough?:
They must be completely and absolutely dry before they go into storage. Believe me when I say this is important. A couple of years ago I was impatient and put a few chamomile buds which must have been not-quite-dry in to a jar with the rest of my (painstaking) chamomile harvest. The next time I opened that quart jar I got a big nasty whiff of mold. I almost cried.
So–the flowers must be dry. They should be fragile, crispy and very dry, like crepe paper. Make a habit of feeling them at different stages of drying to develop sensitivity in your finger tips. You’ll notice that when they’re not quite dry they’ll *look* dry but when you touch them they are a bit cool compared to a truly dry flower. In other words, you can feel the water in them. Leave those for another day or so.
The green part, the flower head to which the petals are attached, dries more slowly than the petals themselves, because it has a greater mass. Be cautious of this. If you’re going to store the heads whole, then you need to allow extra time for the green parts to dry.  Which brings me to the next item:
To pluck or not to pluck:
There isn’t a right or wrong here. Everybody does it different. 
If you plucked all the petals off the heads when you first brought them indoors, those petals would dry very fast. But that, in my frank opinion, would be a pain. It would be like playing a game of “He loves me, He loves me not” that lasted for hours.
If you want to leave the petals on the heads that’s fine. The heads (green parts) have medicinal properties too, so you can use them whole. The only thing is that you must make sure those heads are completely dry before you store them, as I said above.
What I do is is wait until the petals are dry, then I pluck them from the heads, to avoid the whole “is the head still damp?” issue. When the petals are dry, they come off the head very easy. In fact, the ease with which they come off the head is an indicator of their dryness. If they’re resistant at all, they’re not dry. To work in bulk, you can take a whole bunch of dry heads and put them in a bowl and rub them between your hands. The petals will fall off. The heads will collect at the bottom of the bowl, because they are much heavier than the petals. Or you can strip them by hand. When they’re dry, this only takes a single gesture.
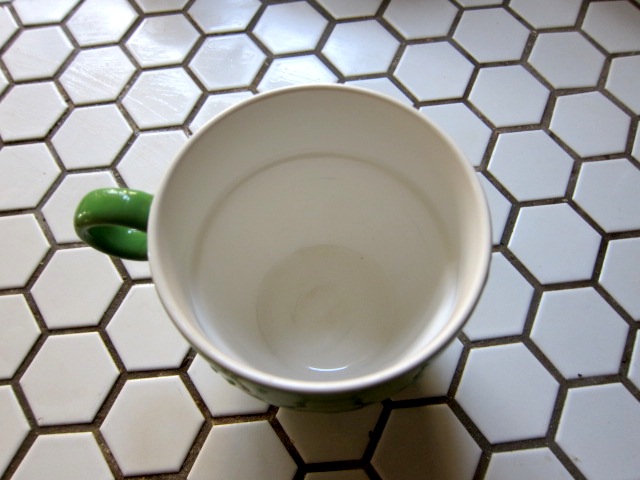
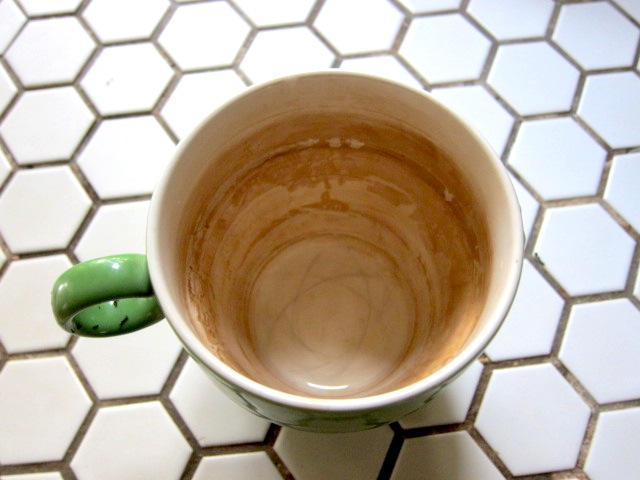
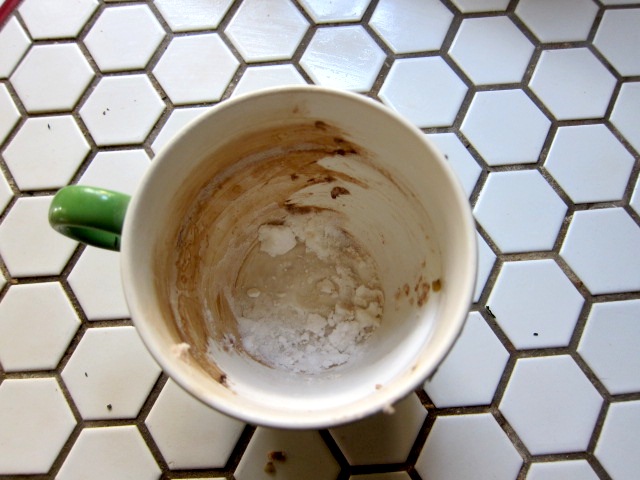
Only the driest petals go in the jar. All that debris around the jar is stuff that’s not dry enough yet.
Can you use the flowers fresh?:
Yes. And no. Depends. The next step in this series of posts is the making of an oil infusion.  I never put anything “wet” in oil, because of the slight chance that botulinum toxin might develop in the oil.  Herbalists who I respect put fresh matter in oil nonetheless, and I envy them, because I suspect they’re getting more out of the plant by doing so. But I’m not going to take that risk–or write about it if I do. This is just safer. 
You can use the flowers fresh other ways. You can make them (and the foliage) into a tea, which you could use as a skin wash for sunburn or irritation–or drink. Fresh flowers could go into your bathwater to make a soothing bath. Fresh flowers can also be soaked in alcohol to make a tincture.  
Storage:
I keep my very dry herbs in sealed mason jars in a dark cupboard. You don’t want to expose any dried herb to sunlight for any length of time. I use jars because I don’t take any chances with pantry moths (it’s amazing what they’ll get into). The risk with jars, as I’ve said, is that if the herbs aren’t perfectly dry, you’ll get mold. This is why other people opt to keep their dried herbs in paper bags–bags breathe a bit, so lessen the chance of mold. This is a good option, too.
I try to switch out my dried herbs every year–at least the ones I grow. Some of the things in my cupboard are older than that. I think some herbs keep their properties longer than others, but in general you should try to use them in a year or so. Like spices, the are best fresh, but usable, if not as potent, as they age. 

Label and date all your herbs. Even if you think you’ll never forget, somehow or another you will, and at some future find yourself standing at your cupboard, holding a jar full of strange plant matter and saying to yourself, “What is this?”

Why not plant some Calendula?

Calendula glows like the sun.

Mrs. Homegrown here, leaving the composting controversy behind…

One of my favorite plants in the garden is Calendula officinalis, aka pot marigold. It should not be mistaken for common marigold, or Mexican marigold, both of which are in the genus Tagetes. Tagetes marigolds are popularly used in companion planting (to ward off bugs in the garden), and for combating nemadtodes in the soil. Calendula is for helping people.

I grow Calendula in order to make lotions, balms and salves. I’m a firm believer in its healing power, my belief based on the happy response by family and friends who use my salves. Calendula is anti-inflammatory and antiseptic. It soothes, heals and helps regenerate skin. You’ll find Calendula extract as an ingredient in expensive beauty products, but you can make your own Calendula salve for pennies. I’m going to come back to how to do that in a later post, but first, I want to talk about planting Calendula so you can get some going in your own yard (or on your balcony) this spring.


Planting Calendula:

Calendula is beautiful and easy to grow, even for beginners. It’s not at all picky and will adapt to various soils and light conditions like a trooper, though–like most things–it does best if planted in rich, loose soil and given full sun. Even if you’ve had bad luck with flowers in the past, try Calendula. I’d be surprised if it let you down.

It’s technically a short lived perennial, so in very mild climates it might be a permanent garden flower, However, it doesn’t live through freezes or extreme heat. Here is southern California it’s a self-seeding annual. It seeds like crazy, so if you don’t want volunteers all over your yard, trim off the spent blooms–“deadhead” them–before they go to seed. (Calendula seed is trippy: big, gnarly crescent shaped pods, each one a little different–very unlike most seed, which is quite conformist.)

It does very well when grown from seed planted directly in the ground. In years past I’ve let Calendula range all over the yard as casual volunteers, all descended from some long forgotten planting, so obviously it’s not particular about planting conditions.

However, when it came time Phan of Pharmacy ™,  I wanted to start fresh, so I bought seeds. And I wanted to start the seeds while I was preparing the ground, so I started the seeds in flats and transplanted the seedlings when they were about three or four inches high. This worked very well. Calendula isn’t particularly pest-prone, but some things will munch on it, particularly when it’s small. Transplanting the seedlings when they were larger may have given them the oomph to withstand attacks. They also didn’t mind the shock of transplanting–I had no losses.

The Rundown on Calendula:

  • When to plant: Almost any time after frost: early spring into early summer. It doesn’t do well in scorching heat, so the earlier the better.
  • Where to plant: As above, it’s not too picky about soil. You want part to full sun. 
  • How deep to plant: About a 1/4″.
  • How far apart:  If planting in flats, seeds can be close, maybe 3 or 4 inches. If you’re planting straight into the ground you need to consider the final size of the plant, and how close you want them together. I like mine close, so in the Phan they are about 8″ apart. I think 8″ to 1 foot is a good range.
  • How big is it? Depends. A foot or so high, maybe more if it’s older or very happy, and probably about a foot across. 
  • Water: Calendula needs regular water. The one thing you have to do is remember to water it.
  • Fertilizer: You don’t really need it, but if you’ve got some nice compost you can spread some around the plants. 
  • Harvest: To save flowers for medicine, pick them when they’re open and at their peak. Don’t worry about picking too much. Picking just forces them to send out more flowers. Not picking is what leads to plants going to seed and closing up shop. Take the heads inside and dry them face down out of direct light. When dry enough to be crunchy, strip the petals and transfer to jar.
  • Pots: Calendula takes well to containerized life. Try it in pots or window boxes. It would do well in self-irrigating container, too.
  • Seeds: Look around for interesting flowers. As long as the seed pack reads “Calendula officinalis” you’ve got the right stuff. This year I planted the “Pacific Beauty Blend” from Botanical Interests and like them quite a lot. They have a wide range of colors, from almost cream to bright yellow to this cool peach color to the classic vibrant orange. Some of them are beautifully double flowered, others have more of the traditional daisy thing going on.
The seeds and some heads brought in from the garden for drying.

One last note: Calendula is edible. It’s not flavorful, but it’s fun to add the petals to salads. Dried calendula leaves look a little like saffron and can also be used in cooking for color. Calendula also can be brought indoors as a cut flower.

How to clean a stained coffee cup

This is what it looked like fresh out the dishwasher. Ugh!

The sink post reminded me about this quick and easy tip. If you’ve got a stained coffee mug, baking soda will take that gunk right off.  Just sprinkle some baking soda in the mug, then wipe down the inside with a damp rag or sponge. The stain will give in on the first pass.

As I described in the sink post, the trick here is to keep the mug on the dry side, because baking soda scrubs best when only slightly damp. Your sponge or rag should be damp, but the mug shouldn’t have water in it.

Just a swipe with the magic powder does it.
I don’t like housework, but this sort of cleaning makes me happy.

Humanure Dry Toilet Made From a Milk Crate


Modern toilets take two valuable resources, water and nitrogen rich human waste, and combine the two to create a problem: sewage. In a dry or “humanure” toilet, you cover your deposits with a layer of non-toxic sawdust. Once the toilet is full you dump the contents into your outdoor humanure pile and compost the waste at high temperatures for at least a year. You can then use that compost as fertilizer for plants. The ubiquitous five gallon bucket is the most commonly used humanure receptacle. Most humanure toilet designs I’ve seen such as the ones on Joseph Jenkin’s website make use of wood which I’m not crazy about in the wet environment of a bathroom. Even with a coat of paint wood gets grungy. Alternatively, you can buy plastic camping toilet seats that will clamp on to a five gallon bucket but they have, in my opinion, an unacceptable wobble when you sit on them. For these reasons I designed a sturdy dry toilet making use of a scavenged milk crate. Even if the idea of humanure grosses you out (and it’s definitely the most controversial subject in our book), our milk crate toilet would be great for camping, emergencies or your remote cabin.

Putting this toilet together takes just a few minutes. First, find a milk or beer crate and a five gallon bucket. Make sure that the crate you use is large enough to accommodate the bucket. And note, I know of someone arrested for scavenging beer crates behind a strip club, of all places, so be discreet or ask for permission. Incidentally, when the police finished booking the beer crate scavenger the officer placed the paperwork in . . . a scavenged beer crate doubling as an in box!

Attaching the Toilet Seat to the Crate

Next, find a toilet seat. Forage one or pick up a cheap seat at your local hardware store. In an emergency situation, you could also use the one on your regular toilet and simply bolt it back on when the zombie threat has passed and the sewage pipes are flowing again. To attach the seat to the milk crate simply position the plastic bolts and nuts that come with the lid in the center and on the short end of the bottom of the crate. Don’t over tighten.

Cutting Out a Hole in the Crate

Place the bucket so that it will be appropriately positioned under the seat. Mark the outline of the bucket on the crate with a knife and cut out a circle with a jigsaw or keyhole saw so that the bucket will fit through the former bottom of the crate.

Attaching Legs to the Crate with Cable Ties

Cut four pieces of scrap wood (we found some old table legs for a more finished look), and attach them to each corner of the crate so that the bucket projects about a 1/2-inch above the level of the crate. The legs will be approximately 13 1/2-inches. Make sure that the toilet seat will fit snugly against the top of the bucket. We attached the legs with cable ties, but you could also use screws or bolts.

Moving the Spacer

The last step is to move the spacer on the bottom of the lid, so that it does not hit the top of the bucket. Pop it out with a knife or chisel, drill another hole, and reposition.

Your humanure toilet is now done and ready for use. Simply lift the crate off the bucket when it comes time to empty the contents. Follow the detailed instructions on Joseph Jenkin’s website to learn how to properly compost human waste.


This toilet is simple to make, easy to clean, and is made of readily available materials. I think this particular design will be useful in emergencies and, when combined with Jenkin’s excellent humanure methods, would prevent the dangerous raw sewage nightmares of the sort we saw in the aftermath of hurricane Katrina. There is a creative commons licence on all the text and photos on this website so feel free to translate and disseminate this post widely. We’re “open source” here at Root Simple. If you make an improvement in the design please let us know.

How to Stake Tomatoes

Our tomato staking method around the Homegrown Evolution compound is simple and lazy. We plant our tomatoes and then surround them with rolled up concrete reinforcing wire. Normally used to reinforce concrete slabs, reinforcing wire comes in 3 1/2′ by 7′ sections. We use a circular saw with a metal blade on it to cut off the bottom rung, so as to leave spiky wires with which to stick the reinforcing wire tubes into the ground, but this is not absolutely necessary.

Once in place that’s it. According to So Cal gardening guru Pat Welsh, tomatoes surrounded by a reinforcing wire staking system need not be pruned nor will they need any additional staking.

Over time the reinforcing wire rusts lending the garden a certain deconstructed vibe.