Why not plant some Calendula?

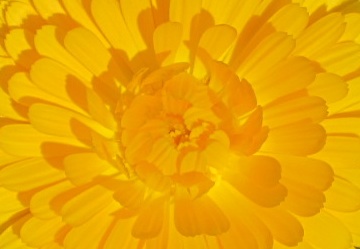
Calendula glows like the sun.

Mrs. Homegrown here, leaving the composting controversy behind…

One of my favorite plants in the garden is Calendula officinalis, aka pot marigold. It should not be mistaken for common marigold, or Mexican marigold, both of which are in the genus Tagetes. Tagetes marigolds are popularly used in companion planting (to ward off bugs in the garden), and for combating nemadtodes in the soil. Calendula is for helping people.

I grow Calendula in order to make lotions, balms and salves. I’m a firm believer in its healing power, my belief based on the happy response by family and friends who use my salves. Calendula is anti-inflammatory and antiseptic. It soothes, heals and helps regenerate skin. You’ll find Calendula extract as an ingredient in expensive beauty products, but you can make your own Calendula salve for pennies. I’m going to come back to how to do that in a later post, but first, I want to talk about planting Calendula so you can get some going in your own yard (or on your balcony) this spring.


Planting Calendula:

Calendula is beautiful and easy to grow, even for beginners. It’s not at all picky and will adapt to various soils and light conditions like a trooper, though–like most things–it does best if planted in rich, loose soil and given full sun. Even if you’ve had bad luck with flowers in the past, try Calendula. I’d be surprised if it let you down.

It’s technically a short lived perennial, so in very mild climates it might be a permanent garden flower, However, it doesn’t live through freezes or extreme heat. Here is southern California it’s a self-seeding annual. It seeds like crazy, so if you don’t want volunteers all over your yard, trim off the spent blooms–“deadhead” them–before they go to seed. (Calendula seed is trippy: big, gnarly crescent shaped pods, each one a little different–very unlike most seed, which is quite conformist.)

It does very well when grown from seed planted directly in the ground. In years past I’ve let Calendula range all over the yard as casual volunteers, all descended from some long forgotten planting, so obviously it’s not particular about planting conditions.

However, when it came time Phan of Pharmacy ™,  I wanted to start fresh, so I bought seeds. And I wanted to start the seeds while I was preparing the ground, so I started the seeds in flats and transplanted the seedlings when they were about three or four inches high. This worked very well. Calendula isn’t particularly pest-prone, but some things will munch on it, particularly when it’s small. Transplanting the seedlings when they were larger may have given them the oomph to withstand attacks. They also didn’t mind the shock of transplanting–I had no losses.

The Rundown on Calendula:

  • When to plant: Almost any time after frost: early spring into early summer. It doesn’t do well in scorching heat, so the earlier the better.
  • Where to plant: As above, it’s not too picky about soil. You want part to full sun. 
  • How deep to plant: About a 1/4″.
  • How far apart:  If planting in flats, seeds can be close, maybe 3 or 4 inches. If you’re planting straight into the ground you need to consider the final size of the plant, and how close you want them together. I like mine close, so in the Phan they are about 8″ apart. I think 8″ to 1 foot is a good range.
  • How big is it? Depends. A foot or so high, maybe more if it’s older or very happy, and probably about a foot across. 
  • Water: Calendula needs regular water. The one thing you have to do is remember to water it.
  • Fertilizer: You don’t really need it, but if you’ve got some nice compost you can spread some around the plants. 
  • Harvest: To save flowers for medicine, pick them when they’re open and at their peak. Don’t worry about picking too much. Picking just forces them to send out more flowers. Not picking is what leads to plants going to seed and closing up shop. Take the heads inside and dry them face down out of direct light. When dry enough to be crunchy, strip the petals and transfer to jar.
  • Pots: Calendula takes well to containerized life. Try it in pots or window boxes. It would do well in self-irrigating container, too.
  • Seeds: Look around for interesting flowers. As long as the seed pack reads “Calendula officinalis” you’ve got the right stuff. This year I planted the “Pacific Beauty Blend” from Botanical Interests and like them quite a lot. They have a wide range of colors, from almost cream to bright yellow to this cool peach color to the classic vibrant orange. Some of them are beautifully double flowered, others have more of the traditional daisy thing going on.
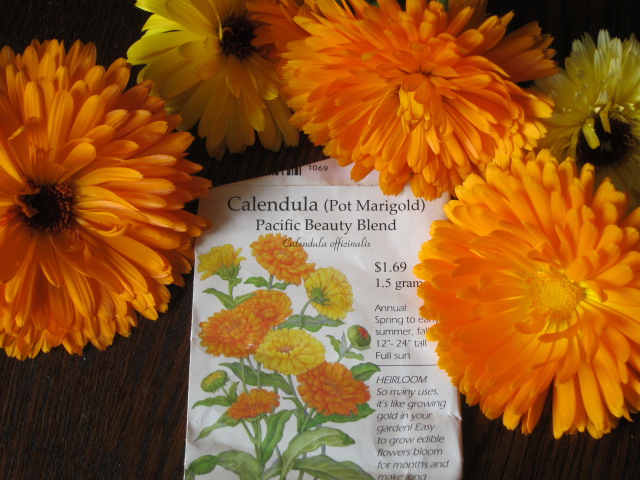
The seeds and some heads brought in from the garden for drying.

One last note: Calendula is edible. It’s not flavorful, but it’s fun to add the petals to salads. Dried calendula leaves look a little like saffron and can also be used in cooking for color. Calendula also can be brought indoors as a cut flower.

I like my chamomile stressed

This poor, abused little seedling is flowering like crazy.

Mrs. Homegrown here:

I made a mistake–I predicted a while ago that this would happen, and here it is. When we remodeled the yard and I set aside space for The Phan of Pharmacy ™ my goal was to maximize the production of herbs and flowers.  I prepped the ground in the fan like a fine flower or veg bed: double dug and richly amended. It was only after I planted my chamomile starts in it that I realized the soil was way too rich for chamomile. Not that it wouldn’t grow, but it wouldn’t grow the way I wanted it to grow.

See, chamomile is a tough, scrappy plant. In our dry climate, it pops up with the winter rains, and lives a fast, hard life, like a beautiful young self-destructive celebrity. It shoots up overnight and throws off blossoms like crazy, its one goal being to spread seed before it dies.

In the past, I’ve harvested chamomile from volunteer plants in my yard. I never planted or tended them, but one or two would get about knee high, and from those one or two plants I’d gather all the flowers I needed by remembering to pick a handful every time I went in the back yard. The thing about chamomile is the more you pick, the more it produces.

But I was greedy–and somewhat lazy, as usual. I thought, why be out there every day milking some scrappy chamomile plant, when you could plant a chamomile crop and harvest a ton of flowers in just a couple of days? So I planted I don’t know how many plants–20, maybe? More? The chamomile thrived in the rich, fertile soil, putting all it’s energy into making lots of feathery green foliage–not flowers. My entire chamomile crop is presently netting me less flowers than one or two abused volunteers would. That sad little plant in the top picture may have to become my harvest plant.

Uh, very pretty. But where are the flowers?

The lesson here is to know your plant, and to pay attention when you’re prepping your garden. I amended that soil on auto-pilot, when I could have left one fan wedge un-turned and un-amended and the chamomile would have flowered all the better for it. To be clear, this isn’t necessarily the case for other herbs and flowers. The calendula I planted in the fan is doing very well, producing huge, hearty blooms. All I’m saying is that you can’t generalize.

My next step is to withhold water from the chamomile and try to stress it into flower production. Of course, we’re heading into another rainy period, so it will be a while before that chamomile is feeling any stress at all.

Our ladies are also well practiced in stressing chamomile

Dumpster Herb Score

Mrs. Homegrown here:

Scored big at Trader Joes yesterday. Love a good dumpster find, almost as much as finding good feral fruit.  It looks like they were clearing out their plants and flowers for Valentines Day, because out by the cardboard piles we found a grocery cart heaped full of wilted flowers and random potted mums. (Joes really needs to start a composting program, don’t you think?)

We sorted through the cart and found four potted herbs, only slightly distressed. One was a lemon balm, which I’ve wanted for some time. The others, I admit, I don’t really need (because I already have them), and don’t have any space for–but I’ll squeeze them in somehow. In this way, I’m like a crazy cat woman.

ETA: This morning two complimentary bits of information came in regarding TJ’s and composting. The first came in an email from our friend Anne, a Master Gardener. She tells us that: “Master gardeners encourages gardeners to arrange pick up times with TJ’s for plants. They will tell you when they are putting out the plants so you can get them. Lots of mg’s do this and bring them to various garden projects all around LA county.”

So that’s cool. And then in the comments there’s an anon comment from a TJs employee explaining the issues around composting for the stores, and giving some dumpster diving tips!

Advances in Gardening Series: The Perennial Herb Bed, Patience and Plant Spacing and Breaking Your Own Rules

No, this is not a pile of weeds. Someday it’s going to look good.


Mrs. Homegrown here:

One of the big lessons of gardening is patience. One way gardening patience is expressed is in planting perennials: buying leeetle teeny plants and planting them vast distances apart and then waiting with your hands politely folded until they grow to full size. A very common landscaping mistake is to go out and buy a bunch of gallon-sized landscape plants and plant them close together, just so the yard looks good right away. This practice has probably worsened with all those “overnight transformation” type TV shows.

Two things are questionable about this scenario. First, it makes both financial and horticultural sense to plant young, small plants. Small plants are cheaper, they catch up with the gallon-sized perennials in no time at all, and will probably be healthier in the long run.

The second is a question of spacing. Perennial plants used in landscaping tend to be bushy things, plants which will need some room when they grow up. Too often they don’t get the space they need and end up looking pathetically smushed together within a couple of years. They can’t express their natural shape, and different plants end up intertwined and melded together like conjoined twins, then forcibly sculpted to size in odd box and muffin shapes.

In short, when planting perennials, you have to place them in reference to their full size. And that size always sounds impossibly big, but in fact, it is is true.

My perennial herb bed above does not follow this advice on conservative spacing. You can’t see from the picture, but this area (which is about 9′ x 6′) is planted with a rose geranium, culinary sage, white sage, yarrow, rosemary, lavender, aloe, lots of thyme and a sick native rose which is probably not going to make it. The spacing between the plants is not quite what it should be. Erik looks at it and shakes his head and does that thing with his mouth which means his lordship does not approve. But I’m holding my ground on this one. This is a working herb garden, not a perennial border. I wedged more plants in there than I should have because I fully intend to be harvesting from each of the plants regularly. If I fail to do that, yes, the bed will look too tight.

Right now, crowding ia the last of my problems. Even if the plants aren’t quite far enough from each other, they are still small, and there is a heck of a lot of bare dirt between them. Ordinarily I’d recommend to anyone in a similar position to fill in all that empty space with a thick layer of mulch. It represses the weeds, saves water, and makes the area look nice. Again, though, I’m not following my own advice.

See, I feel bad about our recent leveling of the yard. Our bug balance (predator bugs vs. problem bugs), had been really nice for the past few years, but now I fear it’s going to be all wonky. Helllllooo aphids! To counterbalance that, I want as many insect friendly plants going as possible in our yard this year. So instead of mulching, the space between the perennials is seeded with all sorts of random stuff. Borage and California poppy and nasturtium are predominant right now, but that will change as the year progresses.

The little perennial herbs are in danger of getting lost under all those boisterous feral flowers. I’ll have to make sure they don’t get smothered. In the meanwhile, nothing is big yet, which means the weeds are popping up like crazy. I hate weeding. Usually I do everything in power to arrange things so I have no weeds. In this case, though, I’m weeding because I want my flowers. And you know, I don’t mind it so much because I know it’s for a cause.

What’s eating my cilantro?

Mrs. Homegrown here:

While we’re inviting questions, we’ve also got a question for you guys. What sort of critter likes to eat cilantro? I think it’s a critter, not a bug. There’s no sign of leaf damage, just nibbling the stems down. There’s no digging or other disturbance.

Whatever this critter is, it has a defined taste for cilantro, because the cilantro is interplanted with parsley and it never so much as touches the parsley, or anything else in the garden, for that matter. It just comes out at night and decimates the poor cilantro.