Side Yard Hops Trellis

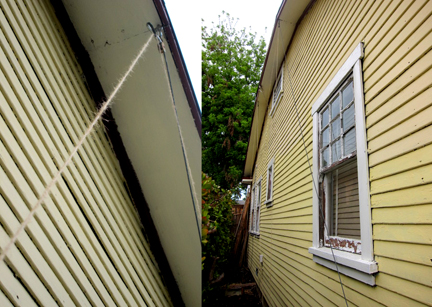
A little hard to see in these crapular photos: the new south side hops trellis.

I love looking out our bedroom window in the summer at the hops I’ve trained up the east side of the house. And I also like the beer I’ve made with those hops, so much so that I decided to expand my hops growing project to the south side of the house.

Otherwise useless, the narrow side yard on the south side of the house is the perfect place for a vertical plant like hops. To accommodate the bines (what you call a plant like hops that attaches itself to a support without suckers or tendrils) I put some pulleys on the eaves of the house so that I can lower the bines to harvest the hops without having to climb a ladder.  I attached some twine to metal cables that run through the pulleys. Hops stick to twine like Velcro and grow so fast you can almost watch them climb. I train them into a “V” shape and cut down all but the strongest two bines from each mound in the spring.

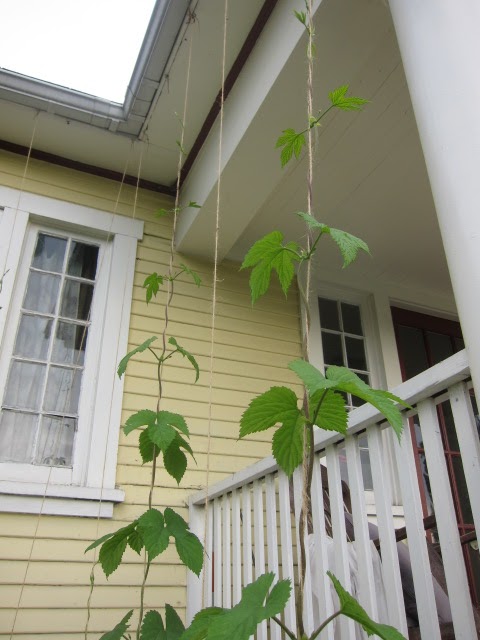
Year three of the front porch hops: Cascade and Nugget.

Two years ago I started Cascade and Nugget hops in self watering pots placed by the porch on the east side of the house. This year I transferred those bines to the ground and they seem to be doing well. Cascade, especially, grows like a weed here. While I proved to myself that you can grow hops in self irrigating pots, I think they will do better in the ground.

The new varieties on the side of the house are Golden and Chinook. Since this blog also doubles as my garden diary I’ll note that the Golden is on the southeast and the Chinook on the southwest. It’s important to keep the bines labeled so when it comes time to make beer you know which variety is which. When I planted the Cascade and Nugget in the ground I got them mixed up. They look and smell different when mature so I’m pretty sure I can tell the difference come harvest time. But, never having grown Chinook or Golden, I don’t want to forget which one is which.

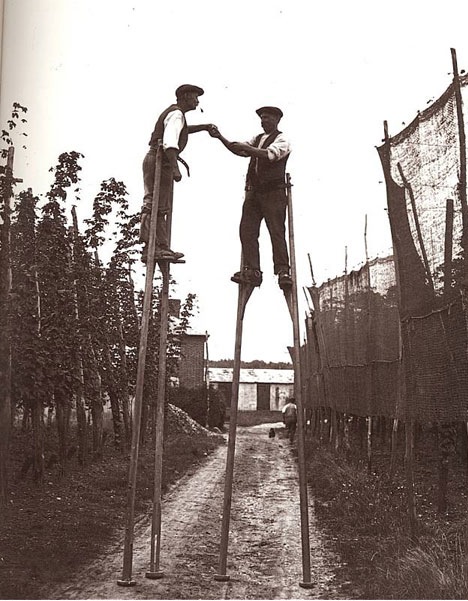
Here’s how you have to harvest hops without a fancy pulley system:

Growing Artichokes on the Sly

Artichokes also provide shade for lazy cats

It is possible to grow vegetables around the grounds of an apartment building, especially if the landlord is neglectful. Often the biggest challenge you’ll face is the gardeners, who will weedwack everything to lawn level. If you can negotiate with them, or somehow put a protective barrier between your plants and the whirling cord of death, you can grow stuff.

Take this lovely artichoke. It was a sprout off of one of our own plants, which we gave to a friend who lives in a courtyard apartment. She tucked the sprout near a wall, between some permanent shrubs. It flourished through our wet winter–she says she didn’t give it any care at all. Now it’s way too big to weedwack, and covered with fat artichokes. It’s also such a magnificent plant that it looks like it belongs there. She’s harvested over forty chokes so far–that’s a lot of good eating!

We realize artichokes don’t grow everywhere, but investigate perennial food-bearing plants that grow well in your area. Check out the book Perennial Vegetables for inspiration. Herbs, like chives, are an easy place to start. Alternatively, consider tucking some annuals here and there among the landscaping. Garlic is a good bet. It blends easily into flower beds and grows with little care. (Of course, you’ll want to take note of whether your landlord is spraying the landscape with pesticides.)

And homeowners can use these same tips to integrate edibles with their existing, ornamental landscapes without alarming their neighbors or the HOA.

Pop Quiz Answer

The answer to yesterday’s pop quiz: as our friend Nic Sammond put it, “Your shelving was designed by Tokyo Electric Power?” Alas, I can’t pass the blame off on anyone but myself. When the big one hits, we’ll have a giant salsa bowl of pickles, jams and broken glass.

It’s well past time to install some bungee cords across the shelves.

And we’ll make our quizzes a little harder next time. 

Friday Pop Quiz

Our pantry. So what’s the main thing wrong with this picture? Hint–we’re in California. Leave a comment. We’ll provide an answer tomorrow.

Wish we could offer a prize, like an all expenses paid trip to Vernon, CA. But, alas, we have a tight budget here at Root Simple. You’ll get bragging rights.

No-Knead Artisinal Bread Part I

You can make a decent loaf of bread with one of the many popular no-knead recipes on the interwebs. With just a little bit more effort you can make a much better loaf of bread with a “levain” (or “sourdough starter” in less yuppiefied parlance).

For about ten years, I used to bake the loaf I blogged about here and put in our first book The Urban Homestead. Lately, however, I’ve completely changed the way I bake thanks to meeting Mark Stambler and Teresa Sitz of the Los Angeles Bread Bakers.

I’ll post a specific recipe once my method crystallizes a bit more. In the meantime, this is the general way I’ve been baking. All the mixing and first fermentation can take place in a plastic tub or large bowl.

1. The night before I mix my dough I take some starter, add flour and water to create the “levain”. Starter is made by mixing dough and water and letting nature do her thing. I’ll blog about the process in detail in a future post. Right now I’m working with a starter that has the consistency of bread dough, but I’m going to switch to a more liquid starter to avoid the dough messes in the kitchen that cause marital strife.

2. In the morning I mix the final dough, carefully measuring ingredients on a digital scale. While I use a stand mixer fitted with a dough hook, I’m trying to wean myself of its use. Kneading, it turns out, is unnecessary labor and can be replaced by simply folding the dough a few times during the initial fermentation period.

3. After mixing the dough I let it rest for around 20 minutes to allow flour and water to integrate.

4. Following the rest period I mix in the salt.

5. The dough rises for 2 1/2 hours. During this first fermentation period I pour the wet sticky dough out onto a work surface every 50 minutes and quickly fold the dough in half two or three times.

6. At the end of the first rise I shape the dough into either a batard or a boule. At some point I’ll make a video on how to do this.

7. Once shaped, the boule or batard goes into the refrigerator covered with a floured piece of canvas, in the case of a batard, or plopped in a proofing basked in the case of a boule. The dough can stay in the fridge for 24 to 48 hours. During this second, slow, fermentation period the dough develops a more acidic, complex flavor, plus it allows for more flexibility in terms of your baking schedule. When you want a loaf, all you do is heat up the oven, pull the bread out of the fridge and toss it in the oven. There’s no need, it turns out, to bring the dough to room temperature before baking.

8. To get a decent crust in a home oven I recommend baking in a dutch oven as in the no-knead method. Pre-heat both dutch oven and stove, toss the loaf in the dutch oven and bake for 20 minutes. After 20 minutes remove the top of the dutch oven and continue baking until done (usually another 20 to 25 minutes).

A note on water: chlorine and chloramine inhibit starters. I have a carbon filter on our house water which I thought removed both chlorine and chloramine. However, I discovered that I got much better results when using bottled, distilled water. After pouring through multiple aquarium enthusiast internet forums (not particularly exciting when you don’t keep fish) I figured out that my cheap carbon filter removes some, but not all of the chloramine in our water supply. At some point I’ll do some tests to confirm this. In the meantime, I’ll stick with bottled water.

I should note that the road to bread baking nirvana is littered with hockey puck loaves and existential angst. Push through the wall of frustration and you emerge on the other side an alchemist, with the power to turn flour into loaves, lead into gold and Dan Brown into Shakespeare. Well, maybe not that last bit.