Making Salves, Lip Balms & etc.: Close of the Calendula Series

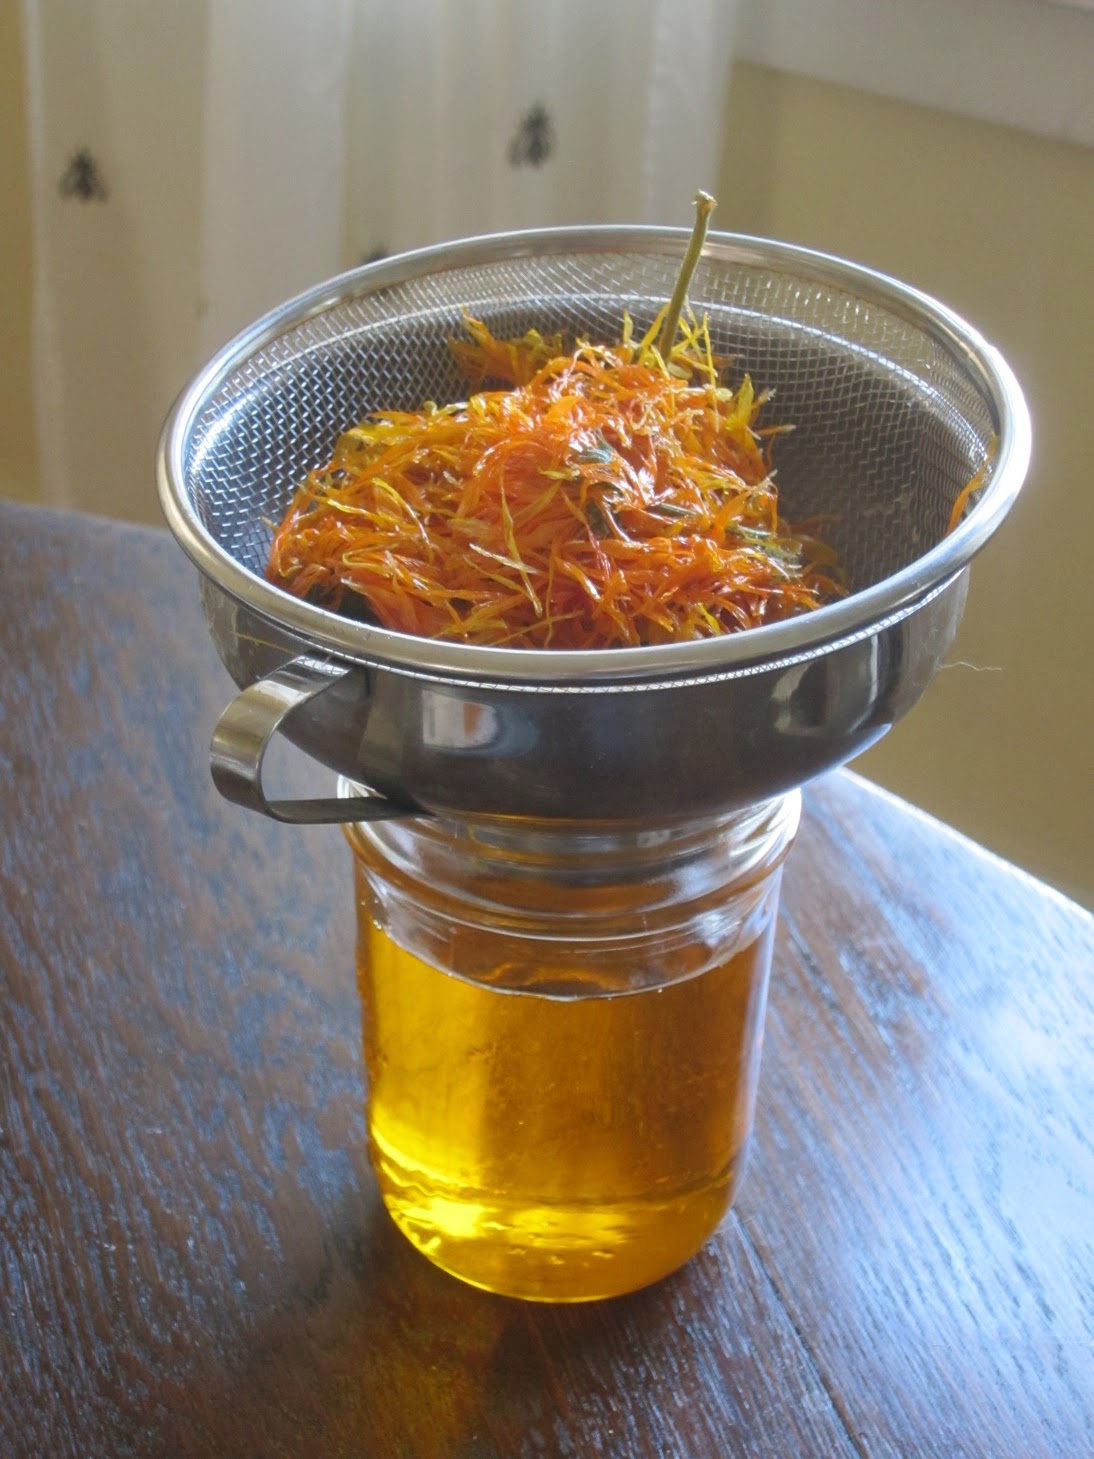
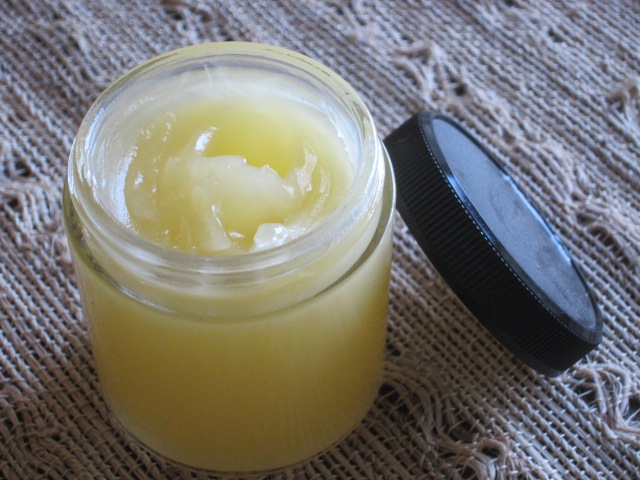
My calendula after-bath salve. The camera refuses to capture the deep butter yellow color

On Saturday, as a part of this long series on Calendula (here, here and here), I posted about infusing oil with herbs.

If you’ve got some herb infused oil, you can make that into a medicinal salve or balm. Salve is nothing but oil thickened by the addition of wax. I prefer beeswax salves, though there are vegan alternatives, like candelilla wax. They are used similarly.

Of course, you don’t have to make salves with infused oils. Plain olive oil and beeswax are a powerful healing combination on their own, great for a no-nonsense lip balm or hand treatment. You can also use essential oils to bring herbal essences into a plain salve.

Once you know how to make salve, you can not only make skin salves, you can make lip balm and headache balm and stick deodorant and homemade cosmetics. It’s a simple technique, but it opens a lot of possibilities.

My favorite herbal salve is made out of a mix of equal parts Calendula (pot marigold), chickweed (Stellaria media) and plantain (Plantago major) oils. These three work together to make an all purpose salve that is as good for gardener’s hands as it is for diaper rash or skin scrapes or bug bites or dry cuticles or badly chapped lips or mild sunburn or whatever. I always have a jar on hand and I give jars to friends and family.

Yesterday I made a batch of pure Calendula salve, a big jar of after-bath moisturizer. Like body oil, salve works best as a moisturizer if applied to wet skin. Calendula extracts are found in a lot of high end cosmetics because it’s a mild but effective skin herb. It’s anti-inflammatory, anti-bacterial, soothing, and helps skin regenerate. I love smoothing it from my cat-scratched ankles and my mosquito-bit knees up to my sun-baked face and arms.

How-to after the jump.

The Secret of Salve

The only secret to salve is that it is so darned easy to make.

The only equipment you need is some kind of double boiler situation: a true double boiler, a heat proof bowl balanced over a sauce pan, etc. What I usually do is put a Pyrex liquid measuring cup into a small pan of water. I set the burner on to medium heat and bring the water to a very gentle simmer. Thus the oil heats without overheating or burning.

To the oil I add a little bit of organic beeswax, and continue to heat and stir until the beeswax dissolves. That’s all there is to it, really, but I’ll explain the details.

First, let’s take a moment to talk about beeswax:

Where do you get the beeswax?  You can order it online, just search “organic beeswax”. I wouldn’t buy it in craft or hardware stores unless it’s marked as organic. Beeswax holds on to chemicals, so if the bees were working fields which were sprayed, traces of those chemicals could end up in your balm. Same goes for cannibalizing beeswax candles. I hope to get some nice clean wax from our hive soon, but in the meanwhile I buy my wax from Mountain Rose Herbs. It comes in both pellets and blocks. Pellets are a lot easier to work with.

Good organic beeswax smells heavenly, by the way, and that scent carries into the finished salve.

How much beeswax do you use?  Making salves is all about simple proportions–the ratio of oil to wax. 4 parts oil to 1 part wax yields a firm salve. You’d want this sort of proportion for roll up lip balm tubes or roll up deodorants, cases where firmness is a virtue.

If you don’t necessarily need a firm salve, you have a lot more latitude. 6 parts oil to 1 part wax makes a soft salve, better for scooping up with the fingers.

To tell the truth, even small amounts of wax will firm oil up to a sort of loose ointment consistency. For this Calendula bath salve I just made, I didn’t bother to  measure. I just added a heaping teaspoon of wax to my oil. The ratio must have been 10 or 12 to 1. I wanted something very soft.

So does this make sense? For instance, say I want to fill a particular tin with my skin healing salve. I measure the volume of the tin first, by spooning water into it. Say it holds six tablespoons. The easy math on this one would be to warm 5 tablespoons of oil plus 1 tablespoon of wax (5:1). That would work without resorting to teaspoons and fractions, but if I wanted a looser salve, I might short the wax measure.

Keep in mind it’s very easy to repair a too-hard or too-soft salve. Just reheat it and add more wax or more oil as needed. You can get some sense of how a salve is going to harden up by dropping the hot liquid onto a cold plate–just like jam.

Measuring beeswax: Because salve measurements don’t have to be precise, there’s a few ways to measure out wax. Measuring by the spoonful is easiest–spoonful of oil to spoonful of wax. If you have wax in the pellet form, just measure the pellets by the spoonful. If you have a block of wax, shave the wax and press the gratings into a spoon.

Alternatively, you could measure wax by displacement: pour oils into a measuring cup, then drop in pieces of wax until the liquid level meets the desired measure. For example, for a 6:1 ratio, fill a clear measuring cup to 6 oz. and then add wax chunks until the volume rises to 7 oz.  That equals 6 oz. of oil and 1 oz. wax.

Back to the melting:

Okay, so you’re warming your combined oil and beeswax in a double boiler-type situation, as described above. Once the wax has warmed enough in to dissolve and vanish into the oil, take the oil off the heat.When using herb infused oils, you want to treat them gently and heat them as little as possible.

Add essential oils:

If you want to add any scent, or if you’re into the healing properties of essential oils, this is the time to stir them in–right after you take the mix off the heat, but before you pour it.

For lip balms, I’ll add a few drops of peppermint essential oil. Do be careful with peppermint oil, though–too much will make your lips burn. Think something along the lines of 2 drops of of peppermint essential oil per small tin of lip balm. It’s easy to warm it again and add more if you want it stronger. Same goes for scents. Use a light hand. A few drops will do it in most cases.

Also, I should add that you can infuse oils with scented herbs, like dried lavender buds or rose geranium leaves or chamomile flowers. They’re not as strong as essential oils, but very nice in salves. And a lot cheaper. 

Here’s a hint regarding essential oils: For inspiration regarding what kind of essential oils might go into different types of salves, check out the product line at Badger Balm.

Pour into jars:

Once you’ve stirred in the essential oils, pour the liquid salve into clean, dry jars or tins. Make sure your containers are dry and clean. Dirt or water could lead to contamination and mold.

Pour it fast, before the mix starts to cool. I find that the lip of a liquid measuring cup gives enough control to fill even those fiddly little plastic lip balm tubes.

Let the containers sit, open, until they are completely cool. Then lid them and label them.

Clean up:

The best way I’ve found to deal with the waxy grease residue (since I stopped using paper towels) is to shake a generous amount of baking soda into the dish and then rub it around. The soda lifts and traps the grease. It works like a charm.

Shelf life:

To be honest, I’m not sure what the expiry date is on these things. I’ve never had a salve go bad, but they do lose potency and scent. Also, a salve or lip balm that’s being used is exposed to a lot more bacteria than one which is unopened. I’d say the unopened ones could last 6 months to a year, but once you open a tin or jar and start sticking your fingers in it, you should use it up in a few months.

 Self promotional note: We cover all this stuff in much more detail in Making It: salves, lip balm, deodorant, etc. –with proper measurements and everything!

How to make a Calendula oil infusion

Love that golden orange color. It’s prettier in real life.
So finally I get around to finishing off this mini series on Calendula (pot marigold). This post will be on infusing oil, and next week we’ll have the one on salves.
We’ve already covered the growing and drying Calendula:
Oil infusion is as simple as can be.  Oil infusion is soaking. Think of it like making sun tea. You take a nice clean jar with a good lid, and fill that about half way full of dried herb, top it off with oil, and let that sit in the sun.
The resulting oil is medicinal. It can be used straight on the skin, or fashioned into salves and balms. I’m particularly fond of Calendula. As a skin treatment it displays regenerative properties, making it really helpful for healing dry, scraped up, or otherwise damaged skin.
 But lets step backwards a bit and talk about materials. 


Materials

Your herb–Calendula or anything else– should be dry when you start this. It should crumble between your fingers. If there’s any flexibility to leaf or flower, that means there’s still water in there.  The reason you don’t want water in there is that spoilage in oil infusions usually comes about because of the presence of water in the plant material. Spoilage can result in anything from off smells to mold to–worst case scenario–botulinum toxin in the oil. 
Now, to be sure, I know folks who infuse fresh herbs in oil, and they’re not all dropping dead. This is like the prohibition against infusing oil with fresh garlic cloves. Garlic oil tastes really good, and lots of people have done it for a very long time, but, theoretically, bad things can happen because of the water in the garlic (i.e. botulism), so it’s not recommended by the Powers that Be. So it’s up to you–I’m just not going to encourage it.
Regarding Calendula specifically, you can soak either the petals alone, or the whole flower heads. Either way is fine. Just make sure the green part of the heads is truly dry.
Your oil doesn’t have to be super high grade. I use un-virgin olive oil–not the lowest, motor-oil sort of grade–just something a little more experienced than extra virgin. This is also a matter of preference. You can use organic, cold pressed, locally sourced extra, extra virgin oil, for sure. It’s just an expensive proposition. Since I make these oils in quantity, I use the less expensive oil and save the good oil for salads. 
It doesn’t have to be olive oil, either, but it should be something good for the skin, like jojoba oil or grapeseed oil. I don’t recommend common cooking oils, like corn or canola. Some people infuse into petroleum jelly (making insta-balm), but that makes me shudder. I’ve not tried infusing coconut oil, but I imagine it would work great. 
The Soaking
All you have to do is fill a very clean jar with a good lid about half way full of dried herb,  then top it off with oil.

If the herb you’re using is very fluffy, and as a result has a lot of air around it–imagine a jar of dry chamomile buds, for instance–you can fill the jar almost to the top with dried matter.

This not an exact science, so don’t get worked up about exact quantities. The only thing you should keep in mind in terms of measurement is that you’ll get less oil out than you put in. The herbs soak up a good bit of the oil, and don’t give it all back. Also keep in mind that you don’t need to make a ton of this stuff unless you’re planning on selling it, or doing a big Christmas project. Salve stretches a long way. A jam jar–the kind that holds 1 cup–is not too small for an experimental go at this.

Now wait
Cap the jar tight and let the plant matter infuse in oil for about a month. The best place is in a sunny window, where it gets some heat and light. Very gentle warming is the idea. You can take your jars outside when the weather is good. When the sun is hiding, I’ll put my jars on the stove top, where there’s constant warmth from the pilot light. 
Give the jar a shake every now and then.
There are other ways to do this. Some people simmer on the herbs and oil on the stove top. I avoid this because plant essences are so delicate and heat sensitive. A crock pot is more controlled, but I don’t have one of those. In Making It I wrote about a technique involving alcohol, the blender, and the stove. It’s tricky, but it will yield finished oil fast. But here at home, I like the simplicity of the long soak. It doesn’t take any energy, and hardly any attention.  
Harvest
Above I said about a month–that’s loose, because again, it’s an inexact science. I’m sure you’d have something useable in a couple of weeks, and I will confess I’ve often forgotten about my oils and left them more than a month with no ill effects. 3 to 4 weeks is ballpark. 
Strain the oil from the dried matter. I used to do this very, very carefully with a tea strainer or with a muslin bag. Now I have the blessed canning funnel.  I line that with various strainers, depending on how clean I want the oil. I have a fairly loose strainer that’s good for big stuff, like Calendula blossoms. Tea baskets fit in there as well. And for very fine straining I can line the strainer with cheese cloth or muslin.
Strain the oil into a fresh, clean jar. Pour off the oil first, then press the dried matter to squeeze out the remaining oil as best you can. You’ll never get it all back.
Label it 
Make sure you label it with the type of oil and the date it was made. Believe me, even if you only make one jar, you’ll forget what it is and when you made it, and a year later you’ll be standing at your cupboard, puzzling over it.

Store

Store the oil in a dark place. Use it up within a year, the sooner the better, to take advantage of the Magick Herb Power.

Of course you should not use oil that smells rancid or looks funny. Smell your herbs and oils as you’re working with them! If you’re familiar with them, you’ll know easily that they’ve gone off.

Don’t throw away old or even rancid oil, by the way. Burn it in oil lamps. That’s a whole ‘nother project that we should cover here. It’s the first project in Making It.

Stinging Nettles and Cat Allergies

Facebookers have already seen these pics. Kitty, being a fast moving black hole, is very hard to photograph.

Mrs. Homegrown here:

Sorry this is sort of rambling, but context is everything.

Our friend Anne, of the pea-eating-Chihuahua fame, and the chicken-sitting-on-kitten fame, and various other fames, is a frequent animal rescuer. She came over to our house maybe 2 weeks ago with a pet carrier. She said, “Someone dropped this off at my house at 1:00 AM last night, but I have to go to work. Can you take care of it?” Inside the carrier was a tiny black scrap of fur, a three week old kitten.

Thus she launched her evil plan. We took care of the creature on work days, until she came to pick it up, until we got so used to it that we missed it when it wasn’t around. You see, she knew that no one could bottle feed a creature like that (teeny wittle paws!) and not go soft in the head and want to keep it forever and always.


So it looks like we’ve got ourselves a cat, maybe. We’d planned on getting a dog ever since our beloved dobie passed on, but the universe works in strange ways, and it sent us a cat.

However, there’s a fly in the ointment. I’m allergic to cats. I grew up with a cat, but developed this allergy later, which always seemed stupid and unreasonable. So I’ve decided to ignore it.

There’s precedent for this. I also grew up with dogs, and yet later developed an allergy to them, too. I ignored this for our dog Spike, because I wanted a dog more than anything else in the world. At first, I broke out in hives every time he licked me, but it went away. I’m trusting the same thing is going to happen here with the kitten.

I mean, come on! Were we going to put this on Craig’s List?

I know it might sound nuts, but it’s going pretty well. The allergies seem to have peaked and declined. I had a couple of bad days, with a constantly running nose and weals all over my chest from the kitty’s claws, but that’s over. Now I sneeze once in a while. I have one weal on my chest. It’s been ten days of close co-habitation with the kitten. I’m its primary caretaker, and it likes to sleep under my chin.

One thing that may be helping is that I’m drinking lots of extra strong nettle tea, sometimes adding licorice to the brew. Both herbs are supposed to be good for allergies. Andrew Weil recommends taking capsules of freeze dried nettle extract instead of antihistamines for seasonal allergies (See his Natural Health, Natural Medicine. Here’s a Google Books link.)

Do nettles really work for allergies? I don’t know. It may be all in my head–but you know what? I’m all for the placebo effect. That’s not a negative term in my book at all. Self-healing is the best healing.

Nettles are also really good for you, being full of minerals and green goodness–so there’s no reason not to try. They’re also free for the gathering in most places.

I make nettle tea the Susun Weed way. We cover this in Making It, actually:

  • Put one ounce of dried herb in a quart jar. That’s a lot, really, about a cup.
  • If you have fresh nettles, just stuff a jar full (the stingers will vanish in the hot water)
  • If you have it, you can add a piece of licorice root or a bit of ground root. This sweetens the tea, albeit in a weird, licorice sort of way, and the licorice itself may help
  • Fill the jar with boiling water
  • Let it sit 4-8 hours to get incredibly strong
  • Strain to a new jar
  • Drink it iced, room temp or gently reheated. Try to drink that quart over the course of the day.
  • Don’t keep it around, because it will lose its potency after a day. Pour it on your plants and make a fresh batch.

Kitten facts for those interested:

Kitten is genderless for now. We took he/she to the vet, and the vet was genuinely puzzled. Tricky kitty! We have to wait for more certainty.

Kitten is about 5 weeks old. He/she was more in the 3 week old range when we took the above pics.

Kitten’s name might be Nyx. Or Woad. Or Woadnyx.

Kitten came off the street but miraculously arrived with no fleas, eye or ear infections, nothing. He/she is healthy and well adjusted, and likes all people.

Kitten is entirely black, and of solid alley cat stock. The eyes have faded to grey from blue this week, but there’s no telling final color. I suspect he/she is always going to look like a scruffy Halloween cat.

Kitten was half blind and sleepy at the start of this, but now is gaining mad skilz by the day and is a holy terror, but still pretty darn cute. He/she has been threatening this post as I write, showing a cat’s instinctive affinity for computer keyboards.

The cute thing is all an act. Hail to our feline overlord! Photo credit: Anne Hars

California poppy tea

 
Mrs. Homegrown here:


Where we live, this is the poppy time of year. California poppies (Eschscholzia californica) are blooming all over our neighborhood, and most especially in our yard. I have to admit I have a mercenary attitude toward plants, my main thought on meeting one being, “What can you do for me?” California poppies, lovely as they are, have become more interesting to me since I’ve started consuming them. Now, don’t get concerned (or intrigued): the Root Simple compound has not turned into an opium den. California poppies are not part of the famous Papaver somniferum species, and they can’t get you high, nor are they addictive. However, they can help you relax.


I’m all for using plants that grow readily in your yard or general area, rather than trying to coax more exotic species along. There are many herbs that can be used to make relaxing teas (valerian, catnip, linden, chamomile, etc.), but this one intrigues me because it’s essentially a weed where I live. If it doesn’t grow readily where you live, I’d encourage you to investigate other herbs which grow more easily in your area. 

But for those of you who can grow California poppies easily, I’ll just say that I’ve been making tea with fresh California poppy foliage this year and must report that I really like it. I like it so much that I’m drying plants so I have a store to last me through the summer and fall, and may make a tincture of it, too. 

It makes a soothing tea. I find it useful in two types of situations: first, when I have a nagging tension headache–the kind that comes about when you’re cranky, and can’t find any way to de-crankify, because your head hurts so damned much. I find that this tea de-tangles my brain enough that the headache goes away. The second situation I take it in is when I’m really tired but am resisting going to bed for whatever reason.

What do experts say?

There’s lots of somewhat conflicting information about the California poppy on the Internets, and even my herb books at home say different things about its properties. Overall I think all sources do agree that it does have sedative quantities and that it won’t hurt you. In fact, in Europe, it’s often used as a component in sedatives for children. Taking that as a starting point, I’m trusting my own evaluation of its effect in regard to me. Everyone reacts a little differently to herbs, and everyone has different needs, so I’d encourage you to try it and see what you think.

In Medicinal Plants of the Pacific West, Michael Moore says its a “…surprisingly effective herb for use with anxiety” and “When used as a sedative, it promotes relaxation and genial lethargy.”  He notes it has some mild analgesic effects in higher doses.

One thing he does address is the question as to whether drinking this tea would make you test positive on a drug test. His answer is that though the plant does not contain the same alkaloids found in opiates, it contains alkaloids that are similar enough that they might create a false positive on an urine test. I’ve also heard firm opinions from other sources that it absolutely will or will not show up.

California Native Americans use Eschscholzia in their own way. According to Healing with Medicinal Plants of the West, the Chumash made a poultice of the pods to stop breast milk. For them, this was (is) the plant’s primary use. Secondary uses include using the root for toothache and a decoction of the flowers to kill lice.

How to use:
 
You can make tea with any of the above-ground parts of the plant: leaves, stems and flowers. You can use these parts fresh or dried. I’ve been using fresh so far. I just stuff my tea basket with fresh leaves, pour hot water over them and let it steep a good long time–maybe 10 minutes. I put a saucer over the top of the cup to help keep the tea warm. The long soak ensures a stronger, more potent brew, obviously.

All the sources I’ve read note that this tea is unpleasantly bitter. I’ve not found that to be so, but my palette may be affected by Erik’s ongoing fascination with bitter Italian greens. Sometimes I throw some mint in with it just to liven up the flavor, but I honestly don’t find it unpleasant straight.

(ETA: Coming back in September to add to this post. Now that summer is almost over, I can say that the plants get more bitter as they get older and the weather gets hotter. It’s the first flush of growth that’s most palatable.)

In terms of dosage, all I can say is that the more of the tea you drink, and the stronger you brew it, the more pronounced will be the effects. If I just want a bedtime brew, analogous to chamomile, I’d just make a cup of tea as I’d make any cup of tea. If I have a headache, I’ll make a small pot of tea (2-3 cups) and brew it strong and sip it until I feel better.

You can also tincture the plant, fresh or dry, in alcohol, and take it in that form. This isn’t the place for a tincture how-to, but if you already know how, Moore says: Dried plant tincture: 1:5,  50% alcohol; Fresh 1: 2; Both 30-60 drops, up to 4x a day, for anxiety. 

I’ve heard that the root can be held against a sore tooth–in places other than the Chumash source–but I don’t know if it works. Some sources I’ve read use the root as well as the above ground parts for tea, but I’ve not tried it. I’ve decided that the root must have slightly different properties than the foliage and haven’t stirred myself to investigate those yet. 


Growing California poppy: 

If you live where this plant is native, all you have to do is throw some seed around your yard in the fall, and the plants will magically appear after the winter rains. There is no special care or soil prep to be done. You don’t even have to bury the seed. The plants will thrive on their own until the summer heat and dryness kills them. Before they go, though, they will spread seed and more plants will appear the next year on their own. I’m not so sure how you’d grow it in other climates, but I assume you’d toss the seed around after the last chance of frost. If anyone has experience growing California poppy in other climes, please let us know what you do.

Nanny state precautions:

You should maybe not drink a lot of this and then drive, or operate drill presses, table saws, curling irons, etc. You probably should not mix this with prescription drugs without consulting your physician, especially if you’re on sedative drugs. If you’re pregnant or breast feeding, you know the usual drill–consult your practitioner. And anyway, that part about drying up milk might be of concern. Finally, California poppies are protected by state law. It’s illegal to pick them except in your own yard.

Harvesting and Drying Calendula

Mrs. Homegrown here:

Okay, so in a previous post I talked about growing Calendula. This post I’m going to talk about harvesting and drying it. The next post I’ll do on the topic will be about making a skin-healing salve from the dried petals, olive oil and beeswax.

When to harvest: 
Start harvesting your Calendula as soon as the first flush of flowers is in full bloom. Don’t try to “save” the flowers. The more you harvest, the more flowers each plant will put out.  After the first cutting, you can probably return to harvest more every 3 days or so.
The ideal time to harvest is in the morning, before it gets warm, but after the dew dries. You want them all fresh and perky and at their peak. This is traditional wisdom. However, I believe it’s better to harvest when you can than not at all, so I harvest at all times of day.
A side note regarding seeds:
If you don’t harvest the heads, they die back on their own, and then they’ll go to seed fast. If you don’t like the idea of Calendula volunteering all over your yard the following year, you’ll want to collect all the heads before they die back. However, you may also want to monitor them carefully and collect ripe seed for planting the next year (you want to collect the seed when it’s brown, not green).  And if you want to keep track of such things, if you make a point of saving seed only from the plants with the best blooms, your favorite colors, etc., over generations you can breed your own line of Calendula.
Alien beauty. A seed head in its early stages. The seeds are the green things that look like bugs.
What parts to harvest:
I harvest the flower heads only, though I understand that the foliage has much the same properties as the flowers. If I were short on plants, and knew I’d get few flowers, I’d harvest and dry the leaves to make up that lack. Given a choice, though, I prefer the flowers, just because they’re good for cooking and decoration as well as my salves. People used to eat Calendula leaves (they’re known as “pot marigolds” because they used to go into the cooking pot), but I’ve tasted them, and I don’t think I’ll be making them part of my diet unless I have to.
To harvest, I either pinch off the heads or cut off the heads with scissors. This often leaves a long, beheaded stem behind. That stem can be trimmed back to the first set of leaves, for the sake of aesthetics. Or not. (ETA: A commenter recommends that you always cut the stem back to the first set of leaves, so the stem does not become a conduit for rot. Makes sense.)
How to dry:
Bring the flower heads indoors, into an area out of direct sunlight. Don’t wash the heads.

Spread the heads out face down on a dishtowel or a sheet or newspaper or for fancy, an old window screen stretched between two chairs. I find laying out the heads an oddly satisfying activity.
Of course, if you have a dehydrator you could use one of those. Calendula should never be subjected to high heat, so oven drying is out of the question. Set your dehydrator to 90-95 degrees F.  
If you’re air drying, turn the flowers over every so often. Keep them out of direct sunlight.
They’ll shrink quite a bit as they dry, so you’ll have room to keep adding fresh specimens as they come in.
When are they dry enough?:
They must be completely and absolutely dry before they go into storage. Believe me when I say this is important. A couple of years ago I was impatient and put a few chamomile buds which must have been not-quite-dry in to a jar with the rest of my (painstaking) chamomile harvest. The next time I opened that quart jar I got a big nasty whiff of mold. I almost cried.
So–the flowers must be dry. They should be fragile, crispy and very dry, like crepe paper. Make a habit of feeling them at different stages of drying to develop sensitivity in your finger tips. You’ll notice that when they’re not quite dry they’ll *look* dry but when you touch them they are a bit cool compared to a truly dry flower. In other words, you can feel the water in them. Leave those for another day or so.
The green part, the flower head to which the petals are attached, dries more slowly than the petals themselves, because it has a greater mass. Be cautious of this. If you’re going to store the heads whole, then you need to allow extra time for the green parts to dry.  Which brings me to the next item:
To pluck or not to pluck:
There isn’t a right or wrong here. Everybody does it different. 
If you plucked all the petals off the heads when you first brought them indoors, those petals would dry very fast. But that, in my frank opinion, would be a pain. It would be like playing a game of “He loves me, He loves me not” that lasted for hours.
If you want to leave the petals on the heads that’s fine. The heads (green parts) have medicinal properties too, so you can use them whole. The only thing is that you must make sure those heads are completely dry before you store them, as I said above.
What I do is is wait until the petals are dry, then I pluck them from the heads, to avoid the whole “is the head still damp?” issue. When the petals are dry, they come off the head very easy. In fact, the ease with which they come off the head is an indicator of their dryness. If they’re resistant at all, they’re not dry. To work in bulk, you can take a whole bunch of dry heads and put them in a bowl and rub them between your hands. The petals will fall off. The heads will collect at the bottom of the bowl, because they are much heavier than the petals. Or you can strip them by hand. When they’re dry, this only takes a single gesture.
Only the driest petals go in the jar. All that debris around the jar is stuff that’s not dry enough yet.
Can you use the flowers fresh?:
Yes. And no. Depends. The next step in this series of posts is the making of an oil infusion.  I never put anything “wet” in oil, because of the slight chance that botulinum toxin might develop in the oil.  Herbalists who I respect put fresh matter in oil nonetheless, and I envy them, because I suspect they’re getting more out of the plant by doing so. But I’m not going to take that risk–or write about it if I do. This is just safer. 
You can use the flowers fresh other ways. You can make them (and the foliage) into a tea, which you could use as a skin wash for sunburn or irritation–or drink. Fresh flowers could go into your bathwater to make a soothing bath. Fresh flowers can also be soaked in alcohol to make a tincture.  
Storage:
I keep my very dry herbs in sealed mason jars in a dark cupboard. You don’t want to expose any dried herb to sunlight for any length of time. I use jars because I don’t take any chances with pantry moths (it’s amazing what they’ll get into). The risk with jars, as I’ve said, is that if the herbs aren’t perfectly dry, you’ll get mold. This is why other people opt to keep their dried herbs in paper bags–bags breathe a bit, so lessen the chance of mold. This is a good option, too.
I try to switch out my dried herbs every year–at least the ones I grow. Some of the things in my cupboard are older than that. I think some herbs keep their properties longer than others, but in general you should try to use them in a year or so. Like spices, the are best fresh, but usable, if not as potent, as they age. 

Label and date all your herbs. Even if you think you’ll never forget, somehow or another you will, and at some future find yourself standing at your cupboard, holding a jar full of strange plant matter and saying to yourself, “What is this?”