Strange brew: herbal steam for a chest cold and sinus pain

Mrs. Homegrown here:

I’ve had a bad cold for almost a week now. It’s gone through all the classic steps: the sore throat, then the snot factory, then the ghastly “productive cough” that keeps you awake at night, and on top of it all, the lost voice. Oh, the fun! I thought I was almost out of the woods, but then I seem to have hit a cul-de-sac involving the sinuses. Sinus trouble is a new malady for me–I’m just not prone to it–so it’s been a learning experience. My new best friend in this experience is my steaming pot-o-herbs.

Most folks know that you can inhale steam to ease congestion, whether that be in a hot shower, a steam room or by tenting a towel over a bowl of boiling water. What I’m going to talk about here is the bowl technique, tricked up by spiking the water with powerful healing herbs.


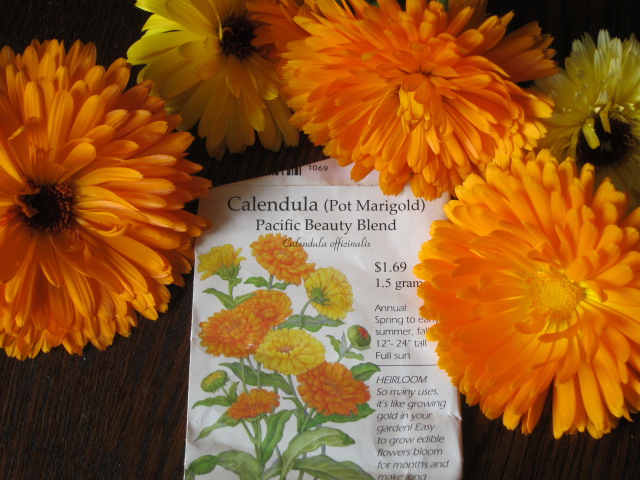
My inspiration came from the book by well-known herb expert, Stephen Harrod Buhner called Herbal Antibiotics: Natural Alternatives for Treating Drug-Resistant Bacteria. It’s a slender, informative book profiling the actions of a short list of top antibacterial botanicals, some of which, like ginger and garlic, are quite commonplace. Highly recommended reading.

This is Buehner’s steam for upper-respiratory infections:

Get yourself a big cook pot–stainless, glass or enamel are recommended for working with herbs.

Fill it with a gallon of water

Into the cold water put:

2 oz. dried eucalyptus leaf
1 oz. dried sage
1 oz. dried juniper or crushed juniper berry

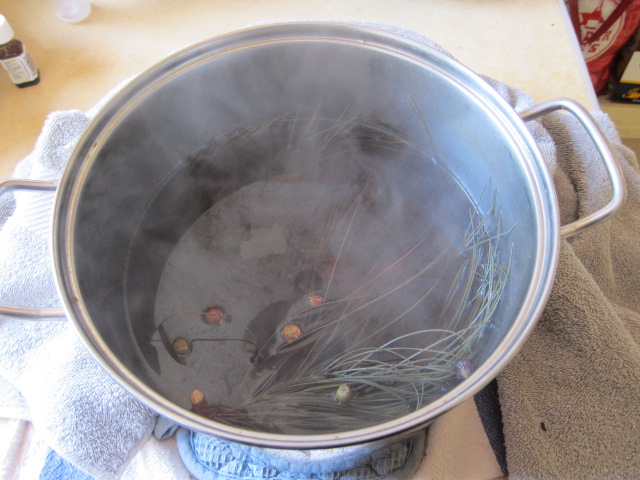
Bring to a rolling boil, then take off heat (I kept the pot covered to keep the good stuff in).

No need to transfer the liquid out of the pot into a bowl. Just put a trivet or folded towel on the table and put the pot on it. Lean over the steam with a towel over your head. Breath deep until the steam dies, or you can’t stand it any longer.

Don’t throw out the pot contents. Just put the lid back on when you’re done and heat it up when you need it again. If it seems to be losing potency, throw in another handful of herbs.

I used my pot for a night and a day before it began to look a little tired. It was also completely full of solid matter! At that point I dumped it out in the yard and started a fresh pot.

Alternative herbs:

You may not have all these ingredients, and that’s okay. You could get by with just one–e,g. only juniper. If you have access to fresh material instead of dried, that’s good, if not better. Don’t worry too much about quantity, just toss handfuls in the pot.

You can also use essential oils of the same herbs in the water if you have those on hand. Buhner says 30 drops of each–I think that’s overkill. I’d start with 2 drops of each and see how that works for you.

My first steam contained dried sage and juniper, and a few juniper berries. I had no dried eucalyptus. Eucalyptus has that nice, lung-opening menthol action which is hard to replace. Fortunately, I had some eucalyptus essential oil and would add one drop of it to the water each time I went into the tent. From now on I’m going to be sure to have eucalyptus essential oil on hand at all times.

On steam round two, I wanted to freshen the mix and had no more dried sage or juniper, so I added a big spray of fresh pine (baby cone and all) from the neighbor’s yard. Pine is considered a good substitute for juniper, followed by fir, cedar and spruce–in that order. You might not have a well stocked herb cupboard, but most neighborhoods and parks have evergreen trees. Just make sure you don’t pick the branches of the yew tree (the conifer with thimble-like red berries), because yews are toxic to consume. I don’t know if the steam would harm you, but I wouldn’t fool with it. I don’t know of any other toxic evergreen.

Remember, these particular herbs were chosen because of their strong antibacterial properties. You can also take steams with other healing herbs that may not have quite the power of these, but which have their own benefits. I’d recommend trying lavender, rosemary and mint as more gentle, but pleasing alternatives.

And failing all that, a plain water steam is better than nothing.

The results:

The idea here is that aromatics opened up my poor nose, sinuses and bronchial passages, loosening all that gunk so my body could  send it on its way. Beyond that, I believe the antibacterial steam killed, or at least inhibited, the nasty bacteria it found on the way. I steamed intensively for 24 hours (every 2 to 4 hours, I think–whenever my head hurt I went back to the tent). Today I feel a lot better, so only did a steam in the morning.

When my sinus pain was at its worst, I’d take a washcloth in the tent with me, wet it in the herb water and use it as a compress over my sore face while I was breathing the steam.

The foremost effect of steaming for me was keeping sinus pain at bay–which it did very well. Ibuprofen did nothing. (And I don’t like OTC decongestants, in case you’re wondering) Steam took care of it just fine. The secondary effect is that my nose and chest have cleared up. The third effect is that my facial pores are now remarkably refined. 😉

Tonight I am pain free, snot free, feeling chipper and happily noshing on a cupcake Erik baked I post this.

Why not plant some Calendula?

Calendula glows like the sun.

Mrs. Homegrown here, leaving the composting controversy behind…

One of my favorite plants in the garden is Calendula officinalis, aka pot marigold. It should not be mistaken for common marigold, or Mexican marigold, both of which are in the genus Tagetes. Tagetes marigolds are popularly used in companion planting (to ward off bugs in the garden), and for combating nemadtodes in the soil. Calendula is for helping people.

I grow Calendula in order to make lotions, balms and salves. I’m a firm believer in its healing power, my belief based on the happy response by family and friends who use my salves. Calendula is anti-inflammatory and antiseptic. It soothes, heals and helps regenerate skin. You’ll find Calendula extract as an ingredient in expensive beauty products, but you can make your own Calendula salve for pennies. I’m going to come back to how to do that in a later post, but first, I want to talk about planting Calendula so you can get some going in your own yard (or on your balcony) this spring.


Planting Calendula:

Calendula is beautiful and easy to grow, even for beginners. It’s not at all picky and will adapt to various soils and light conditions like a trooper, though–like most things–it does best if planted in rich, loose soil and given full sun. Even if you’ve had bad luck with flowers in the past, try Calendula. I’d be surprised if it let you down.

It’s technically a short lived perennial, so in very mild climates it might be a permanent garden flower, However, it doesn’t live through freezes or extreme heat. Here is southern California it’s a self-seeding annual. It seeds like crazy, so if you don’t want volunteers all over your yard, trim off the spent blooms–“deadhead” them–before they go to seed. (Calendula seed is trippy: big, gnarly crescent shaped pods, each one a little different–very unlike most seed, which is quite conformist.)

It does very well when grown from seed planted directly in the ground. In years past I’ve let Calendula range all over the yard as casual volunteers, all descended from some long forgotten planting, so obviously it’s not particular about planting conditions.

However, when it came time Phan of Pharmacy ™,  I wanted to start fresh, so I bought seeds. And I wanted to start the seeds while I was preparing the ground, so I started the seeds in flats and transplanted the seedlings when they were about three or four inches high. This worked very well. Calendula isn’t particularly pest-prone, but some things will munch on it, particularly when it’s small. Transplanting the seedlings when they were larger may have given them the oomph to withstand attacks. They also didn’t mind the shock of transplanting–I had no losses.

The Rundown on Calendula:

  • When to plant: Almost any time after frost: early spring into early summer. It doesn’t do well in scorching heat, so the earlier the better.
  • Where to plant: As above, it’s not too picky about soil. You want part to full sun. 
  • How deep to plant: About a 1/4″.
  • How far apart:  If planting in flats, seeds can be close, maybe 3 or 4 inches. If you’re planting straight into the ground you need to consider the final size of the plant, and how close you want them together. I like mine close, so in the Phan they are about 8″ apart. I think 8″ to 1 foot is a good range.
  • How big is it? Depends. A foot or so high, maybe more if it’s older or very happy, and probably about a foot across. 
  • Water: Calendula needs regular water. The one thing you have to do is remember to water it.
  • Fertilizer: You don’t really need it, but if you’ve got some nice compost you can spread some around the plants. 
  • Harvest: To save flowers for medicine, pick them when they’re open and at their peak. Don’t worry about picking too much. Picking just forces them to send out more flowers. Not picking is what leads to plants going to seed and closing up shop. Take the heads inside and dry them face down out of direct light. When dry enough to be crunchy, strip the petals and transfer to jar.
  • Pots: Calendula takes well to containerized life. Try it in pots or window boxes. It would do well in self-irrigating container, too.
  • Seeds: Look around for interesting flowers. As long as the seed pack reads “Calendula officinalis” you’ve got the right stuff. This year I planted the “Pacific Beauty Blend” from Botanical Interests and like them quite a lot. They have a wide range of colors, from almost cream to bright yellow to this cool peach color to the classic vibrant orange. Some of them are beautifully double flowered, others have more of the traditional daisy thing going on.
The seeds and some heads brought in from the garden for drying.

One last note: Calendula is edible. It’s not flavorful, but it’s fun to add the petals to salads. Dried calendula leaves look a little like saffron and can also be used in cooking for color. Calendula also can be brought indoors as a cut flower.

What’s eating my cilantro?

Mrs. Homegrown here:

While we’re inviting questions, we’ve also got a question for you guys. What sort of critter likes to eat cilantro? I think it’s a critter, not a bug. There’s no sign of leaf damage, just nibbling the stems down. There’s no digging or other disturbance.

Whatever this critter is, it has a defined taste for cilantro, because the cilantro is interplanted with parsley and it never so much as touches the parsley, or anything else in the garden, for that matter. It just comes out at night and decimates the poor cilantro.

Advances in Gardening Series: The Fan

Yet another heat wave slowed our backyard redesign project, but the weather is looking more cooperative at last and things are coming along. What we thought we might do over the next few days is share some of the new things we’ve put in, and how/why we built them, just in case any of it might be useful to you.

Everything is pretty rough and ragged right now, but it will be fun to report back in a couple months and do a compare/contrast.

The Concept:

Above you see the bones of my herb fan (and lots of chaos beyond). This space used to be my herb patch, which consisted of a bunch of random plantings, some perennial, some seasonal. It somewhat useful and occasionally attractive, but  didn’t earn its keep. So what I’ve done is split my herb production into two categories: kitchen and medicinal.

The kitchen herbs are going to live in a smaller planter box, all compact and tidy (because really, how much marjoram do you need?). This new bed, The Fan, is for medicinal annuals, because I need more space to produce them in useful quantities. For instance, you need a good number of chamomile plants if you want enough to put away for tea and a little more for salves. With this in mind, I’m going to rotate “large” crops of annuals through this space, one variety per wedge.

This winter’s fan is planted with, from left to right, Calendula, chamomile and bread seed poppies. I started the Calendula and chamomile in flats ahead of time, simply to get a head start, then transplanted them into their wedges this week. Poppies don’t like to be transplanted, so I sowed those seeds today.

The original herb garden was a rough quarter circle. We kept that footprint, but used spare bricks to divide the shape into 3 smaller wedges. The bricks give me a way to walk between the wedges without compacting the soil. 

The Process:

To prepare the ground…

I first forked the original soil, because while it’s not bad soil, it was compacted. Poppies have deep taproots. Like carrots, they need loose soil, so I really worked their wedge deep. If it hadn’t been so hot, I would have done the same for all the wedges. Then I spread 1″ of good homemade compost over the whole area and a bit of alfalfa meal and forked that in about 3 inches deep. Then I watered deeply to prepare for planting.

By the way, I made a mistake at this stage. While merrily amending and forking the soil, I forgot that chamomile likes crappy soil.  With chamomile, hard conditions yield many blossoms. So by putting my chamomile in a deluxe bed, I may have guaranteed myself lots of foliage and few flowers. We’ll see. The lesson? Pay attention. Don’t garden on autopilot.

Next I coiled drip tubing in each wedge…

pinning the tubing down with bent wire. Erik did the heavy lifting in setting up the drip system a couple of years ago. Now when we want to irrigate, we just have to move the tubes around or switch them out as necessary. You can see the tubing snaking around in the photo. Soon as the plants get a little bigger it will become invisible. The mainline tubing is visible at the bottom of the photo–this is where all the little tubes plug in. That will also be obscured later.

The final step is to protect newly planted seeds and seedling from marauding critters.

We do this by stretching bird netting over wire hoops. Bird netting, also called aviary netting, is a super light, fine plastic netting that can be bought at most nurseries. You can drape trees or garden beds with it to protect them when in fruit, or when plants are tiny and tempting.

Erik says he’ll do a whole post on the wire hoops one day, but right now can’t remember the name of the wire. But he gets in the chain-link fencing section of the Home Despot. But basically, it’s a sturdy galvanized wire. Because it’s sold in circular bundles, it’s easy to cut off a piece and use it as a hoop. The cut ends get thrust in the ground and the netting is spread over the arch. We weigh the ends down with bricks or boards. You can see the bricks on the far left wedge above–if not the netting itself.  This system isn’t elegant, but it’s temporary, and it works.

Now all I have to do is top water…

until the plants get roots deep enough to take advantage of the drip. It’s nice to have the chamomile and Calendula so far along. These seedlings are too big for bugs to bother, and should do fine. The poppies I planted by simply sowing the seed thick on the surface of the soil, and patting them down a bit.  When they germinate, there will be tons of teeny sprouts, and I’ll have to thin them ruthlessly so that each poppy has lots of breathing room. I’ve made the mistake in the past of planting them too closely. When you do that, they get spindly and sad.

And that’s that. I can hardly wait to see the beds fill in.

Tune in next time for… The Germinator!


Chumash Plant Wisdom

Mrs. Homegrown here:

Great news for our readers in Southern California (and parts near)! I’ve just found the holy grail of local plant guides: Healing with Medicinal Plants of the West. It’s co-authored by a Chumash healer, Cecilia Garcia and a USC pharmacology prof., James David Adams, Jr., both of whom write for Wilderness Way magazine. It features full-color pictures of plants familiar to you from hikes in the desert and the chaparral, and discusses the recommended use of the these plants from both the Chumash perspective and the western scientific perspective.

I found this book in the wonderful Green Apple book store while visiting San Francisco. It can be ordered direct from the publishers. The title link will take you to their site. It also is available in our Amazon store.