How to make a Calendula oil infusion

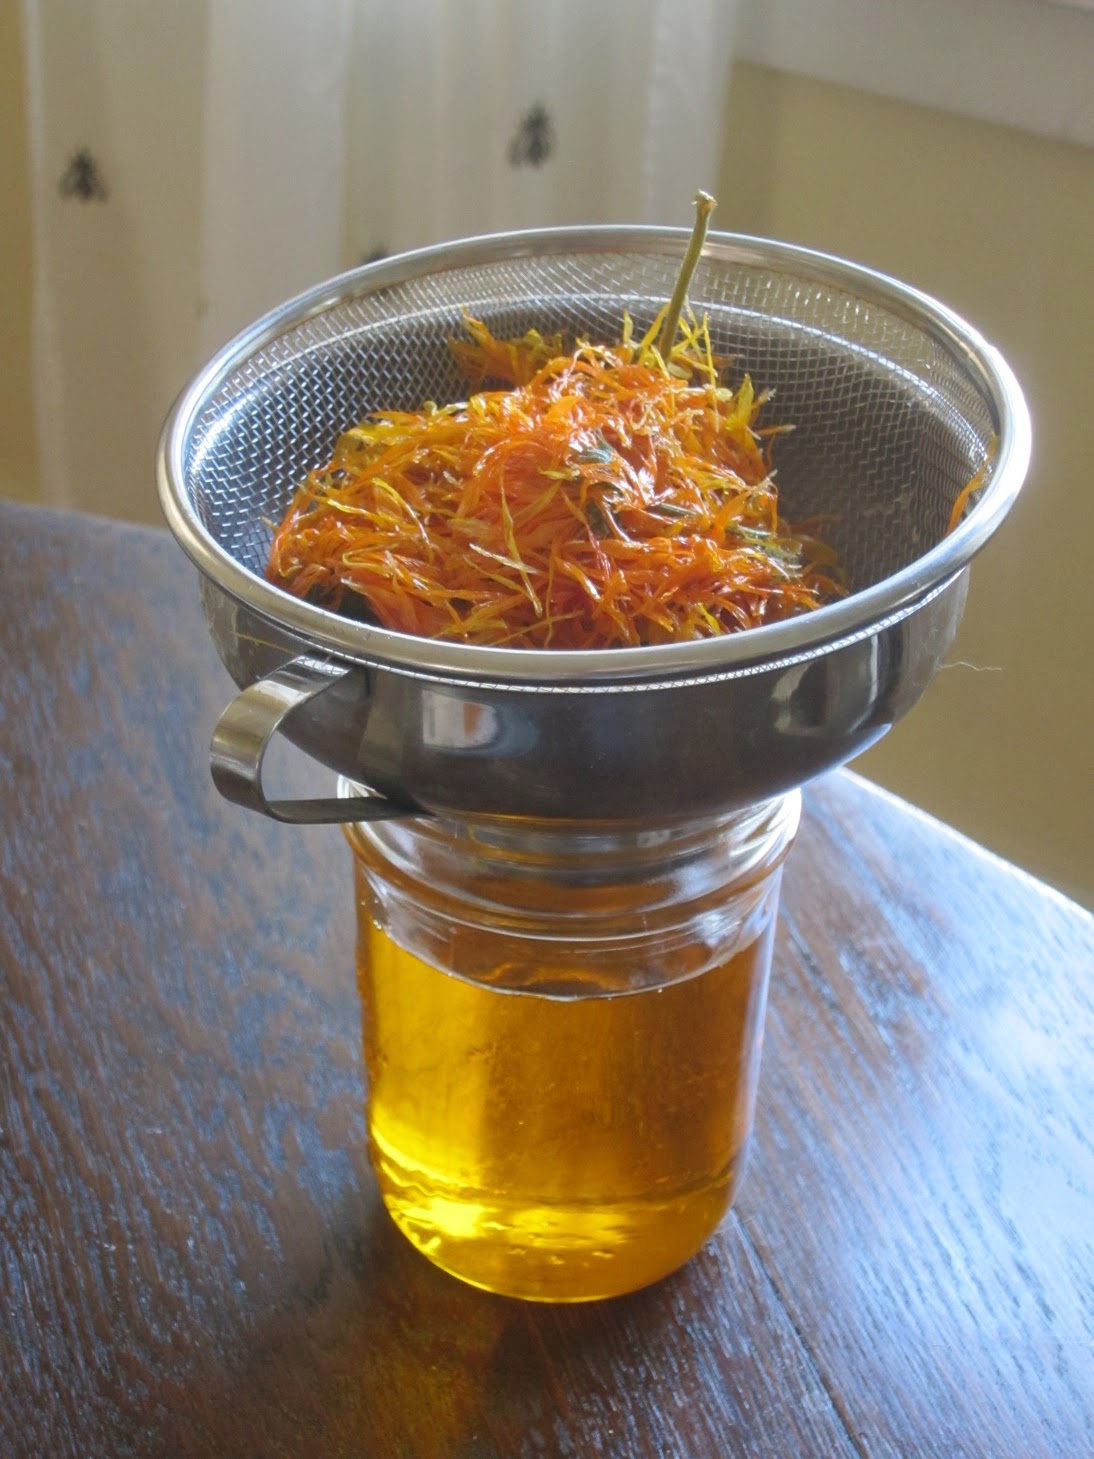
Love that golden orange color. It’s prettier in real life.
So finally I get around to finishing off this mini series on Calendula (pot marigold). This post will be on infusing oil, and next week we’ll have the one on salves.
We’ve already covered the growing and drying Calendula:
Oil infusion is as simple as can be.  Oil infusion is soaking. Think of it like making sun tea. You take a nice clean jar with a good lid, and fill that about half way full of dried herb, top it off with oil, and let that sit in the sun.
The resulting oil is medicinal. It can be used straight on the skin, or fashioned into salves and balms. I’m particularly fond of Calendula. As a skin treatment it displays regenerative properties, making it really helpful for healing dry, scraped up, or otherwise damaged skin.
 But lets step backwards a bit and talk about materials. 


Materials

Your herb–Calendula or anything else– should be dry when you start this. It should crumble between your fingers. If there’s any flexibility to leaf or flower, that means there’s still water in there.  The reason you don’t want water in there is that spoilage in oil infusions usually comes about because of the presence of water in the plant material. Spoilage can result in anything from off smells to mold to–worst case scenario–botulinum toxin in the oil. 
Now, to be sure, I know folks who infuse fresh herbs in oil, and they’re not all dropping dead. This is like the prohibition against infusing oil with fresh garlic cloves. Garlic oil tastes really good, and lots of people have done it for a very long time, but, theoretically, bad things can happen because of the water in the garlic (i.e. botulism), so it’s not recommended by the Powers that Be. So it’s up to you–I’m just not going to encourage it.
Regarding Calendula specifically, you can soak either the petals alone, or the whole flower heads. Either way is fine. Just make sure the green part of the heads is truly dry.
Your oil doesn’t have to be super high grade. I use un-virgin olive oil–not the lowest, motor-oil sort of grade–just something a little more experienced than extra virgin. This is also a matter of preference. You can use organic, cold pressed, locally sourced extra, extra virgin oil, for sure. It’s just an expensive proposition. Since I make these oils in quantity, I use the less expensive oil and save the good oil for salads. 
It doesn’t have to be olive oil, either, but it should be something good for the skin, like jojoba oil or grapeseed oil. I don’t recommend common cooking oils, like corn or canola. Some people infuse into petroleum jelly (making insta-balm), but that makes me shudder. I’ve not tried infusing coconut oil, but I imagine it would work great. 
The Soaking
All you have to do is fill a very clean jar with a good lid about half way full of dried herb,  then top it off with oil.

If the herb you’re using is very fluffy, and as a result has a lot of air around it–imagine a jar of dry chamomile buds, for instance–you can fill the jar almost to the top with dried matter.

This not an exact science, so don’t get worked up about exact quantities. The only thing you should keep in mind in terms of measurement is that you’ll get less oil out than you put in. The herbs soak up a good bit of the oil, and don’t give it all back. Also keep in mind that you don’t need to make a ton of this stuff unless you’re planning on selling it, or doing a big Christmas project. Salve stretches a long way. A jam jar–the kind that holds 1 cup–is not too small for an experimental go at this.

Now wait
Cap the jar tight and let the plant matter infuse in oil for about a month. The best place is in a sunny window, where it gets some heat and light. Very gentle warming is the idea. You can take your jars outside when the weather is good. When the sun is hiding, I’ll put my jars on the stove top, where there’s constant warmth from the pilot light. 
Give the jar a shake every now and then.
There are other ways to do this. Some people simmer on the herbs and oil on the stove top. I avoid this because plant essences are so delicate and heat sensitive. A crock pot is more controlled, but I don’t have one of those. In Making It I wrote about a technique involving alcohol, the blender, and the stove. It’s tricky, but it will yield finished oil fast. But here at home, I like the simplicity of the long soak. It doesn’t take any energy, and hardly any attention.  
Harvest
Above I said about a month–that’s loose, because again, it’s an inexact science. I’m sure you’d have something useable in a couple of weeks, and I will confess I’ve often forgotten about my oils and left them more than a month with no ill effects. 3 to 4 weeks is ballpark. 
Strain the oil from the dried matter. I used to do this very, very carefully with a tea strainer or with a muslin bag. Now I have the blessed canning funnel.  I line that with various strainers, depending on how clean I want the oil. I have a fairly loose strainer that’s good for big stuff, like Calendula blossoms. Tea baskets fit in there as well. And for very fine straining I can line the strainer with cheese cloth or muslin.
Strain the oil into a fresh, clean jar. Pour off the oil first, then press the dried matter to squeeze out the remaining oil as best you can. You’ll never get it all back.
Label it 
Make sure you label it with the type of oil and the date it was made. Believe me, even if you only make one jar, you’ll forget what it is and when you made it, and a year later you’ll be standing at your cupboard, puzzling over it.

Store

Store the oil in a dark place. Use it up within a year, the sooner the better, to take advantage of the Magick Herb Power.

Of course you should not use oil that smells rancid or looks funny. Smell your herbs and oils as you’re working with them! If you’re familiar with them, you’ll know easily that they’ve gone off.

Don’t throw away old or even rancid oil, by the way. Burn it in oil lamps. That’s a whole ‘nother project that we should cover here. It’s the first project in Making It.

Another item for the plastic haters file

Photo: TWRA. More at link.

As if the specter of hapless marine animals ensnared in six-pack rings wasn’t enough, here comes a story out of Tennessee about a bear who spent three weeks with his head stuck in a big plastic jar. (Perhaps one of those things that holds several gallons of Cheetos?)

They cut it off him, re-hydrated and released him. This is being presented as an happy ending story. And true–it’s a miracle that he survived at all, but he’s lost 3 weeks’ worth of fat reserves. Can he reclaim that weight before winter?

Why do people leave plastic crap lying around in nature? Can we just stop with the throw-away plastic already?

Color me cranky this morning.

Link to the full story at knoxnews.com  (via The Awl)

One way to salvage stale bread

Mrs. Homegrown here:

So I bought a baguette this week, which caused Mr. Homegrown to grumble with hurt indignation. His homemade bread is better than any store bought, it’s true–but he hadn’t baked in a few days, and I wanted to make caprese sandwiches. However, my plans went awry and the baguette went stale.  Oh, the shame on my head! Just where did we put out our supply of sackcloth and ashes?

However, tonight I salvaged the bread by making it into Melba toast (?) or rusks, maybe (?).  I have a fondness for hard, blandish cracker breads like this. You can pile an amazing amount of dip-like-substances on them, and as I’ve said, I could live on chips and dips.

I have to admit that for anyone who’s ever made croutons, this recipe is a little “Well, duh”– but, nonetheless:

All you have to do is slice the stale bread up into reasonably thin slices. Lord knows my slices vary in thickness quite a bit. Thinner is easier on the teeth.Very thin would be exquisitely crunchy, but mine are never very thin because I am both uncoordinated and lazy. Baguettes make perfect rounds, but you could chop up larger loaves into bite size squares.

 I like to make these out of bread so far gone it could not be sliced the next day. You know that thin line between salvageable and brick? That’s what this recipe is for. I think there are better things to do with only slightly dry bread–like making bread salad, for instance. See below.

Then I use a garlic press to add garlic juice to some olive oil–maybe one or two cloves to 1/3 cup? It doesn’t really matter, because this is a very loose process. I put the bread slices in a big bowl and drizzle the garlic oil over them and toss them about until it looks like all the slices have been well greased. This usually means I add some more olive oil. I like lots of oil, but I’m sure it would work fine with less. It would also work fine with no garlic.

Finally, I toss the greasy bread with lots of salt and pepper. And yes, of course, you could use all sorts of herbs and spices at this point. Whatever takes your fancy.

The bread goes on a cookie sheet into a 350 degree oven for about 20 minutes to a half hour. I’m not sure about the timing because I just check until they look done. “Done” means they’re brown, but not black, and have gone dry and hard as rocks.  Timing will vary by how stale the bread is when you begin, fresher bread taking longer. Thinner slices dry out faster than thicker ones.

Not so wild about melba toast? I don’t have tested recipes on hand, but google up “bread salad” or “panzanella.” This is basically just pieces of stale bread tossed with basil and tomatoes, lots of olive oil and a touch of vinegar. It can be jazzed up with cucumbers or olives or hard boiled eggs or whatever is on hand.

Also, I just saw this recipe for cold bread and tomato soup at the Awl. Haven’t tried it, but it looks interesting.

What do you do with your stale bread?

Mongolian Giant Sunflower

Nothing much to say about the Mongolian Giant Sunflower other than, “wow”. I got these seeds from Seed Savers Exchange and they have lived up to the “giant” in the name. I’m going to have to climb a ladder to harvest the seeds.

Though I don’t see the need to get competitive with my sunflowers, Renee’s Garden has some good harvesting advice,

As the petals fall off, the center florets dry up and the seed kernels begin to swell in the disks, carefully climb a stepladder and cover your flower head with a mesh onion bag or loose burlap or paper bag. This keeps marauding birds from robbing your seeds so that the heads look perfect and complete when you are ready to show them off to friends or proudly display them on their long stalks at your local county fair. Cut the stalks at the base when the ripened seeds develop a hard shell. If you plan to eat your sunflower seeds or preserve them for your bird feeder, wait until the seeds are completely dry; then remove them by hand or by rubbing them over wire mesh into a basket. Store in tightly closed containers to keep rodents away.

In addition to the native sunflowers that reseed themselves every year I think I’ll plant a few Mongolian Giants each summer. If you’ve got a favorite sunflower variety, either ornamental or edible, please leave a comment.


Mrs. Homestead here: Turns out sunflowers can also help clean up radioactive contamination. Good to know! They’re planting them in Fukushima. (via Boing Boing)