
Mrs. Homegrown here:
This summer I suggested we plant broom corn for no other good reason than I saw the seed pack at the nursery and thought it would be fun to make a broom. (This sort of temporary insanity often overtakes me in the seed aisle.) So without knowing anything at all about broom corn or broom making we planted a block of the stuff. Maybe I should have done a little research into broom making before planting, but I let it slide ’til harvest time. It’s not a disaster–I’m still going to try to make a broom. But now I know more and would do things a little differently if I was serious about the broom biz.
I’m going to share with you what I know about growing and harvesting broom corn to make brooms. Making the broom will have to be another post.
What is broom corn?
It’s a member of the very useful sorghum family: Sorghum vulgare var. technicum. It’s a tall plant that closely resembles sweet corn, especially when young. However, when it matures it sports big, seedy tassel heads instead of corn cobs.
As its name implies, it is an excellent material for broom manufacture. It really has no other purpose, except maybe in floral arrangements or as not-so-great animal fodder. As my favorite source, Broom Corn and Brooms: A treatise on raising broom corn and making brooms on a small or large scale (1908) says:
Like cork, Broom-corn is one of those natural products that are so perfectly adapted for the uses to which they are put, that no substitute has been, or is likely to be, found for it. In toughness, elasticity, sufficient, but not too great rigidity, lightness, and ease with which it is manufactured, it excels all other materials used for brooms.
The first recorded mention of it comes out of Italy in the 1500’s. Ben Franklin is credited with introducing the seeds to this country. But really, what innovation is that man not credited with?
Broom corn and broom manufacture was a big in the States, once upon a time. In the early 1900’s the US was the only country in the world exporting brooms. Of course that’s no longer the case–I assume our brooms come from China now–and most broom corn you buy probably comes from Mexico.
It was also not uncommon for folks with a bit of land to grow a stand of broom corn to keep them in brooms. Again, from the 1908 book:
…it is often cheaper to raise a patch of broom corn and have the boys make it up on rainy days, than to buy the brooms ready made. While home-made brooms may not be as handsome as the “boughten” ones, they will do quite as good work–provided the right person is at the other end of the handle.
I think this says a lot about our general resourcefulness in past years–as well as something about the relative price of brooms.
Broom corn or Broomcorn?
I have no idea! My 1908 manual calls it Broom-corn. I tend trust the grammatical chops of people working a century ago for print. Broomcorn is just plain strange looking. But I’m sticking with broom corn as sort of a compromise, knowing that if anyone was searching the topic they’d probably use that form. And thus I contribute to the decline of literacy via the expediencies of the Internet.
ETA: It is broom corn, according to the OED. You see broomcorn a lot though.
Can I grow it myself?
Yes. Apparently it can be grown almost anywhere. Certainly, if you can grow sweet corn you can grow it, but it’s less fussy than sweet corn, being tolerant of both drought and poor soil. However, the best broom material comes from big healthy plants raised on good soil with plenty of water and sunshine. The midwest used to be broom country.
You definitely want to plant your broom corn in blocks instead of long rows, so you get good pollination rates.
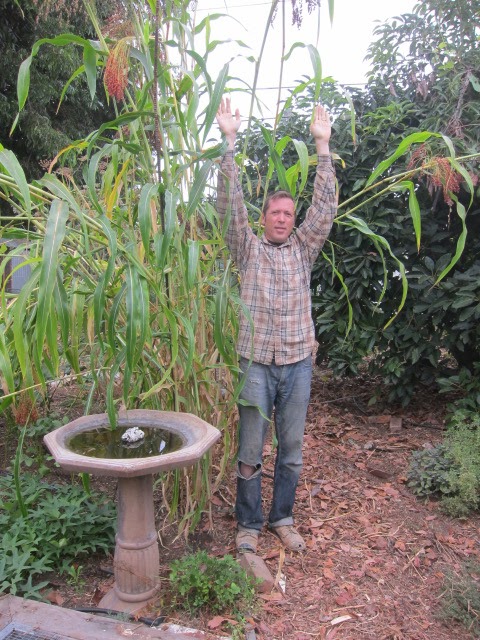 |
| It’s really tall stuff (up to 15 feet), and needs some support if you let it ripen, because the heads get heavy. |
Where do I get the seeds?
A quick search will give you several options. Mine were from Seed Savers Exchange. It’s a variegated color variety. The picture on the seed pack promised a huge variation in color. For the longest time I thought I’d been ripped off, because the tassels came out uniformly green and stayed that way til they ripened. Then they started to turn a uniform reddish-orange color. Only at the very end of the growing season did a bit of color variation begin to be evident–ranging from light orange to rust to red to burgundy, as you can see in the first picture. Very pretty stuff, but subtle. I think the seed packet illustration included the most extreme variations they could find, plus some unripe stalks for the lighter colors.
How much do I plant?
I finally found some good instructions on broom making (links later), long after planting, and those said that you need 45 nice big heads to make a standard flat broom. Each plant yields one head. My harvest was 50 heads total, including scrawny ones. This means I won’t be making a standard broom.
Keep that number–45–in mind, and then pad it to make allowance for small or malformed heads and your own mistakes while crafting. So I dunno how much exactly…lots? 60 or so plants per big broom?
Here’s something else you need to know: you have to use long heads to make full-sized brooms. The ideal tassel, or head, measures a cubit, which is the length from your elbow to the tips of your fingers. That’s the tassel alone, not the stalk to which is attached. None of my heads got that long. I’m not sure if this is because of our cultivation, or the variety, or what. From what I can glean, substandard sized heads are the part of every harvest–these were set aside for making whisk brooms. I will be making a whisk broom.
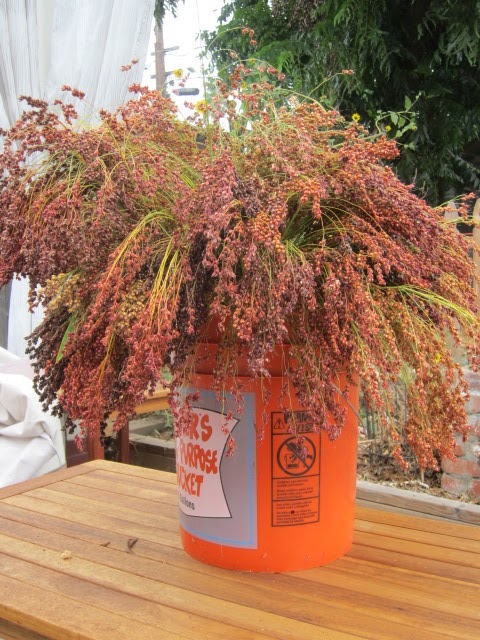 |
| My harvest fit in a 5 gallon bucket. This is almost enough material to make a regular flat broom. |
When do you harvest?
While waiting to see if the tassels would ever turn out to be variegated in color, I let my broom corn get completely ripe. The seeds are fully formed and heavy. This makes for pretty autumn bouquets, but is not ideal for broom manufacture. My 1908 manual says that the finest broom material is green and young. I don’t think I’m totally sunk, because those 1908 folks had very high standards re: brooms. Higher than mine, I don’t doubt.
Anyway, this is what they say about harvesting for brooms. This is the only info on this topic that I have been able to find:
Most successful growers say that the cutting should commence as soon as the “blossoms” begin to fall. After the flowers have been fertilized and the seed “set,” the antlers, or male organs and male flowers, fall away, and this is called the dropping of the “blossom.” At this time the seed has just begun to form and it is in a merely rudimentary condition, and the brush at this period is not only the best color, but it is heavier…and more durable.
How do you harvest?
For broom material, cut the stalks 6 to 8 inches beneath the base of the heads. If you want the heads for floral arrangements, the length is up to you. After cutting go ahead and peel away any leaves. The old manual has much advice as to how to do this systematically in the field–for instance, this charming illustration:

But alone in your backyard, and sadly lacking the dapper headwear, you will probably just have to wrestle with the tall stocks as you think best, bringing them down so you can lop of their heads. This will leave you with a ton of compost material–or useful compostable biomass in Jeavons-speak.
 |
| Her you can kind of see how the strands that form the heads come together at the stalk. You cut 6-8 inches below that point. |
Curing the material
The heads have to be dried after harvest. No one is saying how long–’til dry, I assume. The stalks should be dried indoors or at least under cover, and they should be laid out flat, so they’ll dry straight. If I kept the stalks in the bucket, for instance, they’d dry with a definite curve to them. Not good.
The problem with taking on agricultural crafts in the city is the distinct lack of agricultural facilities, such as drying sheds. (A tobacco shed, apparently, would be perfect.) Not to mention a lack of space in the house. My broom corn is currently on the kitchen table, where it will be a nuisance for a week or two.
 |
| The cats were thrilled by the corn in the bucket, but as compelling as it was as a cat toy, I had to take it away from them and lay the heads out flat to dry. |
Removing the seeds
Yep, the heads have to be stripped down so you have nice clean broom straw to work with. I haven’t done this yet, so will have to include what I learn in the next post where I tell you of my zany broom making adventures. But it sounds like you have to comb them off. For small batches, the 1908 book suggests either a long toothed curry comb (’cause we all have those around!) or sawing teeth into the end of a board to make a comb, and then fixing that board to something stable, so you can really tug the heads through. Go read the manual if you want more deets. I might just try a regular comb. You can also thresh it. If you have any idea how to begin threshing–which I don’t.
One last thing to think about:
If you want to make a broom with a long handle, you can use a dowel, or a re-purposed handle, or a hardwood branch. If you like the rustic branch look, keep in mind that the branch must be aged and dry. So if you’re planning on growing some corn to make brooms next summer, now would be a good time to gather your branches. Put them somewhere dry and let them cure for a year.
Resources
Broom Corn and Brooms: A treatise on raising broom corn and making brooms on a small or large scale (1908) I love this little book for its illustrations and wonderful fuddy-duddy prose. I read it out loud until Erik begged me to stop. Its instructions on making brooms are hard to follow and mostly unillustrated, but the cultivation info is invaluable. This link will take you to Google Books, where you can download a pdf.
How to Make a Broom, by Little John Holzwart. This is a Mother Earth News article, and the best instructions I’ve found. He doesn’t talk about growing or harvesting at all, though. Be sure to look at the photo gallery. Pictures help a whole lot. Little John sells brooms at Moonwise Herbs.
There are a surprising number of broom handcrafters on the Internets. Seems they’ve been given a big boost by Harry Potter in general and specifically by Quidditch teams needing funky brooms. Seriously. So poke around and see what these things look like.
I like seeing all the forms laid out in one place here at Granville Island Broom Company. I’m tempted to make a turkey wing whisk, a cobwebber or a scrubber. A scrubber suits my skill level.


