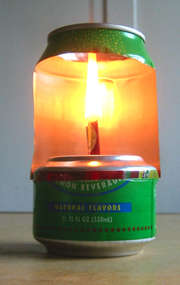
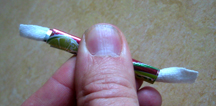
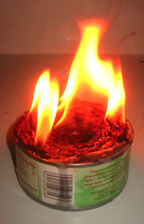
 An easy craft project for the family survivalist, taken from the brilliant 70’s Mormon classic: Roughing it Easy, by Dian Thomas.
A buddy burner is a heat source for camping or emergencies made out of a tuna can, candle stubs and cardboard. It acts like a Sterno can, will burn for 1 1/2 – 2 hours, and can be recharged and reused.
To make a buddy burner you need to gather: a clean tuna can, a piece of corrugated cardboard, a bunch of candle stubs, and a soup can or something similar to melt the wax in so you don’t get wax on your cookware.
 Cut the cardboard into strips as wide as the can is deep. Cut across the corrugation, across the ridges, so that when you look at the edge of the strip you see the open channels. Capiche? You are going to coil the cardboard in the can, so you will need maybe 3 or 4 feet of cardboard. One Amazon mailer made 3 BB’s here at Survive LA. Roll your strips up like a sweet roll and tuck them into the can. It does not have to be tight, but you do want to fill it up.
Pile your candle stubs next to the tuna can to get a sense of how much you need. The wax soaks into the cardboard, so you always seem to need more than you expect. Don’t worry about the wicks, dust, soot, those little metal things–the purity of your wax doesn’t matter.
Melt the wax. If you melt your candle stubs over direct heat the wax will burst into flame if it gets too hot. Therefore it is safest and best to use a double boiler set up. Now, if you own a double boiler you probably don’t want to coat it with wax, so use a tin can to hold the wax, and place the can in a saucepan of simmering water. Here we balance the can on a metal cookie cutter to keep it off the bottom of the saucepan.
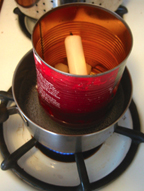 When the wax melts it will liberate bits of old wick. Fish these out first and tuck one or two or three between the cardboard layers to help with lighting the burner. Then pour the hot wax slowly into the can. It will fill up fast, then the wax level will sink as the cardboard soaks up the wax. Keep adding wax–you want to be sure the can is absolutely full of wax and the cardboard completely saturated.
To cook with your buddy burner, all you have to do is figure out how to elevate your cooking pot above it. You could use your fondue set up, or perhaps stack up some bricks on either side, or best of all, make a stove for it out of a big #10 can. That will be the subject of another post.
To light the BB, light the wicks and turn the can up on its side so that the cardboard catches fire too. The cardboard is a huge wick. That inferno effect is what you want. Control your flame by making a damper out of a piece of aluminum foil folded into a long rectangle three or four layers thick and as wide as the can, but much longer so that you can use the excess as a handle. Slide the foil back and forth to expose or repress the flame as needed.
To recharge the BB, place chunks of wax on top of the BB while it is burning. The wax will melt down and refuel it. The wax will always burn at a lower temperature than the cardboard, so the cardboard should last a long time.
UPDATE – 7/1/08
Reader Michael writes:
“Hey! I love your site. But some thoughts on Buddy Burners! I made SOOOO many of these as a kid growing up (Mormon, y’know?), but they are not safe anymore. Most aluminum cans are now fully lined with plastics and other coatings (to prevent botulism, yay!) but they cannot be burned (boo!). Please please please do not suggest people make these as burning the coatings can be TOXIC.”
I’m beginning to wish we had a science lab here at the Homegrown Evolution compound to test these sorts of problems. I’d add to Michael’s concern that these plastic coatings leach estrogenic compounds into our food. BooII! See this alarming article from Cornell University on the connection between plastics and breast cancer.