Appletastic Apple Cake

Here’s something easy and delicious for you to make this weekend. You might even have all the ingredients on hand.

It’s a light, flavorful, not-too-sweet cake which is comprised mostly of apples held together by an egg batter. I suppose you could think of it as an apple quiche. It’s very pleasing, and versitile, too–it would be a good addition to brunch, or an afternoon snack, or, if dressed up with ice cream or whipped cream, it would be a fine dessert. This morning, I ate the leftovers for breakfast.

The recipe comes from The Paris Cookbook, by Patricia Wells, which I’ve mentioned before.

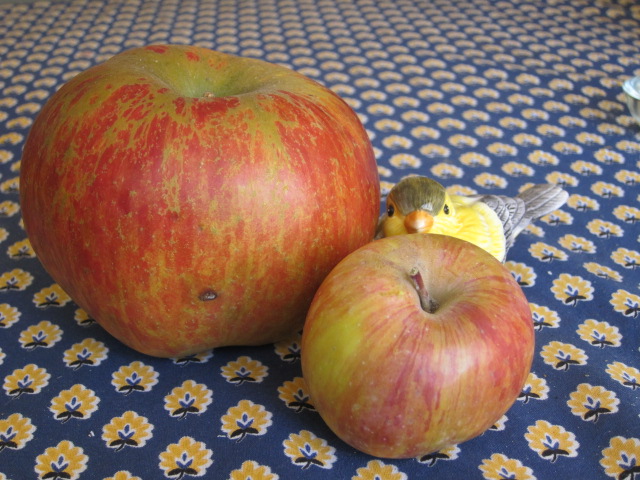
The key to this recipe is good apples. The better the apple, the better the cake. Wells prefers acidic cooking apples for this recipe, recommending Cortland, Gala or Gravenstein. But she says sweeter cooking apples, like Jonagold, are good too. I used Fujis because that’s what I had on hand.

You’ll need:

Equipment:

A 9 inch springform baking pan. (These are pans with sides which open up and disengage from the bottom.)  If you don’t have one, you could make it in a regular round cake pan, or even a square one. It’s just that the final product is a little sticky, and the springform helps with a clean release. You’ll lose points for presentation if you have to dig it out of a regular pan, but it will still taste mighty good.

The cake batter:

1/2 cup flour
1/3 sugar
1 tablespoon baking powder
1/8 teaspoon sea salt
1/2 teaspoon vanilla extract
2 large eggs, lightly beaten
2 tablespoons vegetable oil
1/3 cup whole milk

Apples, about 2 pounds worth. Wells says that’s about 4. I found it took 5 Fujis to add up to 2 lbs.

Peel and core the apples, cut them in half and slice the halves into thin slices.

The topping:

1/3 cup sugar
1 large egg, lightly beaten
3 Tablespoons melted butter

Put it together:

Pre-heat the oven to 400 F.

Butter the pan heavily and set it aside.

In a big bowl, combine the batter ingredients in the order listed. The dry come first in the list. Fork or whisk them around to blend them before you add the liquids. I cleared a well in the dry ingredients,  added all the liquid ingredients (vanilla, eggs, oil, milk) into the well, then used the whisk to draw the  dry stuff into the liquid, bit by bit, until I had a nice smooth batter.  But really, this isn’t fussy cooking so I suspect you could just dump it all together at once and stir it up.

When the batter is smooth, add in the apple slices and toss until they’re coated.

Pour the this apple batter mix into the greased pan and sort of jiggle it around until the apples are all lying more or less flat.

Put it on the center rack of the 400 degree oven. Bake this until the top turns golden, and the batter doesn’t look liquid anymore. You should be able to touch the surface and not encounter wet batter. Wells calls this “fairly firm.”  She says this should take 25 minutes.  For me, it took 35 minutes, but my oven may not have been sufficiently preheated.

While you’re waiting for it to bake, mix together the topping ingredients in a small bowl and have that standing by.

After 25 minutes or so, when the cake reaches this dryish, fairly firm state described above, take it out of the oven and pour the topping over the surface, then put it back into the oven to finish.

Finishing takes about 10 minutes. What you’re waiting for is for the surface to turn a yummy deep golden brown, perhaps a little dark on the high points (like a well cooked quiche), and again, for the surface to dry and firm up.  When it’s not quite done you’ll still be able to see liquid bubbly stuff broiling away at top. When it’s ready, it will mostly dry up, and the cake will feel firm when pressed.

(Edit: Comments have helped me remember that while 10 minutes was the recipe’s rec’d time, it took longer for it to brown–more like 15. Don’t pay as much attention to the clock as to color, and the dryness of the surface.)

Take the cake out, let it cool for at least 10 minutes, then ease a knife all around the sides. The browned sides of this thing are my favorite part, so be careful to keep that crusty stuff intact. It also looks nice. After you finish loosening the edges, release the springform.

This cake is meant to be served at room temperature. Wells specified that it should be served in thin slices, but we didn’t really follow that advice. It’s more like we each took half.


Slaughtering Turkeys for Thanksgiving

A noble Royal Palm tom. This photo by Kevin Saff. The rest are ours.

This post is not for everyone, so we’ve concealed most of it behind the jump. This week we helped our friend, Steve, slaughter and dress four turkeys for Thanksgiving. There will be pictures, so those of you who are interested can get some idea of what the process involves.

Steve is an especially conscious carnivore, because he raises and slaughters all the meat he eats, and he does this in a small back yard in Los Angeles. This means he does not eat a whole lot of meat.


He doesn’t have the time or space to put meat on his table every night, or even every week. Beyond those logistics, he also doesn’t have it in him to slaughter frequently, because the act is intense and emotionally draining. Though Steve is now well practiced in killing birds, he has not become callous about the act. He loves his birds–he raises chickens, ducks and turkeys with care, and does not take killing them lightly. Each kill is difficult for him, and he believes that it should remain so, always. He strives to remain open to the complex emotions that accompany the slaughter, instead of shunting them aside. This, he claims, is the hardest part. And that is why he is our teacher.

Erik and I first met Steve when we were researching our upcoming book. It’s a how-to book, and we wanted to include how-to slaughter a chicken instructions, and we wanted to present the most humane technique we could find. Homegrown Neighbor introduced us to Steve, and the day we met, we helped him kill three young roosters. Well, I’m not sure how much help we were, blundering around, green around the gills and frantically taking notes. I suppose we helped with the plucking.

When Steve invited us back for this Thanksgiving slaughter, we accepted. First, it’s just neighborly to help others with heavy tasks. “Many hands make light work” and all that. And we like hanging out with Steve. And we wondered if it would be easier the second time around. (It wasn’t.)

We had a fourth pair of hands, too–our friend, Christine. Christine is a meat eater who eats very little meat, who volunteered to help because she wanted to see and understand the process.

And in this Ominivore’s Dilemna sort of world, I suppose I should also define Erik’s and my stance on meat eating, so you’ll know where we’re coming from. Erik eats meat only when he knows it was well raised. Functionally that means he never eats meat. I’ve been a “fishatarian” since high school, and I eat fish only when I go out to restaurants, or when I go home, because the parentals don’t think they’re feeding me properly unless they serve me some sort of flesh. Erik eats fish when out, too. We never cook meat or fish at home.

However, lately we’ve been wondering about eating our own chickens. This notion will need its own post to explain, but suffice it to say that we returned to Steve’s driveway abattoir in part to evaluate whether or not we could do this at home–and also to continue our training.

***

Okay, so let’s get down to business. This is an overview of a turkey slaughter. I didn’t write this to be a how-to guide, just an orientation to the concepts. It’s slim on details, but big on pictures. We describe the chicken slaughter in more detail in our upcoming book, Making It, which comes out in the spring.

The first step is to collect the turkey, quiet it with gentle words and petting, and hang it by its feet. Birds don’t seem to mind hanging like this–they are remarkably calm at this stage. Ideally, they are just as calm all the way through.

You can see how pretty this turkey is. Steve raised his little flock from eggs. They’re a heritage breed called Royal Palm, a beautiful white bird with flashy black markings.

The next step is to slit the big veins on either side of the bird’s throat, just under the jaw. Steve prefers to use an extra sharp grafting knife–sort of a disposable scalpel. This time he used a brand new razor blade, which works, but isn’t as maneuverable.

There are many ways to kill a bird, but Steve researched them all and decided this quick, almost surgical opening of the veins is the least painful. It’s the kosher method without the rest of the kosher elements. It is not, however, the fastest method. For the human, it would be easier to lop off the bird’s head and walk away.  This method requires that Steve remain with the bird for its final minutes while it bleeds out.

This process doesn’t take long for chickens, but turkeys are bigger and tougher, and have more blood to drain. All the time, Steve sits by them, talking in a soft voice and holding the neck out stretched to facilitate bleeding.

They experience brain death shortly after the cuts, because blood is no longer traveling to the brain. The death of the body takes longer, and there are some reflexive flurries of wing flapping along the way.

Even though you know the flapping is automatic, it is hard to see. Christine, as a first timer, wept while she watched the first turkey die. There is a gravity and a pathos to this moment that you can only deny if you close down all your emotional organs.

I’m very moved by the spreading and flapping of the wings, which I think of as not blind reflex, but as the body’s last protests against death, against the great stillness. Witnessing it reminds me of my place on the wheel of life, and what I feel is mostly awe–awe and sadness for the loss of a beautiful, vibrant bird. The moment hits us all differently. It sends Erik’s mind back to melancholy memories of the deaths of our loved ones.

There is a justice to this. In order to to eat another life, to profit from that death, we have to embrace our own mortality. To me, this makes sense.

Neither Erik nor I have yet wielded the blade. I’m afraid of screwing up the cuts, and making the bird suffer. I’ve never been a fan of dilettante slaughtering. But next time we help Steve, I think I will try.

The next step is to immerse the bird in hot water to loosen the feathers. When Steve slaughters, he’s got a big pot heating on a propane burner standing by, heated to 158F.  The bird soaks for just a minute or two.  Here Erik is using a stick to hold the carcass beneath the water.

The smell of wet, dead poultry is…uh…distinct.

Next, plucking begins. The big feathers come out easiest, you just pull them out in the direction of growth. It’s the little pin feathers that will drive you crazy–more on that to come.

The good thing about plucking is that it quickly reduces the corpse to something that looks more like you’d see in the market.

 
Turkey feet are pretty amazing things:

The next step, for ease of cleaning, is to take off those amazing feet. Using a blade, Steve teases the joint apart with a blade. As you can see, they separate cleanly, leaving the classic drumstick behind.


Next comes evisceration. Birds have one hole for both excreting and egg laying–it’s called the vent, or the cloaca. It’s that little button structure you see in the picture below, just above the tail. The first step is to cut a careful circle around it. It will come out like a plug, and the intestines will slither out, attached behind it. Have a garbage can ready.

Next, you can enlarge that hole and reach in to pull out the other organs. In the photo below it looks like Steve and Christine cut a second hole–and I’m not sure why they did that, to tell the truth. I was off getting a breath of fresh air, because this part is the hardest for me.

I’d have to clean a lot more birds to be able to face this stage without gagging. It’s not the appearance or even the texture of the guts in my hands–I’m pretty sturdy about yucky things–it’s the smell. It hits me hard.

Christine, however, was a complete trooper and dove right in, and by the end of the day was gutting like a pro. She even sawed off a turkey head. At least one.  I think everyone who does this will discover both their strengths and their weaknesses, and the form these take might surprise you.

At any rate, the two holes you see above merged into one at some point. It doesn’t really matter, except aesthetically.

You can see above that the organs came out in neat sack. It may not always happen so neatly–you may have to fish around in the cavity to make sure you have everything. See the little green blotch? That’s the bile sack. This has to be removed and discarded carefully–you don’t want to spill bile on the meat.
Here’s one of four big fat livers Steve collected. We tossed them in a bowl and coated them with olive oil to help keep them fresh:
Our last step outdoors was chopping off the head. Of course this doesn’t have to be done last–it could be done at any point in the process.  Unfortunately I have no pics of that.
Finally, the carcasses go to the kitchen sink for detail work. I made that my job, so that I could cravenly avoid the stinky intestines. 
(I can’t help but see this as a Lynchian baby pool)
The first thing I did was wash eac carcass well under cold running water, rinsing out the cavities. Then I plugged the sink and immerse the birds in cold water–both to keep the flesh cool and to help with cleaning. 
After the first plucking, there are a lot of feather barbs left in the skin, some of them small feathers, others broken barbs. These all have to be plucked out of the skin one by one. Some are very resistant to extraction, and have to pried or squeezed out. Some have puss at the base–sort of like turkey zits–and these are particularly disgusting to pull. It’s tedious work, very detail oriented. I kept myself vigilant by imagining one of Steve’s family biting into a barb I’d left behind. But in the end, I found it rewarding. It appeals to my nature to put final order to things, and to clean until the water runs clear. (Out damned spot?)

When you’re done, you have turkeys that look like they came from the store–except they’re not grossly inflated through the breast.

While you could slaughter and eat on the same day, if you’re new to this it might be wise to slaughter the day before. Steve finds he doesn’t much want to have anything to do with poultry after slaughtering them for a day or so. So he brines his birds before cooking. It gives him a chance to recover, and makes the bird taste better, too.
Mr. Homegrown here: Allow me harangue for a moment. My guess is that if most Americans sitting down to Thanksgiving supper had to slaughter and eviscerate their own meat we’d have a lot more vegetarians. It’s a hell of a lot of work, both physical and emotional to do this. Even the meat eaters would be eating meat a lot less often.

Oatmeal: It’s Not Just for Breakfast Anymore

(we’ve really gotta get us a live-in food photographer)

Mrs. Homegrown Here:

Okay, this is one is a little weird.  I’ll tell you right off that Erik won’t eat this stuff (it just seems wrong to him), but I love it.

I’m exploring the world of savory oatmeal. I’m sure there are savory oatmeal recipes on the web, but I haven’t looked because I’m enjoying working without a map.

What I’m doing right now is making oatmeal with seaweed in it, inspired by both my love of Japanese style breakfasts, and half remembered things about the Irish eating dulse in their porridge. I don’t like sweet cereal, so this suits me fine in the morning–but I also like it for lunch or dinner.

What I do is start the oatmeal water boiling and toss in shreds of dried seaweed. I’ve been using roasted nori, the sushi sheets, and also the flavored nori strips, because that’s all I have on hand. But there’s a whole world of more interesting seaweeds to try–including dulse. Anyway, after I shred a lot nori in the water, I add a dash of tamari and a dash of soy sauce, then the oatmeal. And finally I stir in a big pat of butter. This doesn’t jive with the Japanese thing so well, but I find butter just takes the whole thing up a notch in terms of savory, unctuous goodness.

I think this would be spectacular with a little salmon on top. And I’m going to move forward and try adding things like mushrooms, or cooking the oatmeal with stock.

Do any of you make savory oatmeal?

How to Process Carob

Before. Photo by Bill Wheelock.

Our neighborhood has an abundance of carob (Ceratonia siliqua) trees that, around this time of year, drop thousands of pounds of pods. Now many of us may have unpleasant associations with carob as a 1970s era chocolate substitute, but the tree has a long history in the Middle East, where it’s used to make a tea, as a source of molasses, as a vegetable and as animal feed. The “locusts” that John the Baptist dined on were not insects but, instead, the pods of the carob tree.

After. Photo by Bill Wheelock.

In the Middle East carob has a reputation as a famine food. According to the carob article in Wikipedia the people of Malta ate carob pods and prickly pear fruit during WWII. How appropriate then that my neighbor Bill Wheelock, who just dehydrated a huge batch of my prickly pear fruit (and faced the thorny consequences), took on the onerous task of figuring out how to dry carob pods and process then into a powder using common kitchen appliances. He has authored a handy step by step guide on Instructables on how to process carob.

As a drought tolerant tree that produces hundreds of pounds of pods each year, Ceratonia siliqua definitely should be included in any food forestry plant list for of our Mediterranean climate. So if that quantitative easing thing doesn’t work out, at lease we’ll have the carob and prickly pear.

The Big Apple

Homegrown Neighbor gave us this gigantic apple as a gift. The smaller one is for scale, and it’s your typical smallish (i.e. not grocery store large) organic apple.

We suspect Monster Apple is not for eating, only for marveling. It’s a Gordon apple, grown at the esteemed Eco-Home here in Los Angeles. According to HN, the other apples on the tree were large, too, but this one was the daddy of them all.