Scrubbin’ It

Say hello to my new friend the KingSeal Stainless Steel Scrubber, Heavy Duty Commercial Size. If you’re doing the cast iron cookware thing, as we are, you’re going to need a scrubber. And this puppy is the Hummer of scrubbers (apologies for that metaphor) and far sturdier than the usual flimsy supermarket scrubbers. It was gifted to me by Steve Rucidel, who owns a restaurant–so this is an item you’ll have to seek out at your local restaurant supply store.

Sadly, made in China–but what ain’t these days?

Now if only I didn’t have to do the dishes!

Mrs. Homegrown here:  

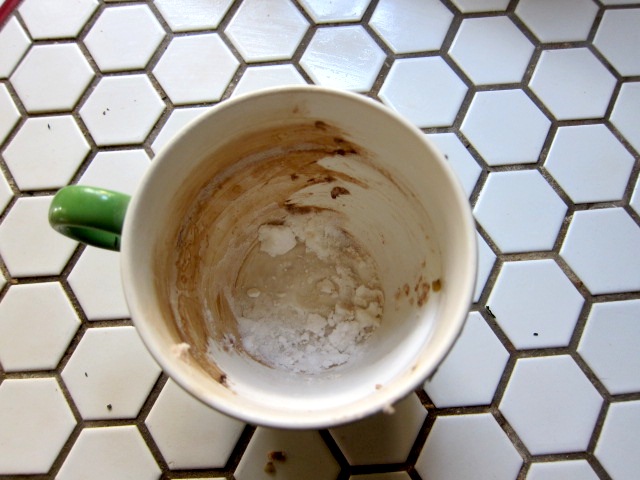
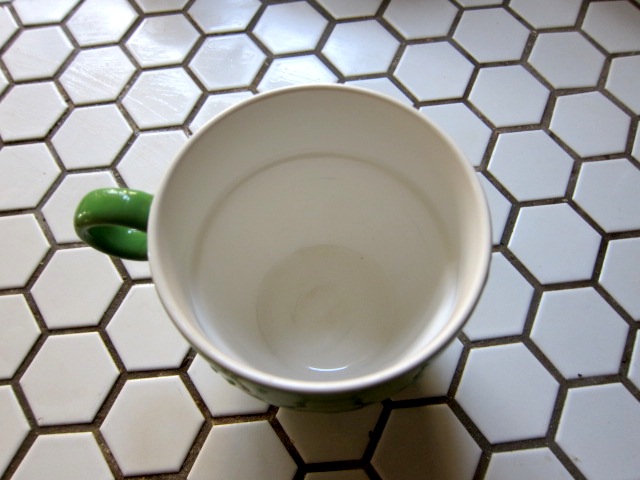
This is indeed a fine, stout scrubbie, but as at least one commenter says, it may not be the best thing for the cast iron. For indeed, if your cast iron is well seasoned, food should come off a rag, or a couple scrapes with a flat spatula. Unless you’ve really burnt dinner or something.  I’m laughing right now that Erik should put forth opinions on scrubbing cast iron, when in fact he’s very, very good at avoiding cleaning it day to day. He’ll do dishes, but “forget” the pans on the stove. Forget them for, like, what is it now…15 years?  He’s excited by the sturdy, attractive qualities of this object, and the fact his buddy Steve gifted him it–but he asked me to post this clarification re: the cast iron.

Loofah Sponges

We talk about the joy of loofah–or luffa– (Luffa aegyptiaca) all the time, but I don’t believe we’ve every blogged about it here. I was reminded of it when we received a letter from Candace, who heard us on a podcast talking about how much fun it was to grow loofah sponges. She said:

I wanted to thank you for that part of the interview in particular.  I decided to grow some this summer and it has been a great joy.  It is a beautiful vine, and the flowers are always loaded with bees, bumble and honey and all kinds of other insects. By the way, luffa are delicious.  Mine has been eatable at a diameter of 1 to 1.5 in and a foot long with no problem.  There are several recipes on line for them as well. They are a definite interesting grabbing item to share at get togethers, pulling the skin off and shaking out the seeds.  I’ve gotten several people interested in growing them that have never grown anything before by showing them the luffa.

Thanks for the feedback, Candace! And thanks for reminding us about this great plant. It’s just fantastic to be able to grow your own cleaning tools. They’re expensive in stores–too expensive to consider using on dishes and such–and just try to find one that’s organic and locally harvested!

Most people think loofah sponges come from the sea, but they are actually members of the cucumber family and grow on vines. With their skins on, they look like zucchini sized cukes. They’re quite attractive and fast growing. The vines can reach 20 feet if they’re happy, and the fruits form on big yellow flowers. They are so prolific and easy to grow (given the right conditions) that you only need a crop every few years to keep you in sponges.

We’ve never tried to eat loofah, mostly because we’ve been too greedy for sponges. But we’re going to chill on that next time around and eat a few. 

The only catch with loofah is that they need a long growing season: 4 months from sprouting to get a sponge, 3 months from spouting to harvest the fruits to eat. This does limit its cultivation to more southern latitudes, unless you can maybe get a jump start by sprouting indoors. 

Some tips:

  • The seeds need warmth to sprout–sort of like tomato seeds. They won’t start in cold soil. Start them indoors over heat if you have to. 
  • Basic growing requirements are lots of sun, lots of water, warm weather and time. Again, three months for food, for months for sponges.
  • Here in SoCal March is a good month to plant the seeds directly in the ground.
  • Provide support for the vine: it’s a climber. The vines are long and the fruit big.
  • Some people harvest for sponges after the skins turn brown. I find that if you wait that long the sponge itself can be blotchy/discolored. This is purely an aesthetic problem. Many people bleach their sponges in a mild bleach solution, so this doesn’t matter. I don’t bleach mine, so I like to harvest while they’re still green–though I think they might be a little harder to peel at that point.
  • It might help if you throw your harvest in a trash can full of water and let it sit overnight before you peel. Then you can peel in the can, in water, because it’s a messy business. Or do it however you want. You can’t really screw this up. Don’t worry too  much about how or when you peel them. You’ll get a sponge.
  • The seeds float out under water, or can be shaken out. The later is an excellent task for pesky children.
  • Each mature loofah yields tons of seeds, but be sure to save plenty because the germination rates aren’t high. Save seeds from the best specimens.

ETA: More info here: http://www.luffa.info/

    How to clean a stained coffee cup

    This is what it looked like fresh out the dishwasher. Ugh!

    The sink post reminded me about this quick and easy tip. If you’ve got a stained coffee mug, baking soda will take that gunk right off.  Just sprinkle some baking soda in the mug, then wipe down the inside with a damp rag or sponge. The stain will give in on the first pass.

    As I described in the sink post, the trick here is to keep the mug on the dry side, because baking soda scrubs best when only slightly damp. Your sponge or rag should be damp, but the mug shouldn’t have water in it.

    Just a swipe with the magic powder does it.
    I don’t like housework, but this sort of cleaning makes me happy.

    Cleaning the Sink with Baking Soda and Lemons

      
    Our sink, freshly cleaned and so darn photogenic!
    This is because you can’t see all the clutter just out of view.
     

    A little green cleaning review here. It is possible to keep a sink white and shiny without bleach or other toxic cleansers. I took pictures this week while I was cleaning to prove it.

    Below is our grungy sink. A photo can’t quite capture that particularly scuzzy quality a dirty sink has, that gunky bacterial record of all the dishes and greasy pans that have sat in it over the week. In the lower right corner you can see my homemade scrubby–just a few of those red plastic net bags that fruits and veg are sometimes sold in, wadded up and tied into a yellow one.

    The more usual state of our sink. That is, minus the piles of dishes.

    Step one: baking soda scrub

    A few quick things about baking soda:

    • Baking soda (sodium bicarbonate) is an inexpensive, non-toxic, mild abrasive. You can use it safely on enamel, stainless and fiberglass sinks. 
    • While you can find baking soda in the baking aisle of most stores, search it out in bulk, both for savings and because you’ll go through quite a lot of it. We buy it in huge boxes or bags at our local restaurant supply chain. I expect it would also come in bulk at grocery warehouse stores.
    • Make a shaker for it out of a jar with holes punched in the lid,  repurpose some other shaker, or buy a sugar shaker from a restuarant supply place. I’d used an old jar for several years before seeing a metal sugar shaker at an Asian market for all of $1.99 and decided to splurge. You can see it in the windowsill of the top picture. You know, it was totally worth the $1.99.

    Using baking soda:

    • The trick to using it effectively is to not use it in a very wet environment. Baking soda dissolves quickly in water, unlike some scouring cleansers. Don’t try to use it in standing water, or even with a very wet sponge.  For it to work well, it has to be on the dry side. If my sink is wet, I’ll run a towel over it to get most of the water out before scrubbing.
    • Use a generous amount of baking soda. 
    • See the lumps and clumps forming in front of my scrubby in the picture below? You can actually see the line between dirty and clean, and the lumps of barely damp baking soda that are picking up the dirt. In my experience, if you’re not producing these sort of lumps, deep cleaning isn’t going to happen. Look for these lumps. They only happen when a) you use enough baking soda, and b) when the cleaning surface is just damp. Not too wet, not bone dry.
    These are the magic clumps. I like to imagine myself a snowplow.

    Step two: bleaching

    Baking soda is an abrasive–it has no bleaching properties. If your white sink remains yellowed or stained after the scrub, you can bleach it with lemon juice. I always set aside unused lemon halves or withered lemons from the back of the fridge for this purpose.

    •  Dry the sink. Again, the less water the better.
    • Cut the lemon into wedges. I find a half lemon will usually do the job on my single sink, but lemons vary.
    • Scrub the sink with the wedges, using both sides. Smear the insides around to spread pulp and juice evenly all over the sink. Use the skin sides to scrub problem areas. I find the wedges do a good job of cleaning around the edges of the drain. I also rub lemon all around the border of the sink and counter, in the tile grout there. It never fails to loosen hidden dirt.
    • By the way, lemon juice is very effective at removing rust stains. For serious stains, combine it with salt to make a paste.
    • Leave the lemon juice to do its work. Leave it sit until dry, at least a half hour. Overnight is fine.
    The sink coated with lemon juice and pulp, the drain edge scrubbed.

    When you come back to rinse I think you’ll be pleasantly surprised by how bright the sink is. As a bonus, the lemon rinds can go down the disposal to freshen it:

    Look Ma! No toxins!

    Yes, this requires a little elbow grease, and a little attention to detail, but the scrubbing with baking soda doesn’t take any longer than scrubbing with a toxic scouring powder, and you’re spared from breathing that junk in, getting it on your hands, and adding it to our water supply–not to mention the danger of having it around the house. The lemon bleaching is an extra step, but one I always enjoy. Maybe it’s the scent, or maybe because I like playing with my food.

    Extra tough situations:

    • If the baking soda isn’t cutting it as a scrubber, try scrubbing with table salt or Borax, or a combo of baking soda and salt or Borax. 
    • Borax is a laundry additive, and sold in the laundry aisle. It isn’t as safe a baking soda. It will dry out your skin if you use it with bare hands, and you definitely don’t want to snort the stuff or feed it to your pets and babies, but it’s not bad for the water supply. I harshed on it a bit in our first book, but have softened my opinion about it of late. It has its uses. What’s interesting about Borax is that it releases hydrogen peroxide when mixed with warm water, so it not only is a sturdy scrubber, but also will have some bleaching properties if your sponge is moistened with warm to hot water. 
    • If I have a stain that lemon juice can’t address, I turn to the laundry room again. There I keep a little box of powdered oxygen bleach–Ecover’s, to give them a free plug. Others would work the same, I suspect. This is basically powdered hydrogen peroxide. I can either plug up the sink and soak it in a strong solution, or make a paste of the powder and leave it sit. 

    Bathtubs/Showers:

    I scrub our enamel clawfoot tub/shower with baking soda, too. The only difference is that tubs and showers accumulate soap scum, and I find you need soap to dissolve soap scum. So to clean the tub I’ll usually spritz it with diluted castile soap. (I keep a bottle of this around for general cleaning.) Then I’ll lay down the baking soda and scrub with a scrubby. The scum comes right off.

    I think the persistence of soap scum has much to do with the kind of products you use in the shower. We use homemade soap, and very mild shampoo, and nothing else. These don’t form much scum, and it cuts easily with liquid castile soap and baking soda.

    If you use more detergent based products, body washes and advanced hair products, and big brand drugstore soap, which has a very different formulation than homemade, you might have trouble dissolving the scum. I’d advise you cut around the problem by using simpler body products. But in the meanwhile, you might find Dr. Bronner’s Sal Suds, their detergent alternative, with cut through that scum better than castile soap.

    Sun Bleaching Really, Really Works

    Line drying in the sun is a time honored means of brightening whites. But I had never guessed how effective it can be.

    I have a pair of white bath towels which developed mysterious, spreading yellow stains all over them, stains which I could not remove no matter what I tried (Borax, oxygen bleaches, stain removers), and which I may have actually worsened by a final, desperate flirtation with chlorine bleach a few years ago.

    The towels were in good condition otherwise, but I wouldn’t hang them in the bathroom because– seriously–they made us look incontinent. I downgraded them to “slop towel” status, and didn’t think about them much again, until lately, when I was considering getting rid of them, to save room. But how to do that? I have too many rags, Goodwill wouldn’t want them, and throwing them in a landfill would be beyond the pale. I pondered composting them as an experiment, but figured they’d need to be shredded.

    Finally, I decided to hang them off the side of our porch for a couple weeks (in good weather, of course!), just to see what happened. Day and night, I just left them there. Turned them whenever I thought about it, then forgot about them entirely.

    Today I pulled them off the porch, and they look a whole lot better. I’m shocked they’re not counter-stained by diesel particulate. There are a few intractable stains from their days as slop towels, but 95% of that nasty yellow splotching is gone. They will be rotated back into bathroom use.

    Mr. Sun, I’m impressed.

    Max Liebermann, The Bleaching Ground, 1882, Wallraff-Richartz Museum

    Sun was once the primary way women used to keep their whites white–urine and lye were other less pleasant alternatives, as well applying bluing to counteract yellow. All of these may have been combined with sun exposure. Villages had designated, communal areas for spreading out laundry. Do an image search for “bleaching ground” and you’ll find lots of old paintings on the subject. Linen manufacturers also used to bleach linen in the sun, so you might find pics of huge operations as well as ordinary laundresses.

    • Some nice factoids on old fashioned laundry techniques can be found here, at Old and Interesting.

    • I’ve read that to rid yourself of perspiration stains on white shirts you can mix lemon juice and water–maybe at a 50/50 ratio? Soak perspiration stains in that and then lay shirts out in the sun to bleach. I’ve not tried that myself, since Erik and I have totally given up on wearing white.