Grow Italian!

It’s almost time to start planting seeds for the most productive growing season in Southern California – winter. While our friends in the cold parts of the country will be freezing their asses off we’ll be picking gourmet salads (sorry to rub it in). Since the climate here is like southern Italy, we like to plant Italian varieties. Which brings us to the source of many of our seeds at the Homegrown Evolution compound, Seeds from Italy.

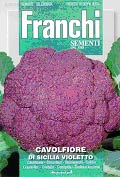
Italians dig vegetables, and the offerings of the Franchi Co., which the folks at Seeds from Italy import, show a tremendous diversity of species and varieties. Why grow the same boring vegetables supermarkets carry anyways? Also, Italy and California both have similar climates. We’ve been growing Franchi vegetables for several years now and have enjoyed everything from sweet beans to powerfully bitter weed-like greens. The purple Sicilian Cauliflower we grew last year was a revelation – fresh cauliflower is a billion times better than store bought cauliflower though, along with broccoli, it can be challenging to grow and it takes up a lot of room. It was still worth it, as was the somewhat less difficult to grow quick maturing broccoli rabe Seeds from Italy caries.

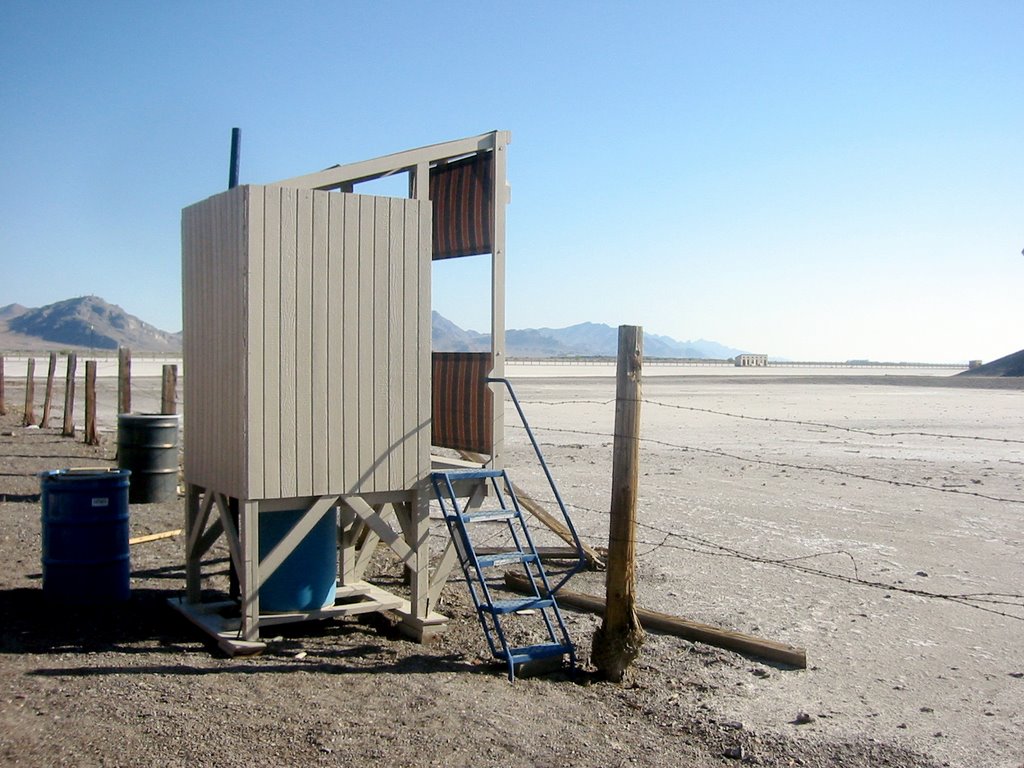
Our seed selection committee is meeting this week to decide on what we’ll be growing and we’ll get more specific in subsequent posts. We’re intrigued with agretti, and we’ll be looking at more perennial vegetables after the multi-year success of our artichoke plant. We’re also jumping on the permaculture bandwagon this year with an experiment in the backyard. And look for more root vegetables in our illegal parkway garden.

Lest we come across as Eurotrashy, here’s two domestic seed companies that have interesting varieties:

Seeds of change.

Native Seeds which sells Native American seeds

By the way, for us in L.A. the back of the seed packages have no connection with our climate. You need a book like Pat Welsh’s Southern California Gardening to set you straight on what to plant and when to plant it. Now get out there and plant some seeds.

Root Simple Visits Simparch’s Utah Compound

Root Simple is in Wendover, Utah this weekend on business and it’s here, in this hallucinogenic landscape of salt flats and casinos, that the artistic/architectural thoughtstylist collective known as Simparch has established a self-sufficiency experiment they call Clean Livin’. Located on the remote South Base section of the historic Wendover Airfield on land leased by the Center for Land Use Interpretation, Simparch’s project proves that self-reliance is possible in what must be one of the harshest climates in North America.

Clean Livin’ features a set of solar panels, batteries, a solar shower, a refrigerator, and a composting toilet all housed in and around a repurposed WWII era Quonset hut. Water is biked in with specially adapted cargo bikes. Solar power pumps the water up to the tower where it is heated by the sun in a black drum. A solar panel array and batteries provide more than enough power, all day and all night, to run power tools and pump some tunes out on the powerful stereo system.

The composting toilet features, what must be the most stunning view to be seen from any toilet seat perch in the world – the decomissioned Wendover Airfield’s munitions bunkers and the endless salt flats beyond.

Essential System #5 – First Aid Kit

The assumption we make around the SurviveLA compound is that in a large scale emergency, such as an earthquake, we’ll be on our own for a while. Anyone who has been unlucky enough to visit the hospital emergency rooms of Los Angeles or any big city, even during non-peak hours, knows that your sorry ass often ends up on a stretcher parked in a forlorn hallway waiting for hours for a distracted and overworked doctor. Which is why, once again, we’ve relied on the world of mountaineering to inform our choice of first aid supplies. The assumption with a first aid kit in the wilderness is that it will be quite a while before you can be reached by a paramedic.

But first some disclaimers – we are not medical experts here, and this first aid kit is in a “first draft” status. We welcome any suggestions for items that should be included. We have copied this list (and added a few things) from the book Mountaineering The Freedom of the Hills.

Adhesive bandages – six 1-inch

Butterfly bandages – three, in various sizes

Sterile gauze pads – four 4-inch b 4-inch

Carlisle dressing or sanitary napkin – one 4-inch (note sanitary napkins are much cheaper and make excellent bandages and provide some low-brow humor potential to cheer up the patient who may find themselves with a sanitary napkin duct-taped to their forehead)

Nonadherent dressings – two 4-inch by 4-inch

Self-adhering roller bandages – two rolls 2-inch width by 5 yards

SAM splint – one

Athletic tape – one roll, 2-inch wide

Triangular bandages – two 36 inch by 36 inch by 52 inch for slings (large bandanas will do)

Moleskin or Molefoam – 4-inch to 6-inch square for blisters

Tincture of benzoin – One 0.5 ounce bottle – to keep tape sticking and to protect skin

Providine iodine swabs – two packages

Alcohol or soap pads – three packages

Themometer

Sugar packets – to treat diabetes or hypoglycemia intervention

Aspirin

anaplasmosis (epinephrine) kit (EpiPen) – for people with severe allergies

Elastic bandage – one 2-inch width to wrap sprains or compress injured area

Latex gloves

Safety pins

Tweezers

Plastic bag – for contaminated items

Breathing bearier – for administering CPR – we have one on our key chain that the Red Cross sells, but note that you will need to take a CPR class in order to know how to administer CPR

Duct tape – a wonder product, cheaper than medical tape – use it to adhere bandages, deal with blisters and a host of other things

Any prescription medications that you take

Syringe – for cleaning out wounds – you can also improvise this with a water bottle

Antibiotic cream

If you already have a first aid kit you can pimp it out with a few of these items. We can’t emphasize enough the importance of large bandage material such as the sanitary napkins. One acquaintance of ours who was unlucky enough to have been severely cut by falling glass in the Northridge quake stumbled around bleeding for hours while her friends could only find small band-aids. Also, just because you have these items does not mean that you know how to use them. The Red Cross offers low-cost first aid and CPR classes but one thing to remember about Red Cross classes is that they assume that you have access to the emergency medical system and that the first aid you deliver is to stabilize the patient before the paramedics arrive. The Wilderness First Aid Course Inc. offers a more comprehensive first aid class that assumes that it will be awhile before your ass is swooped up in the little red paramedic wagon.

We keep these items in our grab and go bags and once again, this is a first stab at a kit. An anesthesiologist we have hiked with in the past carries a larger first aid kit full of potentially recreational prescription drugs and she’s more than prepared to do some fairly gruesome field surgery and appetite-suppressing improvised dentistry. They’ll be much more on the first aid topic in future post and until that time we welcome comments and suggestions.

SurviveLA Scoops Field and Stream

Looks like Field and Stream Magazine, the Robb Report of the guns and pickup crowd, has their own survival system in a Altoid can. We don’t like to brag too much here but in an earlier post, thanks to the folks at Illuminate LA, we featured a similar system with more items that is half the size.

Speaking of Illuminate LA make sure to check out the handy preparedness info they have posted on the right side of the page as well as all the fun destinations and bike rides they have planned.

Essential System #6 – Fire

On the crazy path of life you may someday find yourself needing to build a fire. When it’s wet and when kindling wood is lacking this can be a challenge. Which is why we always have fire starting implements on hand including a butane lighter and waterproof matches. Most importantly we carry something to really get the fire going – our homemade wax and dryer lint fire starters.

To make a wax and lint fire starter, save up the ends of a few candles and a bunch of lint from the dryer. Take a paper egg carton and put a big wad of dryer lint into each cup of the carton. Melt the candle wax in a double boiler. The easiest way to do this is to put the stubs in a clean tin can, and put that can in a saucepan about halfway full of water.  When the wax is melted, fill each cup of the carton up to the top with wax, soaking the lint. When the wax solidifies tear the carton apart, but keep the wax and lint in the individual paper carton sections. Light the torn edges of the cup to start the firestarter burning. The paper of the carton helps to get the wax and dryer lint burning. And burn it does! You will quickly learn why it’s a good idea to clean out the lint in the dryer vent – lint is seriously flammable.

With your dryer lint fire starters and some waterproof matches, you’ll be ready for any situation.

See this 2011 post for a picture.