 Reuseable food wrap made with wax infused cloth is a thing. DIY instructions for it are all over the web. It sort of had its moment in the sustainable limelight a few years ago, so I know this post is not offering anything new for the jaded sustainable DIYer.
But I wanted to tell you that I’ve finally made a couple of pieces to test out, and I like them. If you’ve been using waxed cloth, let us know what you think of it.
The factor which finally spurred me into action on this project was our Solavore Sport solar oven. It seemed like the perfect vehicle for this project, and proved to be so–in most ways. Read on.
In case you missed the craze, these food wraps are simply beeswax infused cotton cloth. Their purpose is to help replace plastic wrap and baggies to some extent. They can also be molded over bowls as a light cover–not an air tight cover, but are likely as effective as laying a plate over the bowl. Waxed cloth can also be fashioned into envelopes to carry snacks.
They can be used over and over, and re-waxed. They can also be washed with cold water and soap.
Food wrapped in wax cloth will dry out more quickly than it would in plastic, and it’s not watertight, so it’s not good for drippy/juicy things. Also, it’s not recommended for wrapping meat, because it can’t be cleaned with hot water. But it works very well for wrapping things like cheese and sandwiches, cookies, nuts, carrot sticks, etc.
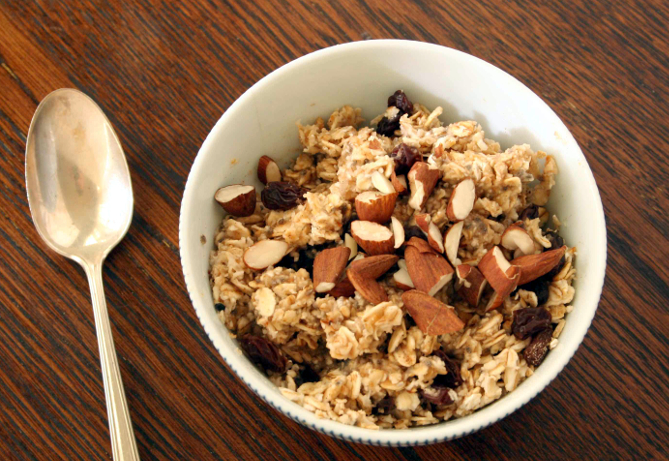
In my testing so far I’ve settled on using my cloths as snack carriers, using them to wrap up trail mix or carrots or chunks of cheese to put in my day pack, and I like them very much for this. I’ve not tried them for long-term cheese storage in the fridge yet, because the two I made have been constantly at work in the field. Time to make, more, I suppose!
Though I’ve experimented with using them as bowl covers, I doubt that I will use them for this purpose, as I have plenty of glass bowls with fitted covers, so I don’t need covers often. When I do, I’ve found the classic “balance a plate on the bowl” technique remains more convenient– but it’s worth giving the wrap a try. It is not breakable, so that may be a plus if you’ve got kids rooting around in your fridge.

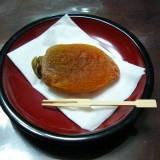
This is the peanut pack from above, folded for carrying. A more formal sewn envelope might be a touch more convenient, but you can do without, because the wax sort of sticks to itself when folded like this. It holds well enough to jounce around in the pocket of your bag for a day. I’ve not had a spill so far, but you could tie it up with string or a rubber band for extra security.
Professional Secrets
There are at least two companies making and selling these wraps now, and both use not only beeswax to infuse the cloth, but also pine resin and jojoba oil to make a fancier product.
I’m not sure what benefits may come from these extra ingredients–the pine resin may add some antibacterial action to the wax, but I don’t know it it would actually make any difference in terms of food safety. The jojoba is more mysterious. I wonder if it improves the texture?
You could probably replicate this proprietary blend by melting smallish quantities of pine sap, soft or hard, into hot beeswax over a double boiler, then stir in some jojoba. The resulting mix can be grated after it cools. Just be sure to cook this up in a jar you’re prepared to throw away, because the pine sap will never come off.

When covering a bowl, crimp the edges of the cloth around the edge as you’d crimp a pie crust. If you were really ambitious you could sew in an elastic band to hold the cover tight.
How-To
Making the cloths is very easy. All you have to do is cut some squares or circles of thin cotton fabric, like muslin. Pink the edges if you have pinking shears–this looks better, but I don’t think the edges will unravel much anyway, because of the wax.
Size depends on intended use. I can imagine eventually having a range of sizes and shapes. For instance, I’m imagining that a really large one might work nicely for rolling out and refrigerating cookie and pastry dough.
To begin, though, I’d recommend making just one or two. Test them and see if you like them and how you’ll use them before going into production whole hog. 12″ (30cm) square might be a good starting point.
Lay the cloth on a cookie sheet protected with foil or parchment and sprinkle the surface evenly with grated wax or wax pellets. You don’t need a ton of wax. You want to saturate the cloth, but you don’t want to use so much that the coating becomes thick and flaky. I used about 1 tablespoon of wax pellets for cloths about 11 inches square, just to give you an idea.
Place the cookie sheet in an oven set between 150F/64C and 185F/85C for about 10 minutes, just until the wax melts.
Safety note: Keep the oven low–don’t be tempted to use a hot oven for speed, because the wax could discolor at higher temperatures, or even burst into flame if the oven reaches 400F/204C.
Take the sheet out and check for coverage.
My experiments had pretty even coverage without any coaxing, because the hot wax wicks through the cloth. But if it looks spotty, you can spread the melted wax over the cloth with a silicone pastry brush or a dedicated paintbrush.
I specify a silicone pastry brush because the wax will come of the silicone brush– I used ours, so I can testify to this fact–but wax will never come off a regular bristle brush. However, if you use an inexpensive brush, you can keep that brush and use it again and again for waxing purposes by simply warming it until the bristles soften. For this reason you’d want to choose a brush with a wooden handle. Hardware stores sell cheap wooden paint brushes with natural bristles which would work perfectly for this purpose.
While the wax is still warm, hang the cloth up on a line to dry and cool. You’ll also need clothes pins or binder clips to secure the cloth.
The only things to remember are as follows:
- Less wax is better than more. If you use too much, your cloth might flake or be otherwise strange.
- Wax cools super fast, so if you’re working with the newly waxed cloth, be quick like a bunny. Instagram later! If your cloth cools before you finish, you can put it back in the oven and rewarm it.
- On the same note, you have to take the cloth off the cookie sheet the moment you remove it from the heat or it will bond to the sheet when it cools–and that happens fast. If it sticks, just put back in the oven.
- Have the drying line set up before you start. You’ll want to hang the hot cloths up right away to cool and dry, not be searching for somewhere to put them while they harden into odd shapes in your hand.
I don’t have many good pictures of the process, so for further research I’m directing you over to Mommypotomus for more details. She also has a cute plan for a snack bag that I might make.
Consider repurposing old textiles
I’m using some of my grandmother’s hankies for this project. I knew there was a reason I kept them around for so long! Take that, Kon Marie!
As I type this, I realize that sounds gross. Be assured, these hankies never saw service. In the 60’s (or earlier ?) people apparently sent one another novelty hankies that came folded inside matching greeting cards. Maybe these were the equivalent of our musical cards, a way to upscale a greeting card ? My grandma had several of these tucked in her bureau.
I claimed her nice linen handkerchiefs for my nose (I never saw her use one, despite having piles of them–she liked those little Kleenex packs), but these novelty hankies, made out of cheap printed cotton, are perfect for food wraps. The cloth covering the bowl in the photos is one of those.
These hankies are particularly nice because they have a finished edge, but this project is also perfect for making use of other textiles you might feel wasteful for throwing out, like old top sheets or a dress shirt with one unfortunate stain or fabric scraps from sewing projects.
Solar Oven Specifics
Beeswax melts at just below 150F/64C. It can discolor if heated above 185F/85C. Its flashpoint is 400F/204.4C.
While many home ovens can be set to 150F, my home oven is really primitive, it doesn’t have a pilot light and it doesn’t cook below 200F. I could fuss with it, prop the door open or whatnot to get lower temperatures, but I never wanted waxed cloths enough to bother with it.
But now that we have this Solavore Sport to play with, I realized I could achieve these lower baking temperatures easily, and simultaneously reach a new pitch of self-righteousness.
Regular cookie sheets don’t fit in the Sport, so I cobbled together a cooking tray out of a shallow cardboard box (a canned cat food case) lined with foil. It barely fit in the oven. It doesn’t even sit on the floor, in fact, but balances above, because the sides of the oven are wedge shaped. Hard to explain, but this should make sense to someone with a Sport.
Back in March, when we got the oven, it peaked around 150F if it didn’t have clips on the lid to seal in the heat–which would be perfect for this project. Now, with the sun higher, it rockets up past 200F pretty quickly even without the clips.
So, at this time of year, working at midday, all I had to do was watch the time and temperature to make sure the oven didn’t get too hot.
I put the tray in the oven, closed the lid (no clips, making the heating is less efficient on purpose) and waited about 10-15 minutes. The temp would quickly rise above 150F and the wax would dissolve, then I’d take it out before it got any hotter. Fast and easy!
Again, the reasons you want to keep the temps low is because 1) you might get discolored wax if you let it bake for too long above 185F and 2) in the very unlikely event the oven temp got to 400F, you’d risk the wax bursting into flame.
The only downside of using the Sport for this project is size limitations. The oven floor is wide but narrow, so I can’t make wraps bigger than 11 inches square. The floor is actually only 9 1/2 inches deep. By wedging the cat food box higher in the oven, off the floor, I was able to fudge things enough to make an 11 inch waxed cloth, but that’s the limit.
I may be able to fold a cloth in half for coating, perhaps layering the wax between the two halves. This is something I’ll play with if I decide to make more.
What’s next for the solar oven?
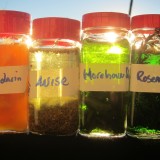
My next crafty project with the sun oven is going to be infusing oil with herbs, and perhaps drying herbs as well.
And for those of you who were following our solar cooking initiative, it has been on hiatus because our weather this May was dominated by a heavy marine layer which kept the skies overcast until mid-afternoon. I love this weather, personally, but it has put a wrench in the cooking experiments.
June, however, is coming in hot and bright. Usually June in LA is characterized by these same overcast conditions–we call it “June Gloom”– but I’m thinking the gloom came early this year and may be over. So look forward to more cooking posts soon!


The wax wraps actually use more than beeswax. I have been working in zero waste for quite a few years, and have heard the talk from the founder of Abeego more than once. Abeego uses jojoba oil and a tree resin as well as beeswax.
I happen to also live in the same town as the founder of Abeego, and visited an art supply store that sells tree resin for use in oil painting I think. The clerk confirmed that Abeego used to buy their resin.
So, toss a little of that in the mix…
Actually, I do mention the “secret ingredients” in commercial wraps like Abeego somewhere near the middle of this epic post. But I’m not publicly shaming you for skimming my post or anything!!! 😉
If you can get any hometown scoop on why they add jojoba and resin to the mix, I’d be very curious to know. I think I have some dried sap somewhere around here — I might mix up a professional-style wax blend and do a comparison for the next round.
Nice post!
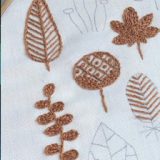
I really like your suggestion to use those old, colorful hankies. I bought a boxful a few years ago at a flea market for about a dollar. There were a couple of really beautiful hand embroidered hankies (the reason I bought the box) along with the others, but until now I’ve just been storing them. They really aren’t my style, but were too nice to toss. Now I’ve got a use for them. Thanks Mrs. Homegrown!
Yes, that’s basically where I’ve been with these–they came along with the nice hankies and were too cute to toss (even with the decluttering). More, I tried using one as a hankie and it turns out the cheap cotton is really rough on the nose when wet! They should be marked “for novelty purposes only.”
I love this idea though I have a few questions… if using these wraps for holding snacks, don’t the outsides of the wrap get yucky from being in the daypack, or do you have nice clean daypack pockets to put the wraps into? and does the cookie sheet you suggest for using to create these then become permanently infused with beeswax? I realise you actually used cardboard and foil, but an actual cookie sheet would be difficult to clean the wax off of it?
As to outer cleanliness, my standards aren’t that high in general, as I’ve mentioned before, and my pack is not very clean. But the whole thing gets a little soapy cold water bath after I use it, so there haven’t been any problems.
And yes, you should maybe line your pan with parchment or foil. Good point. You can scrape wax off a pan with a spatula, but lining it would save trouble.
could you use silk for the same purpose ??
have several shirts that are torn and am unable to throw out.
I don’t know–but I don’t know why not. Try it!