Bees: Shown to the Children

Mrs. Homegrown here:

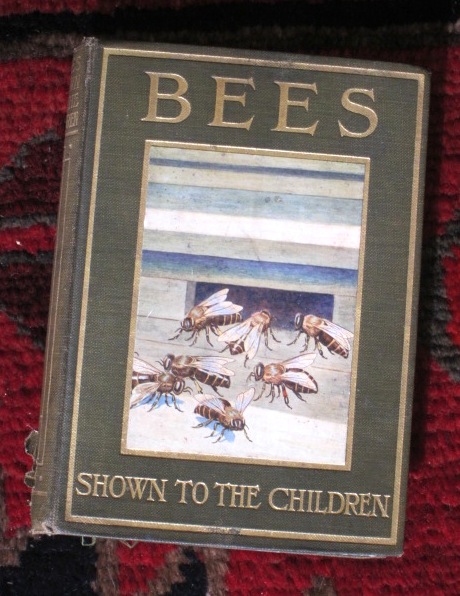
Homegrown Neighbor lent us this beautiful little book. The author is Ellison Hawks (what a name!) and dates to 1912. This book is part of a series of books for kids on various natural history topics, all titled the same way (i.e. X: Shown to the Children). I’d love to see the whole collection.

Every time I read an old children’s book, I’m struck by the sophistication of the language and themes presented, and wonder why this has been lost, and then try not to despair for civilization. Take this passage about intruders to the hive, from the chapter called Workers in the City (in the book, the hive is conceptualized as a bee city). It’s poetic and morbid and violent fascinating–all things I would have loved as a child:

Sometimes a mouse or a snail enters the hive, and then indeed there is great excitement. Imagine a great elephant-like creature, thirty or forty feet high, with a tail thirty feet long, to come walking into one of our cities, and you will have some idea what it seems like to the bees when a mouse is foolish enough to poke its head in the hive! But the bees are not frightened; the guards are promptly called out, and the poor mouse is soon put to death by hundreds of stings. Having made sure that the intruder is quite dead, the bees leave his body to the scavengers, who are confronted with the problem of disposing of it. If it were left it would cause disease and pestilence throughout the city, and it is too big and heavy for them to move. It is true that they might bite it into tiny pieces and thus carry it outside the hive, but this would take too much of the bees’ valuable time. A better plan is thought of, and the body is soon covered over with a thin coating of wax. It is thus embalmed in a beautiful white tomb, which is made perfectly air tight. If the tomb is near to the door, and interferes with the passing in and out of the workers, tunnels are cut through it. Sometimes when we look inside a hive, we may see two or three of these little mounts of was, and we may be sure that each one is the grave of some intruder who had no right to be there.

Granted, I believe foreign bodies in the hive, such as mouse corpses, are actually covered with propolis, not wax, but I’m not going to hold it against the authors. First, I’m not sure if I’m right or not, and at any rate, the idea is the same, and very well described.

There’s so much good to say about this book. It’s illustrated with early photos, line drawings, and pretty full color illustrations. In somewhat more than 100 pages it covers bee anatomy, behavior, the process of collecting nectar, hive society, beekeeping basics and even includes a chapter on “The Ancients” which addresses the apparently long-lasting ancient supposition that bees are born from the rotting bodies of oxen (?!?). I’m wondering if that was more of a symbolic conceit, because surely the ancients were no dummies and could tell the difference between blowflies and bees. But it makes for colorful reading, and again, as a child, I would have been entranced. Even if I couldn’t understand half the words.

Turns out this book is hard to find in the US because it’s an UK title. There’s only one Amazon listing, and it’s $23, and a couple more expensive at Alibris, but lots of UK listings for less. We may have to begin direct negotiations with Homegrown Neighbor for this copy.

UPDATE: A reader wrote in to tell us the whole book is available online, for free, at the Hathi Trust Digital Library. So if you want you can jump over there and page through it. I’d checked Google books, and it’s not there. I’m glad to learn of Hathi. They’ve got three other books in the series, too, btw.

Build a Worm Tower

Host: Leonnie Shanahan. More info: www.ecofilms.com.au

Mrs. Homegrown here:

One of our commenters on the compost debate, Nick H., offered up a link to a great video about worm towers, so we thought we’d share. A worm tower is a wide (at least 50cm dia.) pipe sunk halfway into the ground, with access holes on the lower half to allow the worms to come and go. Food and bedding is dropped in the top, which is kept capped.

We happen to have worm & compost expert Nancy Klehm staying with us this weekend, and she explained to us that this particular technology makes a lot of sense for hot, dry climates (note the video comes from Australia), because it’s sunken and it allows the worms to distribute themselves in the cool soil during the day. Conversely, I can imagine this wouldn’t be such a great thing in rainy climates as it could easily flood.

Nancy told us the worm holes clog up, so you do have to remove the pipe for cleaning fairly regularly, and perhaps take that opportunity to reposition it. I imagine that’s when the casting harvest would occur, and harvest promises to be a pretty messy process. 

The video speaks of using PVC pipe for the tower. PVC is cheap and easy to work with, but it’s pretty well established that it leaches toxins as it degrades, so you might want to seek out pipe in other materials. As an aside, we used to use PVC pipe in our self-irrigating pots, still still have PVC in some of them, but are phasing it out in favor of metal or bamboo pipe. Yet we still have PVC lines as part of our irrigation system. This is something you have to weigh and decide for yourself. 

Once Erik dragged home a section of ceramic sewer pipe he found in the street. It lingered in our yard for years, and was finally returned to the street. Now we’re singing the pack rat’s lament (See! See what happens when you throw things away!), because it would have been perfect for this.

On first glance I’d characterize this system as a novel idea, one which is worm-friendly, and best suited to hot, dry climates. It looks convenient to set up and use, but probably not the best system to use if you’re primarily interested in the castings.

If we can find another length of sewer pipe we’ll try it out and report back.

A Taste of Honey – Story from the BBC

Gentle readers,

Mrs. Homegrown here. When we renamed our blog Root Simple we were making a commitment to build a better blog. We don’t have the change all mapped out yet–we’re letting it evolve organically (how else?) but one thing we’ve known for a long time, and that is that we wanted to partner with Eric Thomason and Julia Posey from Ramshackle Solid. We’ve long admired their aesthetics, the grace with which they live simply, and the way they’re raising their boys: free and bold.

Don’t worry, Ramshackle Solid fans: they will continue to document their adventures on that blog, just as always. Here at Root Simple they’re going to liven up our game, dropping by with opinions, ideas and information that you probably wouldn’t get from me and Erik, making Root Simple a more interesting place. At the same time, Erik and I will continue to blog as we always have.

So give them a big welcome! And now, on with Eric’s first post, about one of my favorite subjects, the healing power of honey:

photo credit: edibleoffice via creative commons lisc.
The other night, Wednesday Feb 9th to be exact, while suffering a bout of sleeplessness, I had the great good fortune to hear this very interesting 27 min. audio story: A Taste of Honey (BBC)
It’s a very informative news piece starting with the history of mankind’s honey consumption and cultivation, discussing small scale vs. large commercial apiaries, colony collapse and ending with new breakthrough medicinal application of honey for aliments ranging from types of cancer to drug resistant staff infections.
One type of honey in particular, manuka honey, has very effective antimicrobial properties due to an additional compound found only in some wild manuka (leptospermum scoparium) in New Zealand.
Here’s a statement from the Summer Glow Apiaries website:

In laboratory studies honey with high UMF activity (over UMF10) has been found to be effective against a wide range of bacteria including the very resistant helicobacter pylori (this bacteria causes most stomach ulcers), the wound-infecting bacteria staphylococcus aureus and escherichia coli, streptococcus pyogenes (causes sore throats).

If you don’t have the time to listen or prefer to read, much of the health benefits being explored are discussed here in this BBC print piece from 2004: Harnessing Honey’s Healing Power

Why not plant some Calendula?

Calendula glows like the sun.

Mrs. Homegrown here, leaving the composting controversy behind…

One of my favorite plants in the garden is Calendula officinalis, aka pot marigold. It should not be mistaken for common marigold, or Mexican marigold, both of which are in the genus Tagetes. Tagetes marigolds are popularly used in companion planting (to ward off bugs in the garden), and for combating nemadtodes in the soil. Calendula is for helping people.

I grow Calendula in order to make lotions, balms and salves. I’m a firm believer in its healing power, my belief based on the happy response by family and friends who use my salves. Calendula is anti-inflammatory and antiseptic. It soothes, heals and helps regenerate skin. You’ll find Calendula extract as an ingredient in expensive beauty products, but you can make your own Calendula salve for pennies. I’m going to come back to how to do that in a later post, but first, I want to talk about planting Calendula so you can get some going in your own yard (or on your balcony) this spring.


Planting Calendula:

Calendula is beautiful and easy to grow, even for beginners. It’s not at all picky and will adapt to various soils and light conditions like a trooper, though–like most things–it does best if planted in rich, loose soil and given full sun. Even if you’ve had bad luck with flowers in the past, try Calendula. I’d be surprised if it let you down.

It’s technically a short lived perennial, so in very mild climates it might be a permanent garden flower, However, it doesn’t live through freezes or extreme heat. Here is southern California it’s a self-seeding annual. It seeds like crazy, so if you don’t want volunteers all over your yard, trim off the spent blooms–“deadhead” them–before they go to seed. (Calendula seed is trippy: big, gnarly crescent shaped pods, each one a little different–very unlike most seed, which is quite conformist.)

It does very well when grown from seed planted directly in the ground. In years past I’ve let Calendula range all over the yard as casual volunteers, all descended from some long forgotten planting, so obviously it’s not particular about planting conditions.

However, when it came time Phan of Pharmacy ™,  I wanted to start fresh, so I bought seeds. And I wanted to start the seeds while I was preparing the ground, so I started the seeds in flats and transplanted the seedlings when they were about three or four inches high. This worked very well. Calendula isn’t particularly pest-prone, but some things will munch on it, particularly when it’s small. Transplanting the seedlings when they were larger may have given them the oomph to withstand attacks. They also didn’t mind the shock of transplanting–I had no losses.

The Rundown on Calendula:

  • When to plant: Almost any time after frost: early spring into early summer. It doesn’t do well in scorching heat, so the earlier the better.
  • Where to plant: As above, it’s not too picky about soil. You want part to full sun. 
  • How deep to plant: About a 1/4″.
  • How far apart:  If planting in flats, seeds can be close, maybe 3 or 4 inches. If you’re planting straight into the ground you need to consider the final size of the plant, and how close you want them together. I like mine close, so in the Phan they are about 8″ apart. I think 8″ to 1 foot is a good range.
  • How big is it? Depends. A foot or so high, maybe more if it’s older or very happy, and probably about a foot across. 
  • Water: Calendula needs regular water. The one thing you have to do is remember to water it.
  • Fertilizer: You don’t really need it, but if you’ve got some nice compost you can spread some around the plants. 
  • Harvest: To save flowers for medicine, pick them when they’re open and at their peak. Don’t worry about picking too much. Picking just forces them to send out more flowers. Not picking is what leads to plants going to seed and closing up shop. Take the heads inside and dry them face down out of direct light. When dry enough to be crunchy, strip the petals and transfer to jar.
  • Pots: Calendula takes well to containerized life. Try it in pots or window boxes. It would do well in self-irrigating container, too.
  • Seeds: Look around for interesting flowers. As long as the seed pack reads “Calendula officinalis” you’ve got the right stuff. This year I planted the “Pacific Beauty Blend” from Botanical Interests and like them quite a lot. They have a wide range of colors, from almost cream to bright yellow to this cool peach color to the classic vibrant orange. Some of them are beautifully double flowered, others have more of the traditional daisy thing going on.
The seeds and some heads brought in from the garden for drying.

One last note: Calendula is edible. It’s not flavorful, but it’s fun to add the petals to salads. Dried calendula leaves look a little like saffron and can also be used in cooking for color. Calendula also can be brought indoors as a cut flower.

Compost Rebuttal

Kelly’s secret compost pile.

I found out via a blog post last week that Kelly had secretly constructed a compost pile to deal with a surplus of kitchen scraps. She knew I’d be unhappy with this due to my anal retentive approach to composting.

So why am I unhappy with this pile? The reason is simple: it’s too small and will never generate enough heat to:

  • Kill weed seeds.
  • Kill human and plant pathogens.
  • Kill root nematodes.

Don’t just believe me, listen to soil scientist Dr. Elaine Ingham in this youtube video:

Ingham’s work is controversial, but I believe time will prove her ideas correct. To grow fussy plants like vegetables we need to introduce beneficial microorganisms and fungi into the soil via well made compost. To make that compost we need to monitor the pile’s temperature carefully (it should be between 55ºC and 65ºC for at least three days according to Ingham). The pile also needs oxygen, provided by introducing loose materials like straw and through periodic turning. A compost pile needs water too. It’s not difficult to achieve the conditions Ingham specifies. You just need enough mass combined with the use of a compost thermometer to figure out when to turn the pile. 

O.K., so now I’m headed out into the garden to combine that tiny and ugly tire pile to the new pile I’m building.

For more information on Ingham’s work read, Teaming with Microbes: The Organic Gardener’s Guide to the Soil Food Web, Revised Edition by Jeff Lowenfels and Wayne Lewis.

Mrs. Homegrown here:

Just rebutting the rebuttal. I don’t disagree with anything Erik says above, and Ingham’s work is fascinating.  But to be clear about my post, the “sooper seekrit” pile was not about producing compost, it was about disposing of waste. Indeed, such a small pile does not have the mass to heat up enough to burn off nasties or to decompose very quickly, but it suited my needs at the time. Homemade compost is a wonderous thing. It’s vital to organic gardening, and moreover it’s really satisfying to take the waste products from your kitchen and garden and make them into something which will build your soil. You get to keep all that wealth close at hand. However, if you don’t want or need compost for your garden, but you don’t want to send green scraps to the landfill, you can return it to the earth in more casual ways, like the sooper seekrit pile.