
The holidays are over. Repentance begins.
I’m going to share with you a recipe for some ridiculously healthy cookie-type things. Despite their minimalist, uber-healthy ingredients, they’re pretty tasty, being nutty and somewhat sweet, even though they contain no added sugar. I’m not going to lie and say these will replace brownies in my heart, but they’re a solid, guilt-free snack. And anyway, they’re the closest I’m going to get to dessert for a while.
The recipe comes from the book, From the Wood-Fired Oven by Richard Miscovich, where the recipe is used as an example of what you can cook in a bread oven which has almost cooled off, because these bake at very low temps. Actually, they’d be good candidates for a solar oven. Or even dashboard cooking in the summer!
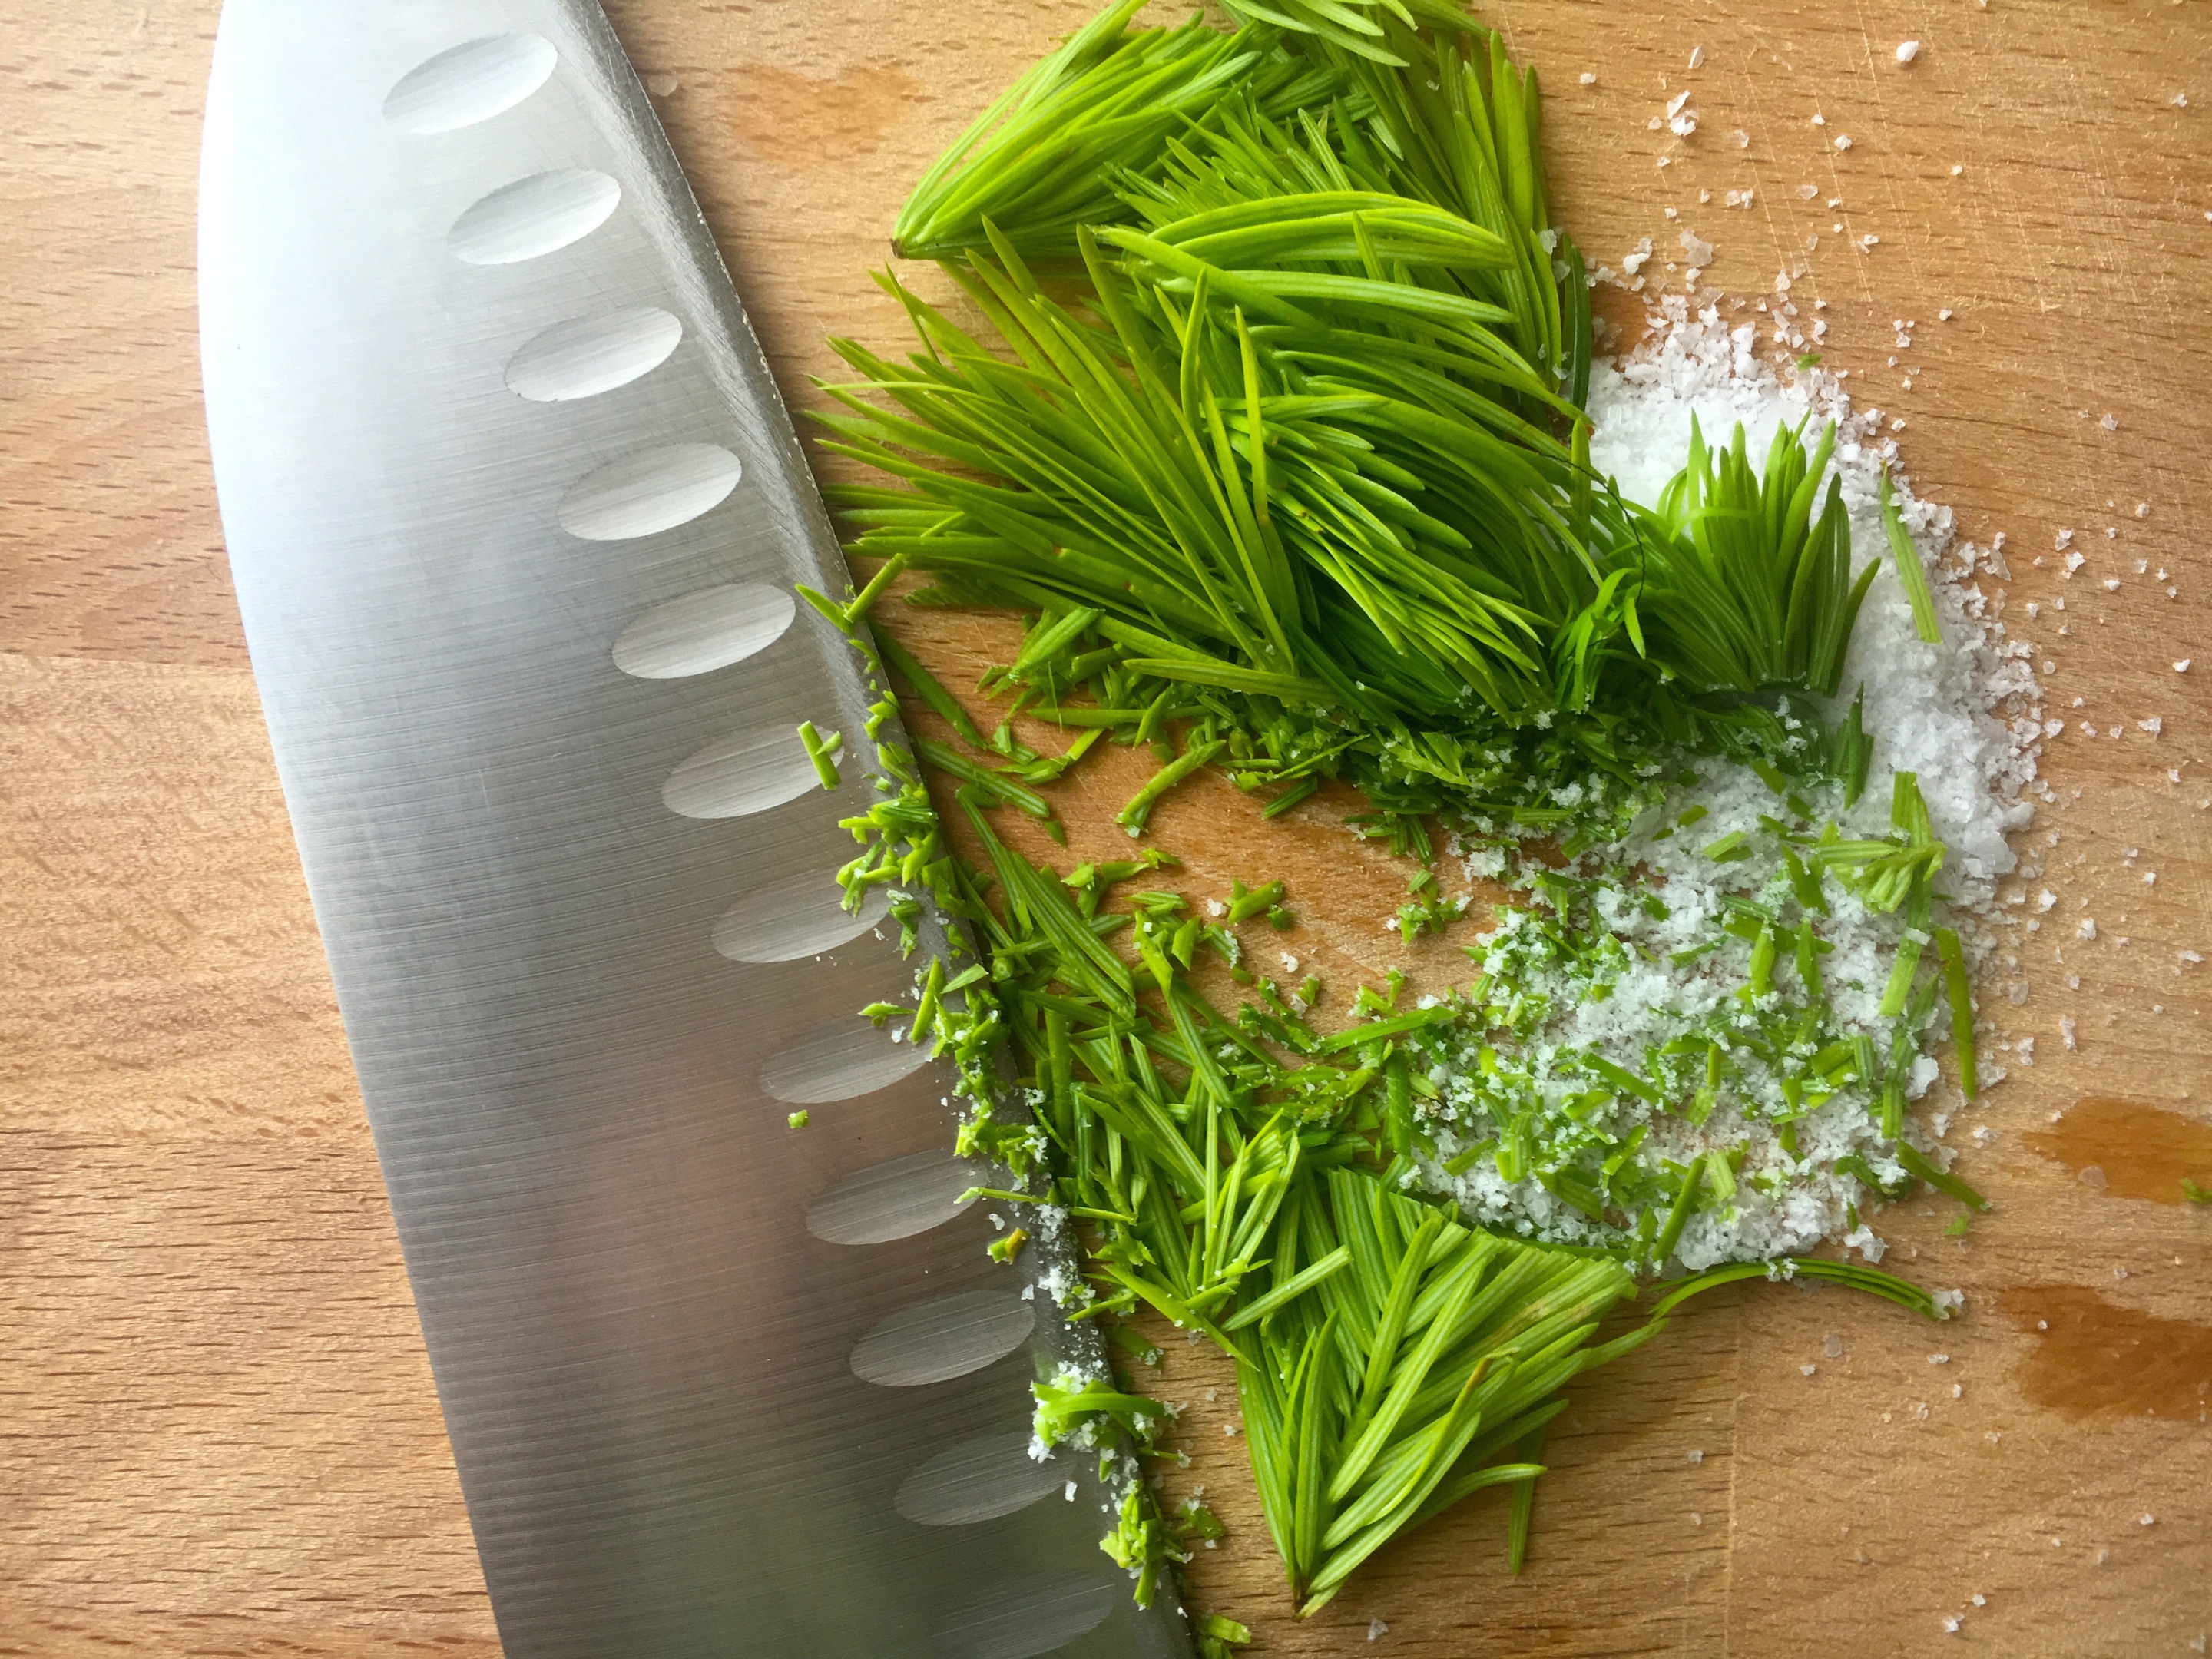
There are four ingredients: sprouted wheat, raw almonds, dried fruit and a pinch of salt. There’s simply no room for sin.
Sprouted Wheat Bars
Makes a small batch, a good size for evaluation. Double it if you feel bold
Pictures below!
Ingredients:
Sprouted Wheat Berries*: 225 g/2 cups (I’m sure this can be subbed for other sprouted grains, but I haven’t tried, and yes, I’ve put sprouting instructions at bottom of post)
Raisins (or other dried fruit): 75 g/1 cup
Whole raw almonds (or other nut): 75 g / 3/4 cup
Salt: 1 g/generous pinch
Tools:
- Some kind of device which can grind all this stuff up into a mush: a crank grinder or a food processor or a coarse metate and lots of patience or… ???
- Cookie sheet
- Baking parchment (helpful)
- Rolling pin (optional)
• Preheat your oven to 200 degrees Fahrenheit.
Mix together all ingredients and grind them up somehow. I used our wonky, cheap Chinese food grinder and sweated and cursed my way through the whole process (but heck, I was burning calories!). You could also use a food processor, though Miscovich notes that food processors tend to leave irregular chunks of fruit and nut behind. All things considered, I would be okay with that.
[UPDATE 1/12: I just made this recipe again, this time using the food processor instead of the grinder. This resulted in cookies studded with tiny, hard pieces of almond. They’re edible, but a little strange. I processed the batter as much as I could–it is very thick and tends to clog up and strain the motor of the processor. If I were to attempt this again with the food processor, I might try putting the almonds in first, with just a smidge of water, and processing them until they were as smooth as they could be, and then adding the wheat and raisins. Or maybe I’ll stick with the grinder and the upper body workout.]
You should end up with a small pile of rough, sticky, wet dough. Sorta like thick oatmeal. I didn’t substitute any ingredients and measured by weight and it turned out perfectly with no adjustments and no liquid. But use your judgement, and if it seems too dry to hold together, add a bit of water.
Because the dough is so wet and sticky, it’s easiest to handle if you use parchment paper. Put down one sheet of paper, turn the dough onto it, then top the dough with another piece of paper. Use a rolling pin on top of the paper to roll the dough out into an rough rectangle measuring about 7 x 9 inches. The dough itself will be about 3/8 of inch thick.
If you don’t have parchment or a rolling pin, you can surely pat the dough flat on the pan with wet hands. I would recommend flattening the dough on the baking sheet, because it’s hard to move it.
If you used the parchment paper, just transfer the rolled-out dough on its piece of parchment paper onto the cookie sheet.
If you want, you can score the rectangle into squares or bars at this point. I think it would be fine to wait until they’re baked, too. They don’t change shape much (if at all) in the oven.
Pop the sheet into a preheat low oven (200 degrees) and bake for about 2 hours. Keep an eye on them in the last hour. They should not get so dry that they turn hard and crumbly. Mine were done in 1 hour and 45 minutes, and my oven runs cool. When done they will have a little color and will hold together, but will be soft to the bite.
These need to be wrapped up and stored in the fridge.

The ingredients. It looks like Heidi’s breakfast.

The grind

The dough

Rolling out with parchment

Just out of the oven
*Bonus: How to Sprout Grains

Start by measuring your grain into a bowl and giving it a good bath with lots of cold water. Skim off any floating chafe. Drain.
Cover the clean grain with lots of fresh water and let it sit for a good spell. I’ve heard recommended times ranging from 6 hours to 24 hours. Basically, let your schedule determine the soak time. Overnight. From breakfast til evening. Whatever.
After the soak, pour of the water and give the grain a rinse. Then let it sit around at room temperature. Give it a rinse every morning and every night until it sprouts. Toss it around a bit so it aerates. Wheat will sprout in 24- 36 hours, depending on temperatures.
I should pause here to point out that since this all happens at room temperature, you want to be careful about cleanliness. Keep your hands and tools and containers very clean.
Don’t let the sprouts get too long (i.e. too old) when making this recipe, because you want the wheat berries to be sweet and firm–not all spent out–or turned to grass! When the roots are about as long as the berries themselves, move them to the fridge and use within a couple of days.
As far as sprouting equipment goes, you’ve got options. Lots of people use a special sprout kit –which is often a canning jar with mesh lid. Others do everything in a colander which they leave on the counter. You could also use a bowl–just make sure the grain is well drained so it’s not sitting in water. In that case you’d just have to use a strainer when you rinsed it. To keep debris and who-knows-what out of the grain, I’d stretch some clean cheesecloth over any bowl or strainer I used.


This looks somewhat like Essene Crackers from Nourishing Traditions. Have you tried those? How does it compare? Also, thank you for the idea of sprouting using only a colander. We’ve created lots of mold before using the mason jar method. We have a salad spinner that might work perfectly as a sprouting dish.
Unfortunately, I don’t know those crackers, so I can’t say. I just googled them, and I’m not sure if I found the right recipe, but the concept of using just sprouted wheat and no flour may be the same. The cookies I’m talking about, though, are sweetened by fruit and baked in a low oven instead of dehydrated.
Glad the colander idea may help you! I guess its just a matter of finding out what works best for you, your climate and your kitchen.
I always find your information to be easy to understand. Thanks for adding the pictures. I am glad you mentioned how long to sprout as I am sure I would have over sprouted and thus only had green for the kitties. These sound really delicious and I am anxious to give them a try! Thanks!
Pingback: Stern Sprouted Wheat Vegan Cookie or Health Bar Type Things
I have made a version of these using nuts and dried fruits and then rolled in shredded coconut. No baking, which works great for me. Did not want to use the oven.
Will try it with sprouted beans….wheat is a problem for me. They do look delicious. Thanks.
I too am feeling the need for repentance after the holidays, and this looks like a tasty enough way to begin. Learning to sprout and cook with sprouted grains is on my New Year’s Resolutions list, so two birds with one stone here! My question is, do I measure the two cups of wheat berries before or after sprouting? Does the volume change a lot when they are soaked? Thanks.
Glad to help yo with your resolutions!
The volume does change– they get larger when they sprout. But unfortunately I can’t tell you exactly how much. I don’t think they quite double in size– perhaps something more like they increase by half. As in, one cup dry might yield 1 1/2 sprouted. Maybe??
What I did when I made mine was just use a generous amount, so I’d have leftovers. The leftovers I made into a salad by adding lots of chopped sturdy veggies, and it was amazingly good. The sprouted wheat has this nice, chewy texture. So you get the cookies and a hearty salad. Not bad.
I’ve been experimenting this week and am pretty happy with the results so I thought I’d share.
First attempt – I followed the above recipe, but substituted the almonds for walnuts which we have in abundance (and I guess are easier to blend than almonds)and forgot to add the salt. Not bad, but we thought they would be better with bigger bits of stuff in them.
I’ve since pasted sprouted wheat and walnuts and then added various combinations of chopped dried apricots, halved sultanas and dried coconut (+/- a spoon of brown sugar)and made them into cookie shapes.
They’ve been cooked at a highish temp. for 40 min, or for a couple of hours at a low temp. We’ve got a wood burning stove so I can’t be more specific, but each batch has been pretty good.
We are calling them happy-fun-time bars rather than hippy-health bars though – it’s all about presentation!
Thanks for the feedback!
I think walnuts would be great, and less crunchy than almonds, which might avoid the problem I noted in the update above. The original recipe talked about different possible fruit/nut combos, like pecans and dried cranberries, for instance, for a sort of holiday flair. Adding coconut is a great idea. I added some cinnamon last time around. They’re ripe for experimentation.
Happy Fun Time Bars is a good marketing gambit!