 |
| Illustration from The Fireless Cook Book |
Mrs. Homegrown here:
Jessica from Holland sent us a letter recently praising our work, but very, very gently scolding us not including the hay box, a groovy old energy saving technology, in our book. We do stand corrected! And her enthusiasm for hay boxes has reignited our interest, too.
We actually considered hay boxes for Making It, but didn’t end up building one for a variety of reasons, including just plain running out of time. But I have to admit one of the primary reasons was that natural gas here is really inexpensive, so the cost savings of starting and finishing a pot of soup on the stove, vs. starting a pot of soup on the stove and finishing it in a box, just wasn’t compelling enough for me to make a lifestyle change. This is a silly excuse–water is also inexpensive here, but I’m obsessed about saving that resource. I guess a lot of what we choose to do just comes down to our various quirks and passions.
I’m thankful to Jessica for reminding me of the hay box. I believe that my New Year’s resolution will be to meditate on the sources and real costs (in terms of the environment, human health, etc.) of gas and electricity, and work on new ways to conserve energy. The hay box, or fireless cooker, may be one of these strategies.
What the heck is a hay box?
Sorry if I’m leaving some of you out of the loop. A hay box aka fireless cooker is a very old fuel saving technology, which perhaps has its origins in Scandinavia. It is simply an insulated box that you put a hot pot of food into, and leave it all day (or all night) to finish cooking. It’s the forerunner of the crockpot.
This cooking technique isn’t limited to hay boxes. The same concept is used by people who put oats and boiling water into a Thermos at bedtime and enjoy the finished oatmeal in the morning, or by campers who wrap their sleeping bags around a cooking pot so they’ll have hot food when they get back to camp.
As far as I can tell, no one is selling fireless cookers made in the old style, but they are quite easily fabricated at home–or improvised in emergencies. However, if you are in a buying mood, a very similar technology exists in something called thermal cookware. These are essentially giant Thermoses–I’m including a link to a random example of one on Amazon here.
Why would you want to build a fireless cooker?
- To save time at the stove
- To have food ready when you get up, or come home from work
- To save energy, because you’re a do-gooder.
- To save energy, because energy is expensive/unreliable where you live.
- To learn this technology well so you’ll know how to use it in case of emergencies. (A fireless cooker combined with something that can boil water, like a camp stove or a rocket stove, would be a great combo for any emergency, long or short.)
Okay, so how do you build one?
It’s really simple. You’re just insulating a pot. There are many ways to do it, including simply bundling the pot up in a bunch of quilts. But if you’re going to do this regularly, you probably want a more stable system than that. You’ll want to build a box.
First, though, you should probably start with your pot and build from there. This technique works best when the pot is full, so you’ll want to choose a soup pot/dutch oven sort of pot that is the right size for you and your family. It should have a lid, obviously, and should be made of something can come and go off the stove top–i.e. no ceramic.
Once you’ve chosen your pot, you’ll need a box to keep it in. This box should allow enough space for at least 4″ of insulation all around your pot. (We’ll talk about the insulation next.) So the pot height/pot width plus at least 8″= the minimum dimensions of your box.
The cooker could be anything sturdy with a lid, but the tighter built, the better. A big cooler would work great. I’ve just had a crazy inspiration that one of those newfangled ottomans that are hollow inside for stashing away your junk when company comes would also work nicely!
You can make a “two holer” if you want to have the ability to cook more than one dish at a time. In that case you might be able to build one in a hall bench or a big toy chest or trunk. If you can’t scavenge anything, you could build a wooden box with a hinged lid. A well-insulated, box-style solar oven can do double duty as a fireless cooker, too. Whatever you choose, the box should have a lid that either latches or can be weighed down so it closes securely.
If your box is not built pretty much airtight–say it’s pieced together out of wood–you should seal it up before you insulate it. In old manuals they recommend gluing a layer of paper all over the interior. You might choose to use tin foil or a Mylar space blanket. A space blanket would help reflect heat no matter what your box is made of.
Then you need to choose an insulating material.
Early 20th century options, as per old books:
- Hay or straw, cut fine
- Sawdust
- Wool (they mention this is the best material)
- Southern moss
- Ground cork (it seems fruit used to be shipped in this!)
- Softwood shavings (“excelsior”)
Contemporary recycled options:
- Styrofoam or foam. Carving a pot-shaped hole into a block that fit your chest would be the best, but scraps could work, too.
- Shredded paper. At last, something to do with all those bills!
- Cotton or polyester batting taken from old pillows or quilts.
- Wool in the form of cast off sweaters and blankets, perhaps shredded?
- This might sound nuts, but if you cut down a bunch of weeds, let them dry and chop them up, they would work as well as hay. Straw has that nice hollow stem construction which probably holds heat better than hay, but some weeds have the same sort of stems.
- Note: I’d discourage using fiberglass insulation for safety reasons. It’s nasty to work with and you don’t want to risk any of it getting in your food.
Fill the box up all the way with insulation. The box should be filled to the top, but the material shouldn’t be packed so tightly that there’s no airspace. Tiny air pockets are where the magic happens.
Next, make a permanent nest for your pot in the box by hollowing out a pot-shaped hole in the insulation material. Line that hole, as well as the top surface of the insulation, with a one big piece of fabric. Secure that fabric to around the edges of the box with staples or something. That will allow you to lift the pot in and out easily and will also keep bits of insulation out of your food.
The final insulation step is to make or find a cushion sized to fill all the empty space in the box from the top of your pot to the closed lid. It should be fat enough that you have to use a little pressure to close the lid. There should be no open space at the top of the box. And again, the lid must latch or otherwise secure tightly. In the image at the top you can see the two cushions that come with that set up.
It’s often easier to understand something just by looking at pictures. If you do an image search for hay box, you’ll see lots of them, many improvised quickly. Whereas searching fireless cooker brings up more antique images.
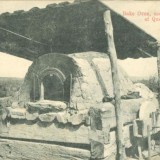
 |
| A fireless cooker from a 19th century German catalog, image courtesy Wikimedia. |
Cooking with the Hay Box
Okay, this is all very theoretical for me because I haven’t done it yet, but this is what I know, and I hope those with experience will comment to help us newbies out.
The cooker is perfect for anything you’d associate with a crockpot, like pot roasts and other stewed meats, soups and stews and chile, bean dishes and also hot cereals, polenta, whole grains and rice.
First, it’s pretty much impossible to offer up exact cooking times. It’s going to vary by both quantity of food and the construction of your box. In short, you’re going to have to play with it.
But the gist of it is that you start your cooking on the stove. If, for instance, you’re doing an initial saute, you’d do that first, then you’d add all your ingredients and liquids and bring it up to a simmer (for how long may vary by recipe–the old cook book I’m consulting most often recommends 10 minutes boiling on the stove for meaty dishes, but if I suspect for non-meat things you could just bring it to a boil and then take it off immediately) then move it to the box to finish cooking. A good box should hold heat for 8 hours. The actual cook time will be less–how much less will vary by dish. But it will not burn or overcook and it will keep warm until you’re ready to eat.
I’ve heard that in general you would use less water than with stove top cooking because there’s no evaporation.
Here’s some of Jessica’s tips:
Suggestion: put the beans/lentils/wheat/rice/peas in a thermos flask together with the absorbable amount of boiling water/stock. Do this in the morning. In the evening you have a thermos with still warm and well-cooked food. With just a few seconds of boiling water. Think of the hours per month that you can turn off the stove and still have warm, cooked food!
…
It works fine with other things as well:
Eggs: put pan with eggs and boiling water in, take out of hay chest after 10 minutes (or more, or less, depending on your experience.
Vegetables: take out of hay chest after 110 to 125% of ordinary cooking time. Experiment! Don’t use a lot of water.
Stock… why not?
It even works with things like meat balls and chicken wings. Have the meat on high fire until the outside develops the right crust or color, then keep in hay chest for xx time until inside is ‘done’,
Mr. Google can lead you to various resources on this technology, but my favorite resource so far is this old book: The Fireless Cook Book by Margaret Mitchell (1909), which is actually both a construction manual and a cookbook–a wonderful crusty old cookbook with recipes for things like Mock Turtle Soup. You can read it online at Archive.org, or download a pdf or even as an e-reader file–for free!
An obligatory nanny-state warning: If food drops below 140F (60C) for an hour or more, bad bacteria can move in. You might want to take the temperature of your food when you pull it out of the box and see where it is. If it has dropped below that temperature, put it on the stove and rewarm it to at least 165F(74C).

Another reason you probably weren’t driven to explore the hay box technology: solar cookers do basically the same kind of cooking and solar is so very available here in So Calif.
I have experimented with the hay box idea. My simplest one was a large laundry basket and tons of towels and old wool throws. My most complex one was a double lined sewn bag (Hay Bag) with “city straw” (shredded junk mail) stuffing the gap between the two bags.
Different types of cookers cook food different ways. We know this from the fossil cooking world: roasting (gas oven) yields different cuisine results than stir frying (stovetop) than barbeque (open fire) than bamboo steamer or crock pot.
So let’s compare the powerdown cooking world to the fossil one as far as cuisine results:
A solar cooker, for the most part, yields results like the crock pot. It cooks using trapped heat and steam, long slow cooking, and the resulting dish is typically rather watery (think: stew, with juices). The cook has to go to great ends to not have the steamy wetness.
A haybox is very similar to that: cooking with trapped heat and steam, long slow cooking, and the resulting dish is typically rather watery. Because these two are so close in cuisine result, I found I was turning to the solar cooker rather than the hay box. I did use the hay box in attempts to “hold” heat into a dish for that period after the sun went down but my family wasn’t ready to eat dinner. In that function the hay box did “okay” (maybe 2 out of 5 star rating). It kept things warm but not hot, certainly not the way we have become accustomed with fossil cooking.
The original idea of a hay box was purportedly “to conserve fuel.” If one was cooking over an open fire and was simultaneously heating the house (think: colonial times), I don’t understand this assertion of saving fuel — you’d still have a fire going to keep the room warm. Perhaps it was good in summer when you wanted to cook food but allow the room to cool off? Perhaps it was good when you needed the space on the fire for another pot — the “double burner” concept? Perhaps it was good when you needed to leave to go to the fields to work and couldn’t tend the fire, or needed to transport a half-cooked dish with you? (from what I have read, I think it was mostly used for the last one)
It must have a spot in our new arsenal of cooking techniques for a powerdown future. But as a very experimental home chef who has tried a lot of things, I have yet to discover what that spot would be.
the haybox is also good to cook meat braised and then set the skillet or cookingpot in the haybox. my grandma used to make diner late in the evening and place it in the haybox. at lunchtime the next day there was a hot meal for the people working in the field. no fuel wasted and hands free for other chores.
to add to my prior comment:
It did occur to me that the hay box might handle long-slow cooking after the pot of food had been brought up to temperature by a low-fuel-consumption rocket stove. But I haven’t tried this one yet because I haven’t yet built a rocket stove.
@Joanne: Thanks so much for the feedback on your experience!
Yes, I did think about the relationship between this and solar cooking–and we do like to use our solar oven, so it did seem a bit redundant. Of course this also works in the gaps where solar does not. They could be complimentary technologies, if we could figure out the rhythm of using them.
And yes–it would pair well with a rocket stove. The thing about the rocket stove is that it requires a lot of attention–constant feeding of little sticks–which makes me reluctant to do much more with it than boil water or cook eggs. If I had to do all my cooking on it, I’d be get cranky, mighty quick. 😉 A hay box, in that case, would be a godsend.
I hope other people will chime in with their feedback, esp. concerning the watery food factor, which I understand can be a problem.
Thanks! This will be great for me, since we will be using propane tanks to cook everything when we move and our 220 outlet will barely handle a crockpot. Yay energy conservation!
It seems that a thickening agent would work for the watery state. Or, the liquid could be used to make gravy or a liquid to cook something else, sort of like a broth. One day I made spaghetti that was too thin for my taste. I took oats I had ground to flour in my coffeebean grinder, stirred it in, and the spaghetti was thicker and more nutritious. Other thickening options could work. I have never used the cooking method you describe.
I have used a modern ‘hay box’ with styrofoam insulation to keep fully cooked chili hot so we could eat something after an afternoon of skiing. We were pretty remote and very cold so wanted hot food to replace all the energy we had used up. Food stayed hot for 4 hours in an unheated cabin at -25°C. Bigger pots in bigger boxes work much better.
I don’t know how much cooking would take place but excellent for keeping food nice and warm.
I use my solar oven as a fireless cooker. because its an insulated box its perfect for this style of cooking when the sun isn’t shinning. I place an old wool blanket in the oven, place in the pot and wrap it on the blanket and close the lid. I like this style of cooking for beans. I’ve heard a styrofoam bean bag is used in south Africa in this way.
We just watched an episode of The Victorian Kitchen (love late 80s BBC) where hay boxes were described as being used primarily for days out on the hunt — food would be made up in the morning, and then go out in the boxes with the group as a sort of hot picnic ready in time for lunch. Less to conserve fuel, more to make hot food more portable.
I know the hay box from guiding days. My mum was a guide leader and put a chicken casserole in the hay box in the morning, we would go out for the day and come back starving hungry grateful for a lovely cooked dinner waiting for us.
I remember your post about the rocket stove! Man I feel old now 🙂
@1916: Blogs grow up so fast, don’t they? 😉
I use an old cooler to incubate my yogurt since my home is quite cold in the winter (down to the 50s at night). This is essentially a hay-box. I fill a pot with boiling hot water, put it in the cooler, nestle my inoculated quart jars of warmed milk around the pot of hot water, and tuck towels in around the empty spaces. Temps inside the cooler stay above 90degrees most of the evening, and I have yogurt when I wake up!
Checking the internal temperature of food is easy with a remote thermometer and probe. Put into the center of the food and run the wire outside the box.
I love my haybox for cooking dried beans. I soak as usual, then boil for 10 min. and pop into the box. So easy, and no danger of boiling over. My super-easy box is a cooler. I covered a cork hot mat with foil and put it in the bottom. I also attached sheets of aluminum foil to the near sides on either side of the mat. I have rolled up bath towels and one big folded beach towel handy. I set the hot pot on the mat, fill the spaces with bath towels, and cover the top with a thick, fleece-filled pot holder and lay the beach towel over all. Close the cooler and latch to seal it. No failures yet! This is a good way to use old ratty towels.
Along these lines is an idea I picked up years ago for something referred to as “Blanketing the rice.” (I could have sworn it was in the More with Less Cookbook, but I can’t find the reference now!) Basically, you bring rice and water to a boil, then wrap the pot in blankets and let it sit and continue to cook for about 3 hours. It’s worked well for me. A hay box cooker sounds like a step-up and a great idea that I want to try.
I’m sorry to be late here. I made my haybox out of a large wicker basket and extra pillows. I’ve experimented with it some and find it most convenient when we can’t stay home all day. I plan on taking it on longer road trips if I can find time before leaving to get things prepared. I use it like a slow cooker at home. We rely on on a camper sized propane tank for cooking fuel and prefer to conserve what we have.
Thanks for a great post!
At Dancing Rabbit Ecovillage in Missouri we use solar cookers, hay boxes, and rocket stoves extensively.
On a sunny day in summer a solar cooker will do the trick for you. On a cloudy day and for most of the winter solar cooking isn’t sufficient for most of our needs and we don’t always have a stove going since our houses do not always require heating (passive solar, thermal mass, mild day, etc.)
We cook a lot of grains, beans and other foods by bringing them up to boil and then putting them in the hay box. This saves tremendously on fuel (wood, solar electric, or propane for us) and means never burning your rice.
We also make extensive use of pressure cookers which can save a lot of fuel as well. Sometimes we even haybox the pressure cooker which allows you to cut cooking time even further.
Our hayboxes range from cardboard boxes with rigid foam, to coolers, to old blankets. Doesn’t have to be too fancy to work.
I don’t know if this would work or not, not having built one yet, but, my thought is to use soapstone tiles to line the box on the sides and bottom. The reasoning behind this is that the soapstone retains and releases heat over a much longer period of time, much like a soapstone wood stove or bread oven. I’m not sure if insulation would, in this case, be needed. Even so, my thought is that the soapstone lined box will not only more effectively heat and cook the food, but also provide a small source of heat to a room. So far in my research on this subject, no one has thought of using soapstone which is a marvelous material for storing and releasing heat over a long time. I have also read that using weeds or straw is not that wonderful an idea because bugs in them can pop up and infest the house and indoor house plants.
Dear RootSimple, *so* wonderful to find your blog!
As I read every entry, I realize how similar the climates (and the urban realities) are between Los Angeles and my current home of Johannesburg. Loquats, prickly pear, water … I am loving your blog and will keep tuning in.
I use the “blanketing the rice” technique mentioned by 20MinuteJan every time I cook rice, but my technique is even lazier: bring the rice (or quinoa, or…) to a rolling boil. Turn off the flame (gas) and then pile dishtowels on top (usually ten).
I have a small child, so I don’t want to keep an eye on boiling stuff in the kitchen. I always add extra water (about 1 cup extra) to the pot. Then when the rice is soft, I strain it in a strainer and steam it for 30 seconds w a 1/4 cup of the same water in the same pot. Hope that’s clear.
Hi Shannon–indeed–we have many of the same plants and I’ve always wanted to visit South Africa.
Many thanks for the tip–will have to give it a try some time. And best wishes for a happy new year!
-Erik
I converted an old toy box from when my kids where small into a hot box (http://ecofootprintsa.blogspot.com/2012/04/earth-hour-meal.html).
Between my hotbox and my solar oven we are quite comfortably living off grid.
But in an urban situation, using either of these to save electricity there is nothing better 🙂
I have a vintage fireless cooker, plus some old cookbooks. The commercial cookers often had multiple wells (less portable for the field or hunt, but worked well for family cooking). One advantage of the fireless (or hay box) was that you could have hot breakfast and coffee waiting in the morning without having to stoke up the wood stove. They were used for other hot drinks as well, cooked cereals (which were supposed to be more digestible when cooked slowly at lower temperatures), soups and stews. With the addition of heated soapstones (or sometimes metal radiators), a fireless cooker could be used for roasting everything from beets to a whole stuffed chicken. I don’t have the soapstone disks for mine, and I’ve often wondered if this would work with a hay box, or if you’d be creating a fire risk. I suppose it depends on temperature.
I use my fireless all the time, but I’m in a cold grey climate, so don’t have the solar box option. Right now it holds a ginger beet soup and a garlic bean and kale soup. Both are probably done, but it will keep them warm until we’re hungry tonight. I also use it all the time to power-soak dry beans (heat and soak on retained heat). I’m going to try to get some stone disks made from a countertop shop that likely has extra sink cut-outs that could be trimmed to size. Maybe then I can try the chicken and report back!
Historically, hay boxes were the basis for the commercial fireless cookers. They didn’t totally die out, but rather got incorporated into stoves in the form of thermowells or deep wells (insulated wells with an electric or gas burner in the bottom that could generate the initial heat and then be turned off). Search pictures for the Chambers thermowell if you’d like to see, though other stove companies had similar options. I’m not sure why this didn’t continue, but I’m guessing the crock pot as we know it took over. I have a Chambers, and I also use the thermowell regularly. I’ve got a batch of maple baked beans in it now. I seriously love retained heat cooking.
Thank you for all this info, Greta. This is fantastic–and inspirational. I’ve not been playing with the hay box–probably because, as you say, we can do solar most of the year here. It’s great to hear from someone who knows the history, and is really making it work.
good wor keep it up
I live in Northern Ontario, and I’m in the process of making 2 haybox cookers. I was told that the original haybox cookers were made by packing damp hay in a wooden box around the pot, and when the hay dried, it retained the shape of the pot. The first one I made was made with wet cellulose packed into a plastic tote with the intended pot in the centre. It’s drying now. The one I will make today is with wet shredded paper packed around a pot in another plastic tote. I’m eager to try them both. It gets very hot here in the summer but cools down at night. My intent is to start supper in the cool hours and avoid heating the house in the heat of the day.
Mary
Very exciting! Please let us know how your boxes work out.
Just used a “hay box” for the first time. Wow!!!! Could not believe how easy it was and how much energy it saved. I live in Zimbabwe and was given one to try out this weekend. I am in the process of telling all my friends and getting the necessary stuff to get everyone I know one made. We do not actually use a box here. Basically the design my uncle made was like a big poof/bean bag filled with styrofoam (kaylite here) with another one made more in the shape of a pillow to seal the top. So whatever the shape of your pot you just nestle it down into the poof and it shapes around it. We have sever energy problems here so it is a god send!!!
Thank you so much for this report! And using a bean bag is a really smart idea. I bet all that styrofoam holds heat well, and it’s a great recycling trick.
Pingback: Aires de cambio Cocinar aprovechando el calor: haybox, wonderbox y wonderbag
hi, i love the idea of making a haybox the old way! i have a commercial one, from the uk, search on thermal cooker if you are interested in it. it is small, easy to store, and i love it for wholegrain rice porridge for the kids in winter. i make soup in it too, and frankly, i think it is a godsend.
Pingback: Sustainablog | Jeff McIntire-Strasburg has been blogging a greener world via sustainablog since 2003!
My wood Jewel fireless stove is for sale. We do not use ours. It has iron heating discs and racks for placing hot discs. Excellent condition. Asking $350.
Pingback: Scott Cooney Blog | Jeff McIntire-Strasburg has been blogging a greener world via sustainablog since 2003!
Pingback: Frugal Tools: 7 Ways a Cooler Can Help You Save | Frugal Upstate