
Mrs. Homegrown here:
Say you have one lavender plant, but you’d like to have more. Or your trusty sage plant is getting old and woody and needs to be pulled, but you wish you could save a bit of it and start fresh. One way to accomplish this is to grow new plants from cuttings taken from your existing plant. This is process called taking softwood cuttings. You cut small bits of plant, dip them in a rooting hormone, then baby the cuttings until they grow roots of their own. Basically, it’s cloning.
Herbs are particularly suited to this sort of propagation, since it’s better to have a fresh young herb plant than scraggy woody old herb plant, and this is a way to renew your herb plants. Also, it may be hard to collect seeds from your favorite herbs, particularly if you live somewhere cold.
It takes a good while for cuttings to root, so you don’t do this when you’re in a hurry to get plants in the ground. But if you plan it right, this is a cheap and satisfying way of propagating plants.
Erik and I are ripping up our back yard, basically taking it down to bare soil. I’m taking cuttings of many of the things I’m ripping out, so that I can replace them later. I decided to document the process for the edification of all ya’lls.
A note on timing:
If you live in a cold winter climate, this will be the wrong time of year to take cuttings–wait til spring. But in a warm winter climate this is the ideal time. We plant perennials in the winter, so that they can use the rains to get established before the long, dry summer.
You’ll need:
–Something nice and sharp to take cuttings with, ideally a grafting knife, but really any very sharp cutting implement. What you don’t want is to take cuttings with something so dull it crushes the stem. Think like a surgeon.
–A seedling tray or a bunch of little plastic containers filled with good potting soil.
(Note: Don’t use peat pots or egg cartons or anything similar. In general I don’t think they’re good vessels for starting plants, but in this case in particular it would be disastrous because they’d disintegrate in the constant moisture, and/or attract mold.)
–A bottle of rooting hormone powder (available at nurseries)
–A glass of water
–A small dish or tray
–A plastic bag or two, or a plastic lid for your tray, or some plastic bottles. See below
–Maybe a spray bottle full of water–for watering later
How to to do it:
This is your set up:
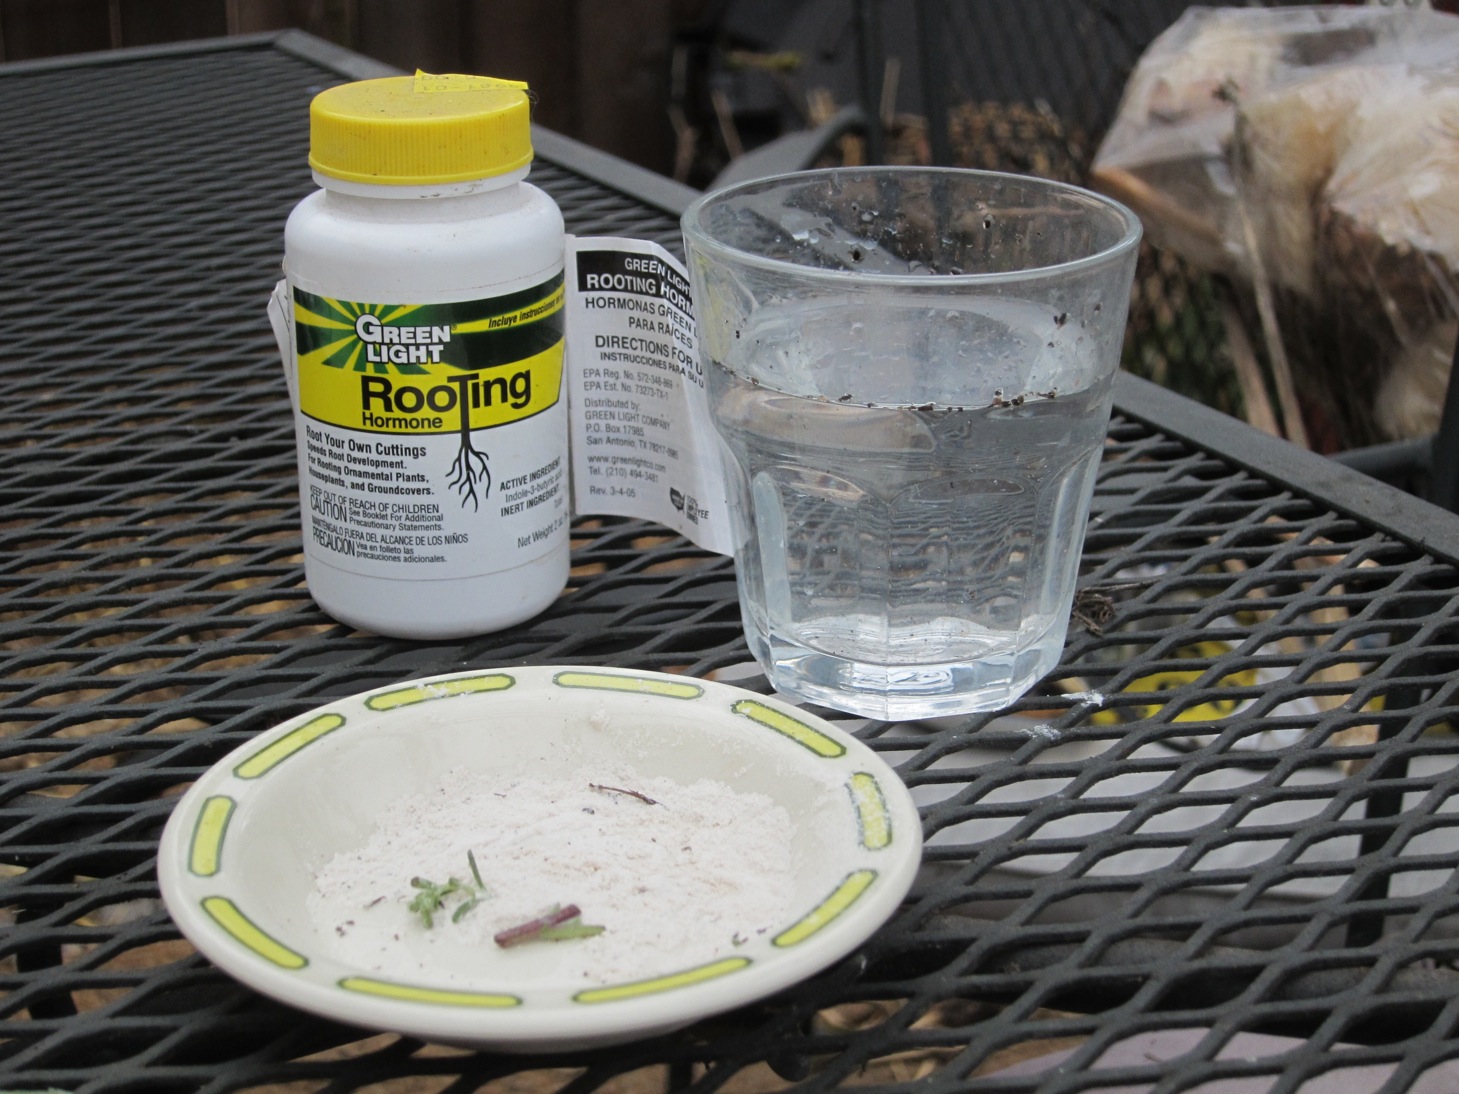
On your worktable you’ll want a glass of water and a dish or tray with a bit of the rooting hormone in it. You don’t need much. You dip in the tray instead of the rooting hormone bottle to keep the contents of the bottle clean and dry. One jar of rooting hormone will serve for hundreds of cuttings.
You’ll also want your seedling tray or plastic pots or whatever you’re using full of soil and ready to go before you start.
Take some cuttings and trim them down:
Go forth ye into the garden and pluck a branch of herb. When choosing a branch to propagate, look for the freshest, plumpest, prettiest sprigs you can find. The ones that seem to be flushed with life force, not ones that seem mature, or worse, in decline. The stems should be pliant, not woody. Look for tiny leaves sprouting at the tips. That’s always a good sign.
Here’s a nice bit of lavender that will be used for this demo:
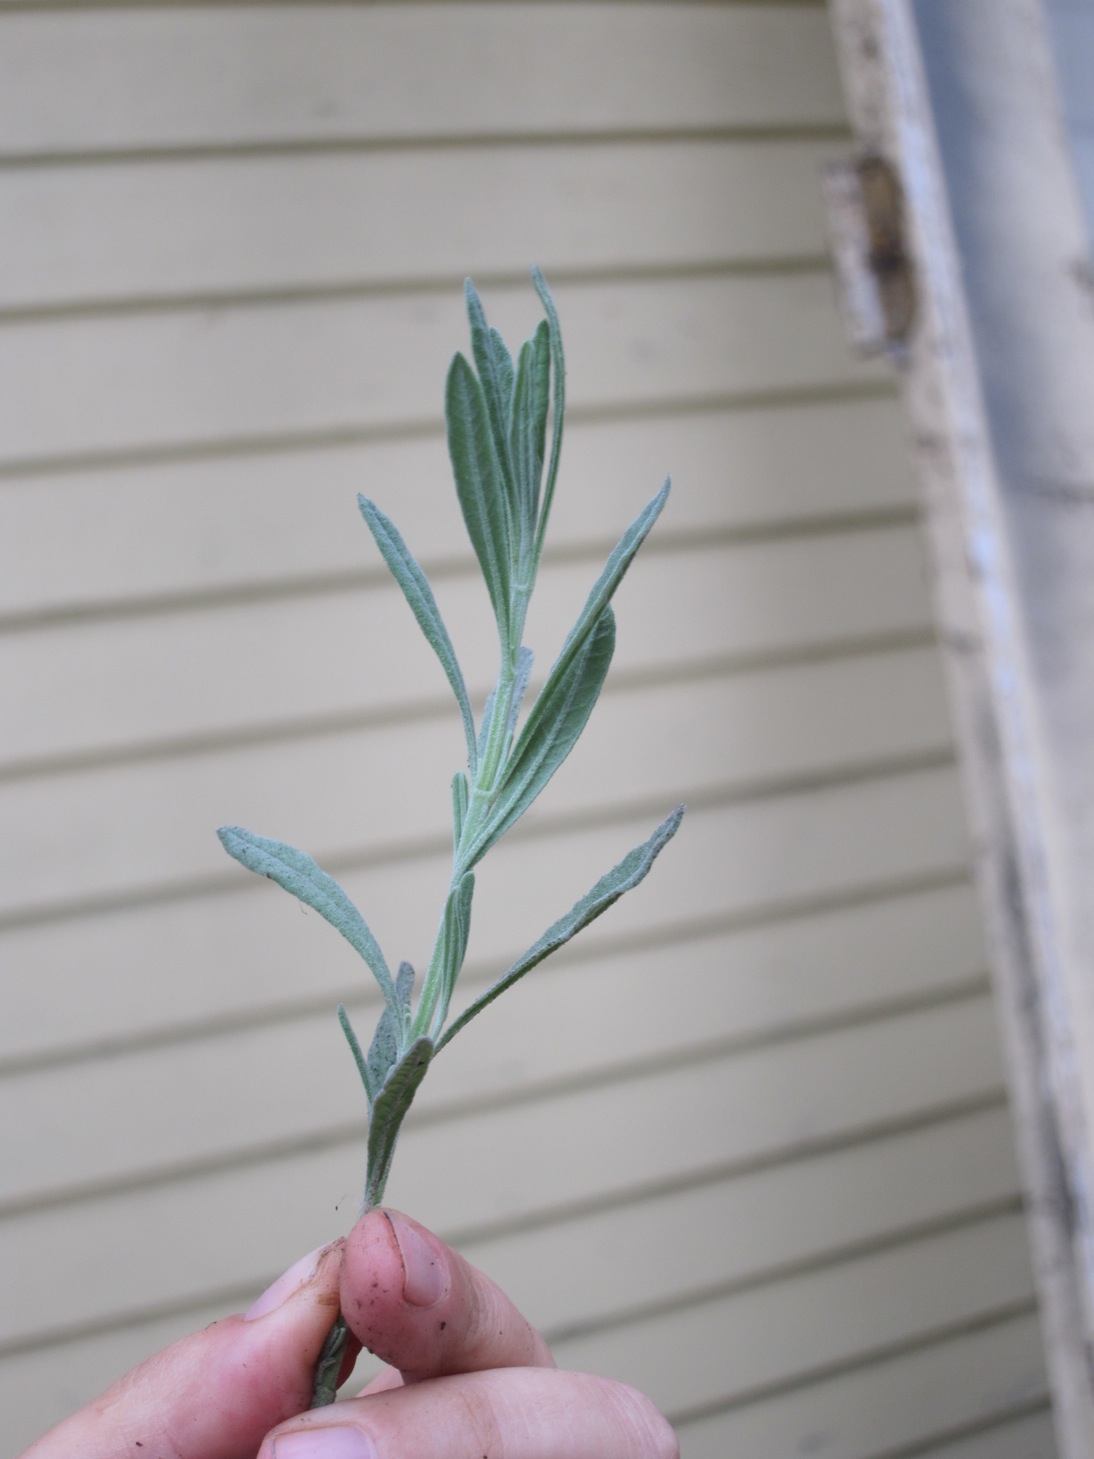
Next you’re going to strip your cutting down to just a little nubbin. You start by plucking off all but the very topmost leaves. Do this cleanly, try not to strip skin from the stem. The reason you do this is because leaves are a site of moisture loss during the rooting process. Excess leaves would die anyway, and too many will imperil the cutting. Pluck it down until there’s only a pair or two pairs at the top. Erik says I always leave too many. Consider what you see in the following photos a generous quantity.
The next photo is the same sprig stripped down. It’s not the clearest picture–I was having serious problems with the macro lens on the camera–but I hope if you look close at the bare stalk you can see the swelling in the stem in the places where the leaves used to emerge. These are called nodes. There are three in that picture. The first a little bump just beneath the leaves, the second a kind of busy node, midway down, and the third just above the bottom of the picture. Ignore that tiny stray leaf between nodes 2 and 3.
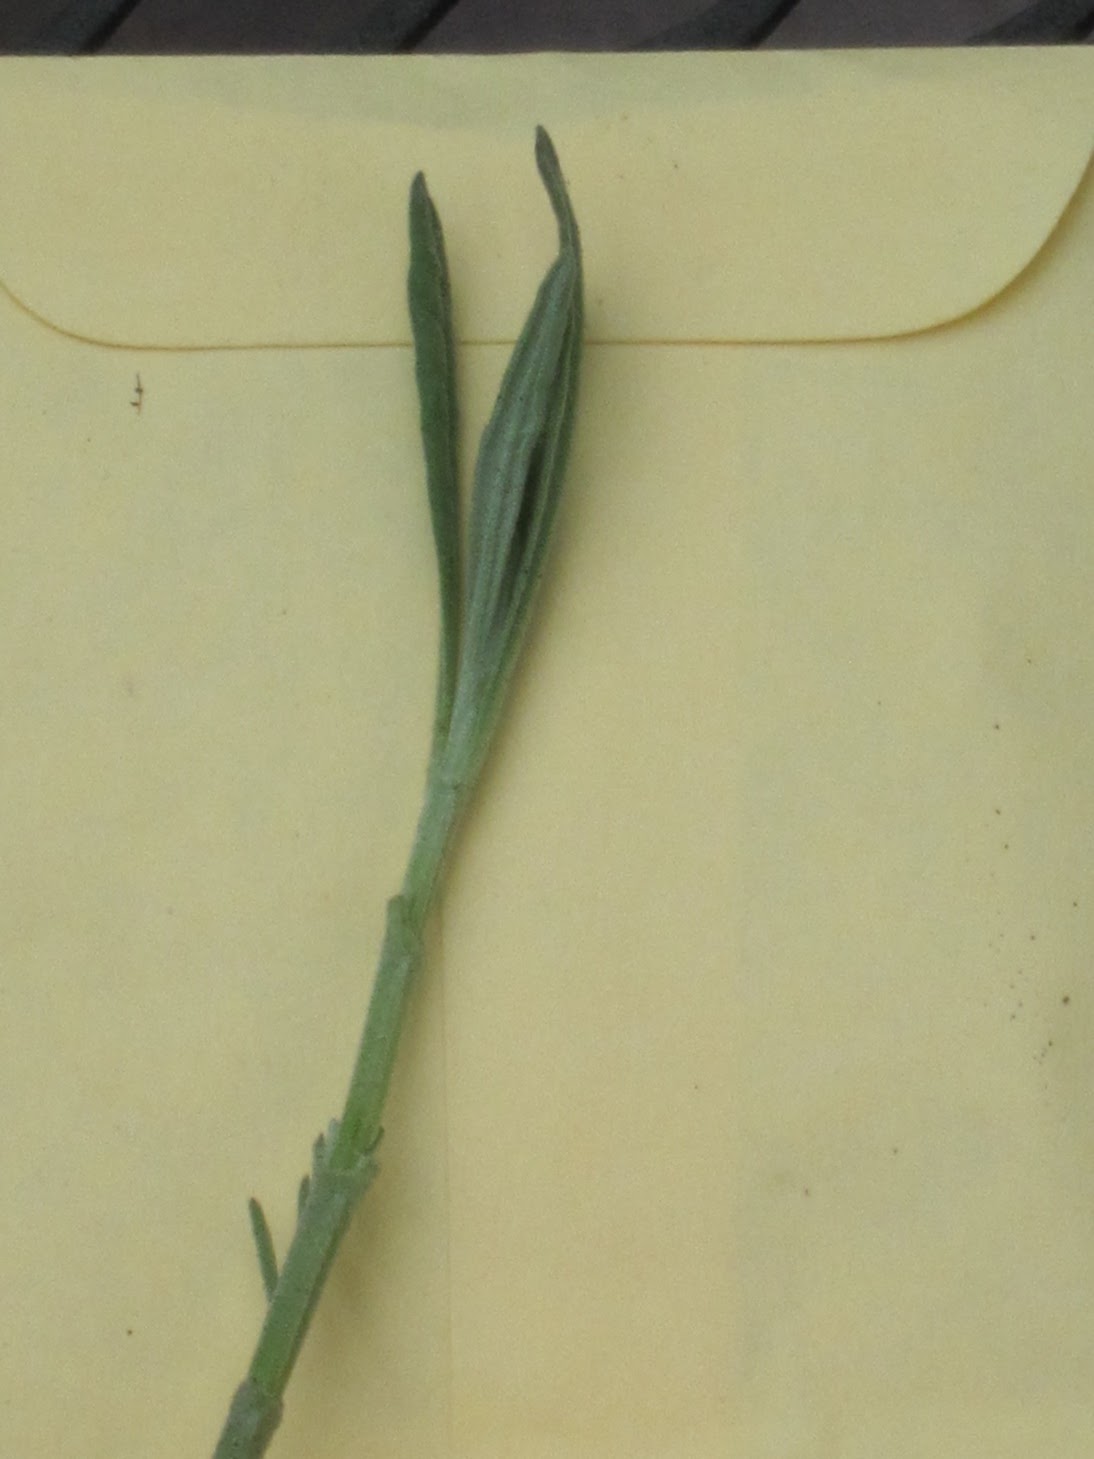
The next step is to make a cut at a node–make the cut just beneath the node, as cleanly as possible. Remember, you don’t want to crush the stem at all when you make the cut.
Which node you choose depends on what sort of herb you’re working with. It’s just a matter of common sense. The cutting will be planted in soil, so the stem needs to be long enough to bury–about an inch, more or less. The lavender cutting is large, relatively speaking, so in this case it was cut at the topmost node. But that day I was also rooting thyme cuttings. These were much smaller and more delicate, so I was cutting them three or four nodes down. I hope that makes sense.
Dip it, Dip it Good:
After you cut the stem, dip the cut end in the glass of water and then dip it in the rooting hormone. Dip only the tip of the stem–try not to get it on the leaves. So you end up with this:
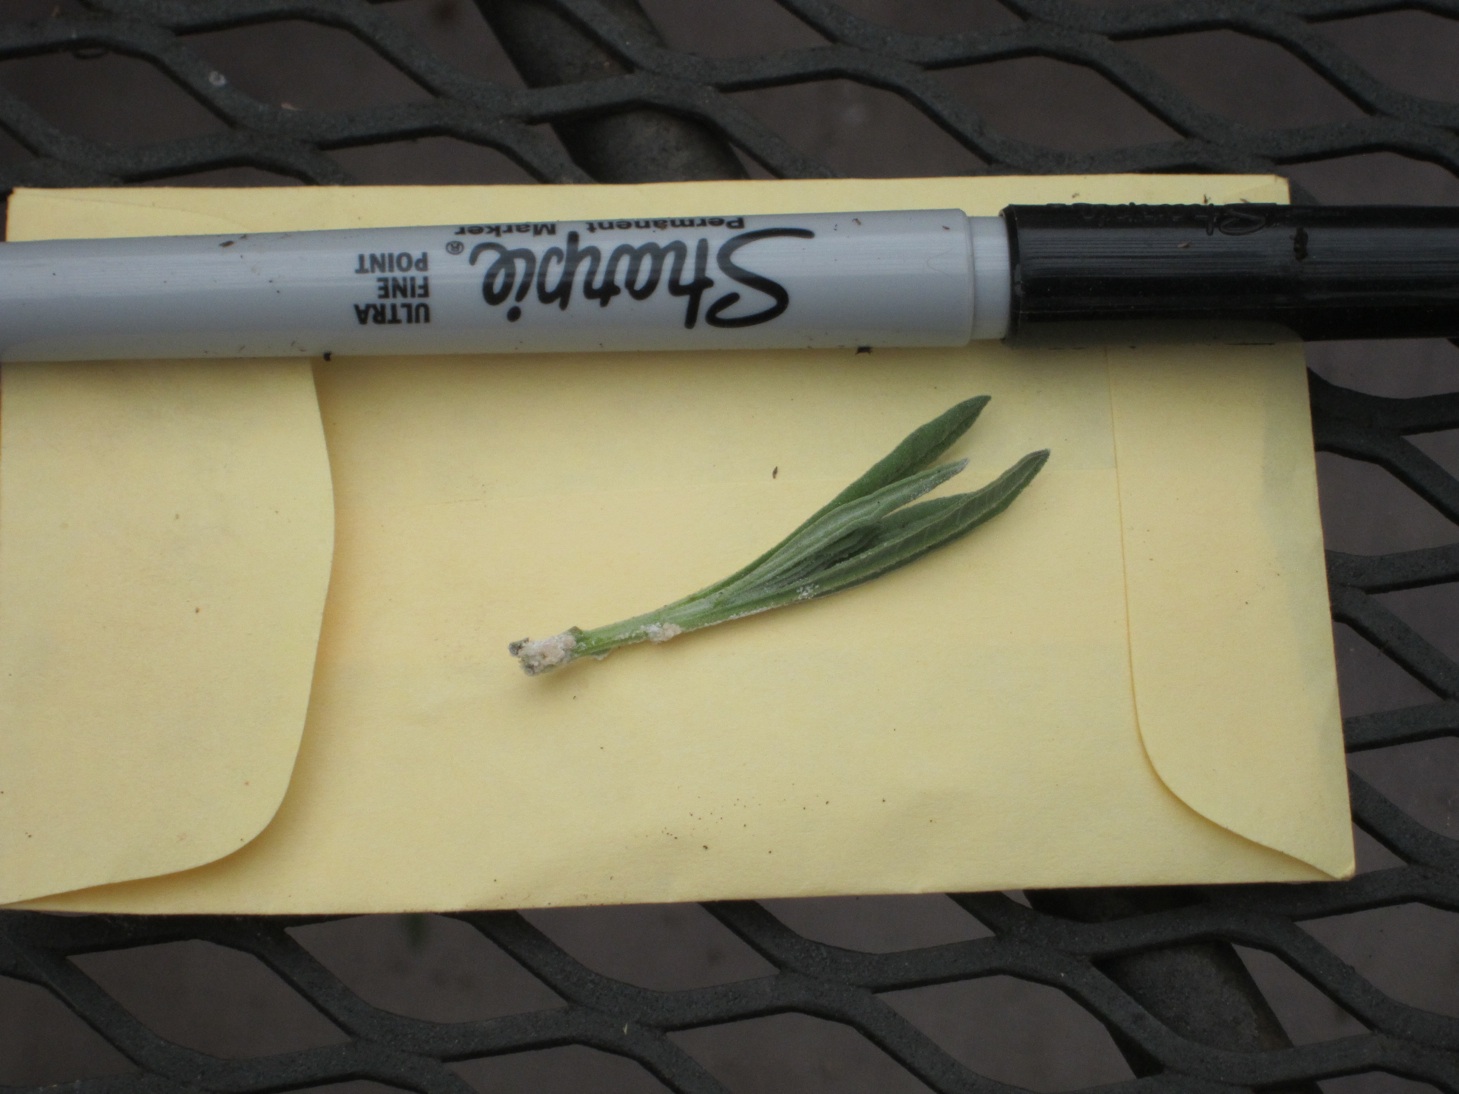
Okay, again, not the best pic. The crap on the end of the cutting is the hormone powder. The pen is for scale. I should have/could have removed another set of leaves from this cutting.
Plant the Cutting:
Next, make a hole in the soil with you fingertip, plant the cutting up to its leaves and gently pat down the soil around it. Here’s a portion of my tray, showing sage and thyme cuttings:
Now, here’s an important tip. Make lots and lots of cuttings of each plant you plan to propagate. Many more than you actually need because there is a high failure rate. Expect that a good number of them will wither up and die of various causes. I figure my failure rate will be 50%, so I make twice as many as I need.
Cover it in Plastic:
The cuttings are very delicate, so they need a moist, hothouse atmosphere. They must be completely covered in plastic. If your tray comes with a plastic lid, that’s great. If you don’t have one, put a plastic bag over your pot(s) or tray. It does not have to be clear. A regular plastic grocery bag or a white plastic bin liner is fine. Cut plastic bottles are good for pots, too.
If you’re using a bag, contrive a way to keep the plastic up, so it doesn’t lay on the cuttings. Prop it up with sticks or plastic utensils or arcs of wire. Encase the entire pot or tray in the bag, so no air gets in. If they have ventilation, there won’t be enough moisture inside.
Aftercare:
The cutting part is the easy part. The hard part is waiting, and keeping these babies alive. They must always be moist, but not boggy. The plastic should make keeping them moist easy, but they will need a bit of water now and then. You might find it easiest to water them with a spray bottle, because if you water with any force before they root, you might dislodge them.
Every couple days take the plastic bag off and turn it inside out, so that there’s not too much condensation collecting on the underside of the plastic and splattering on the cuttings. It’s a delicate balance between nicely moist and too wet.
If you see any fungus or mold–anything suspicious at all– on one of your cuttings, pull it out. You don’t want that spreading.
If the cuttings are outdoors, you also have to protect them from heat and sun. Remember, the plastic could make your tray into a solar oven. We’ve come home after a day of unexpected heat to find our cuttings steam cooked in their trays. Move them to a shady spot if the weather is expected to be warm and sunny. They like to be warm, but not too warm. The 65-70ºF zone is perfect.
You know your cuttings are succeeding when they put off new growth. They should be well rooted and ready for transplant in about 4 weeks.


