Prepper Cat

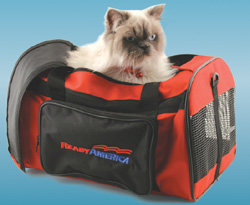
I predict we might just have a new internet meme here: please say hello to Prepper Cat. The image comes from an outfit selling a “Cat Evacuation Kit.” Prepper Cat looks crabby enough to be on an episode of Doomsday Preppers.

I think it’s a good idea to have a pet evacuation plan. But Prepper Cat looks like he might just be a feline mall ninja.

Thanks to John Zapf for the link.

How To Dry Food With the Sun

Drying Apricots in Southern California–early 20th century style.

Dehydration is one of my favorite food preservation techniques. Drying food concentrates flavor and is a traditional technique in our Mediterranean climate. Best of all, drying food is one of the best applications for low-tech solar power. In many places, you can simply set food out under cheesecloth to dry in the sun.

But there’s a catch to sun drying: humidity. Food dries best when temperatures are above 85º F and below 60% humidity. If you live in a desert, humidity isn’t a problem. But in most other places in North America it’s simply too moist to set food out under the sun. It will rot before it dries. In Los Angeles, due to the influence of the ocean, it’s slightly too humid most of the year for sun drying to work well.

But there’s an easy way to overcome humidity: convection, i.e. hot air rises. Most solar dehydrators take advantage of the passive movement of hot air to lower humidity enough to dry food. Here’s a couple of solar dehydrators that harness this simple principle to dry food without electricity:

Continue reading…

Doomsday Preppers: Exploitative, Uninteresting, Unreal “Reality”

Doomsday Preppers, a series on the National Geographic channel, is part of a cloud of meaningless cable drivel that envelopes our national psyche like the smog that hangs over Los Angeles. In many ways Doomsday Preppers is indistinguishable from countless other low rent reality TV shows. Does anyone really sit down and watch this endless parade of house flippers, dance moms and custom motorcycle enthusiasts? Or is it all a kind of background, tranquilizing, electronic wallpaper?

I bring up Doomsday Preppers because many of its subjects are engaged in precisely the types of activities we write about on this blog and in our books: growing food, keeping livestock, building solar ovens, preserving food etc. And I finally got a chance to see the first episode and a few segments from later shows.

Of the three “compounds” profiled in the first episode, the most interesting was the family of Dennis McClung in Mesa, Arizona and the Kobler and Hunt families, who share a rural homestead. McClung has built an amazing tilapia farm in an old swimming pool in their backyard. They also have chickens and goats and have integrated the livestock into the greenhouse/tilapia project. It would have been interesting to see how the system McClung created works as a whole. But the producers were more interested in filming the family putting on gas masks and making duck weed smoothies. The Kobler and Hunt families operate what seems like a pretty normal rural homestead. What is unusual is their social arrangement: two families living together. It would have been interesting to explore that relationship. Instead the producers gave us endless scenes of the family shooting AR-15s.

Memo to the National Geographic folks: the internet has been bringing educational video content into living rooms for many years now, showing us how to actually grow tilapia, keep goats, etc. McClung, in fact, has his own website, gardenpool.org, which shows all the things I wanted to see on the TV show. Doomsday Preppers, on the other hand, has no redeeming educational content.

Continue reading…

Disconnect to Reconnect: Ditching the “Flushie” for a Composting Toilet

Image from the Wikimedia Commons

We’re lucky to have another guest post by Nancy Klehm (see a nice interview with her on foraging here). Nancy visits us at the Root Simple compound at least once a year. What follows is an account of a plumbing misadventure she had on her last visit. 

To give you some context, ever since we’ve remodeled our bathroom and switched to a low-flow toilet we’ve had periodic backups. We think there is a low spot just within reach of our turlet snake. The toilet flushes OK most of the time, but at least once a week I’ve got to deploy that damn snake.

Here’s Nancy:

I don’t use a flushie often, I made the decision to ‘go dry’ years ago, adopting the bucket toilet + sawdust system as it pairs nicely with my composting obsession and food growing habit.

I stayed at Erik and Kelly’s back in February. Their low flush toilet and antique piping can’t seem to handle even the most modest bodily donation. Once a flushing attempt proves unsuccessful, and immediately following the ‘oh no…’ guilty grimace, a light-hearted blame game plays out and then according to homestead rules, Erik snakes the toilet. The closet augur is kept on the front porch (to greet visitors?). Erik augers for a few minutes, flushes successfully, marches the tool back outside to air out and we settle back into our routines relieved that our burdens are flowing into the larger mystery of pipes and their soupy contents to the municipal waste treatment plant miles away.

But with Erik and Kelly out of town on one of the weekends during my stay, the daily chores of feeding the kittens, letting out the single hen to roam the yard and snaking, if so needed, fell on me. And yes, the toilet clogged and no, I did not assume the blame. I am regular enough (2-3x/day) as are Erik and Kelly for the record [editor’s note: the editors demur from either acknowledging or disavowing the hypothetical frequency of their natural propensities.] to avoid creating such monsters and yet, the flushie needs snaking every day soon after the post-caffeine effect.

Continue reading…

Hay Boxes or Fireless Cookers

Illustration from The Fireless Cook Book

Mrs. Homegrown here:

Jessica from Holland sent us a letter recently praising our work, but very, very gently scolding us not including the hay box, a groovy old energy saving technology, in our book. We do stand corrected! And her enthusiasm for hay boxes has reignited our interest, too.

We actually considered hay boxes for Making It, but didn’t end up building one for a variety of reasons, including just plain running out of time. But I have to admit one of the primary reasons was that natural gas here is really inexpensive, so the cost savings of starting and finishing a pot of soup on the stove, vs. starting a pot of soup on the stove and finishing it in a box, just wasn’t compelling enough for me to make a lifestyle change. This is a silly excuse–water is also inexpensive here, but I’m obsessed about saving that resource. I guess a lot of what we choose to do just comes down to our various quirks and passions.

I’m thankful to Jessica for reminding me of the hay box. I believe that my New Year’s resolution will be to meditate on the sources and real costs (in terms of the environment, human health, etc.) of gas and electricity, and work on new ways to conserve energy. The hay box, or fireless cooker, may be one of these strategies.

What the heck is a hay box?

Sorry if I’m leaving some of you out of the loop. A hay box aka fireless cooker is a very old fuel saving technology, which perhaps has its origins in Scandinavia.  It is simply an insulated box that you put a hot pot of food into, and leave it all day (or all night) to finish cooking. It’s the forerunner of the crockpot.

This cooking technique isn’t limited to hay boxes. The same concept is used by people who put oats and boiling water into a Thermos at bedtime and enjoy the finished oatmeal in the morning, or by campers who wrap their sleeping bags around a cooking pot so they’ll have hot food when they get back to camp.

As far as I can tell, no one is selling fireless cookers made in the old style, but they are quite easily fabricated at home–or improvised in emergencies. However, if you are in a buying mood, a very similar technology exists in something called thermal cookware. These are essentially giant Thermoses–I’m including a link to a random example of one on Amazon here.

Why would you want to build a fireless cooker?

  • To save time at the stove
  • To have food ready when you get up, or come home from work
  • To save energy, because you’re a do-gooder.
  • To save energy, because energy is expensive/unreliable where you live.
  • To learn this technology well so you’ll know how to use it in case of emergencies. (A fireless cooker combined with something that can boil water, like a camp stove or a rocket stove, would be a great combo for any emergency, long or short.)

Okay, so how do you build one?

It’s really simple. You’re just insulating a pot. There are many ways to do it, including simply bundling the pot up in a bunch of quilts. But if you’re going to do this regularly, you probably want a more stable system than that. You’ll want to build a box.

First, though, you should probably start with your pot and build from there. This technique works best when the pot is full, so you’ll want to choose a soup pot/dutch oven sort of pot that is the right size for you and your family. It should have a lid, obviously, and should be made of something can come and go off the stove top–i.e. no ceramic.

 Once you’ve chosen your pot, you’ll need a box to keep it in. This box should allow enough space for at least 4″ of insulation all around your pot. (We’ll talk about the insulation next.) So the pot height/pot width plus at least 8″= the minimum dimensions of your box.

The cooker could be anything sturdy with a lid, but the tighter built, the better. A big cooler would work great. I’ve just had a crazy inspiration that one of those newfangled ottomans that are hollow inside for stashing away your junk when company comes would also work nicely!

You can make a “two holer” if you want to have the ability to cook more than one dish at a time. In that case you might be able to build one in a hall bench or a big toy chest or trunk. If you can’t scavenge anything, you could build a wooden box with a hinged lid. A well-insulated, box-style solar oven can do double duty as a fireless cooker, too. Whatever you choose, the box should have a lid that either latches or can be weighed down so it closes securely.

If your box is not built pretty much airtight–say it’s pieced together out of wood–you should seal it up before you insulate it. In old manuals they recommend gluing a layer of  paper all over the interior. You might choose to use tin foil or a Mylar space blanket. A space blanket would help reflect heat no matter what your box is made of.

Then you need to choose an insulating material.

Early 20th century options, as per old books:

  • Hay or straw, cut fine
  • Sawdust
  • Wool (they mention this is the best material)
  • Southern moss
  • Ground cork (it seems fruit used to be shipped in this!)
  • Softwood shavings (“excelsior”)

Contemporary recycled options:

  • Styrofoam or foam. Carving a pot-shaped hole into a block that fit your chest would be the best, but scraps could work, too.
  • Shredded paper. At last, something to do with all those bills!
  • Cotton or polyester batting taken from old pillows or quilts. 
  • Wool in the form of cast off sweaters and blankets, perhaps shredded?
  • This might sound nuts, but if you cut down a bunch of weeds, let them dry and chop them up, they would work as well as hay. Straw has that nice hollow stem construction which probably holds heat better than hay, but some weeds have the same sort of stems.
  • Note: I’d discourage using fiberglass insulation for safety reasons. It’s nasty to work with and you don’t want to risk any of it getting in your food.

    Fill the box up all the way with insulation. The box should be filled to the top, but the material shouldn’t be packed so tightly that there’s no airspace. Tiny air pockets are where the magic happens.

    Next, make a permanent nest for your pot in the box by hollowing out a pot-shaped hole in the insulation material. Line that hole, as well as the top surface of the insulation, with a one big piece of fabric. Secure that fabric to around the edges of the box with staples or something. That will allow you to lift the pot in and out easily and will also keep bits of insulation out of your food.

    The final insulation step is to make or find a cushion sized to fill all the empty space in the box from the top of your pot to the closed lid. It should be fat enough that you have to use a little pressure to close the lid. There should be no open space at the top of the box. And again, the lid must latch or otherwise secure tightly. In the image at the top you can see the two cushions that come with that set up.

    It’s often easier to understand something just by looking at pictures. If you do an image search for hay box, you’ll see lots of them, many improvised quickly. Whereas searching fireless cooker brings up more antique images.

    A fireless cooker from a 19th century German catalog, image courtesy Wikimedia.

    Cooking with the Hay Box

    Okay, this is all very theoretical for me because I haven’t done it yet, but this is what I know, and I hope those with experience will comment to help us newbies out.

    The cooker is perfect for anything you’d associate with a crockpot, like pot roasts and other stewed meats, soups and stews and chile, bean dishes and also hot cereals, polenta, whole grains and rice.

    First, it’s pretty much impossible to offer up exact cooking times. It’s going to vary by both quantity of food and the construction of your box. In short, you’re going to have to play with it.

    But the gist of it is that you start your cooking on the stove. If, for instance, you’re doing an initial saute, you’d do that first, then you’d add all your ingredients and liquids and bring it up to a simmer (for how long may vary by recipe–the old cook book I’m consulting most often recommends 10 minutes boiling on the stove for meaty dishes, but if I suspect for non-meat things you could just bring it to a boil and then take it off immediately) then move it to the box to finish cooking. A good box should hold heat for 8 hours. The actual cook time will be less–how much less will vary by dish. But it will not burn or overcook and it will keep warm until you’re ready to eat.

    I’ve heard that in general you would use less water than with stove top cooking because there’s no evaporation.
     
    Here’s some of Jessica’s tips:

    Suggestion: put the beans/lentils/wheat/rice/peas in a thermos flask together with the absorbable amount of boiling water/stock. Do this in the morning. In the evening you have a thermos with still warm and well-cooked food. With just a few seconds of boiling water. Think of the hours per month that you can turn off the stove and still have warm, cooked food!
     …

    It works fine with other things as well:
    Eggs: put pan with eggs and boiling water in, take out of hay chest after 10 minutes (or more, or less, depending on your experience.
    Vegetables: take out of hay chest after 110 to 125% of ordinary cooking time. Experiment! Don’t use a lot of water.
    Stock… why not?


    It even works with things like meat balls and chicken wings. Have the meat on high fire until the outside develops the right crust or color, then keep in hay chest for xx time until inside is ‘done’,

    Mr. Google can lead you to various resources on this technology, but my favorite resource so far is this old book: The Fireless Cook Book by Margaret Mitchell (1909), which is actually both a construction manual and a cookbook–a wonderful crusty old cookbook with recipes for things like Mock Turtle Soup. You can read it online at Archive.org, or download a pdf or even as an e-reader file–for free!

    Do you have any recipes, tips or techniques to share? Please do!

    An obligatory nanny-state warning: If food drops below 140F (60C) for an hour or more, bad bacteria can move in. You might want to take the temperature of your food when you pull it out of the box and see where it is. If it has dropped below that temperature, put it on the stove and rewarm it to at least 165F(74C).