Why You Should Have a Thermometer in Your Refrigerator/Freezer

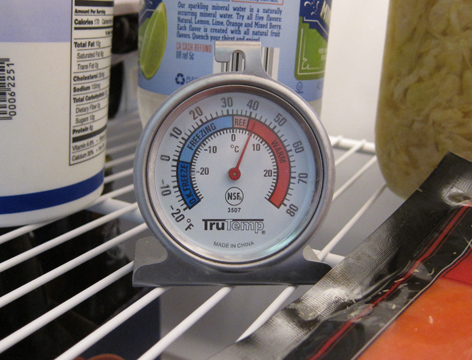
While I’m tempted to buy lots of kitchen gadgets (a male disease, I think), I know that to do so with a kitchen as small as ours is a foolish and costly pastime. One gadget that I picked up recently, however, has proven very useful: a refrigerator/freezer thermometer.

Freezers should be kept at 0ºF (-18ºC). At that temperature most frozen foods will keep for a year. The refrigerator should be below 40ºF (4.5ºC). (Source: Food Safety Advisor)

After picking up an inexpensive thermometer, I discovered that our old fridge/freezer was simply not keeping low enough temperatures. I made the mistake of replacing it with a used fridge, which also did not maintain low enough temperatures. Nor did the loaner fridge, provided to us by the shop that sold us the used fridge, keep low temps. Thankfully we were able to return those units and buy an inexpensive new fridge which works just fine. The moral here was that I should have listened to the advice of a friend of mine who owns a restaurant who told me that you should buy used stoves and new refrigeration. Stoves are easy to fix, but fridges, often times, are harder to keep running.

So why don’t fridges come with a built-in thermometer? How else can you know the temperature?

Four Ways to Preserve Prickly Pear Pads (Nopales)

For my final project in the Los Angeles Master Food Preserver Program I attempted to see how many ways I could preserve the abundant pads of the prickly pear cactus that grows in our front yard. Of course they are best fresh, but I like them so much that I wanted to see if I could preserve some for use later in the year. Incidentally, I prepare them fresh by first cutting them into strips and boiling them for five minutes to remove the mucilaginous texture. After boiling I pan fry them and serve them with eggs. It’s a meal that comes, except for the salt, entirely out of the yard. What follows are the methods I used to preserve those tasty pads.

Dehydrated
I removed the spines, cut the pads into 3/4 inch strips and boiled them for one minute. I then marinated them for ten minutes in soy sauce and dried them until brittle in an Excalibur dehydrator at 135º F for a couple of hours. Prepared this way they actually taste a bit like beef jerky. You definitely need to spice them–when dried plain they have a bit of a dirt note in terms of taste. Next year I plan on trying some more dried “nopalitos” with some different marinades.

Frozen
Once again, I removed the spines. cut them into strips and boiled them for one minute. I then packed them in to freezer bags. Freezing is the best method in terms of taste and nutrition. It’s easy and it works great.

Pickled
I used the this okra recipe from the National Center for Home Preservation for my pickled nopalitos. They turned out very tasty.

Pressure Canned
Prickly pear is sold canned both in water and with a small amount of vinegar.  Unfortunately there are no tested home canning recipes for pressure canned prickly pear pads (this needs to be rectified but is difficult in an era of reduced funding for Extension Services). I used a tested recipe for okra and consumed the product immediately as I don’t trust my own untested pressure canning recipes. The results were acceptable but not exciting–basically they tasted like canned vegetables and had a slightly mushy texture. If I had a tested recipe to work with, that used a small amount of vinegar, perhaps the processing time could be reduced, leading to a crisper result.

Lastly I should mention that I’ve dried and made jelly with the fruit in previous years. If you’ve got a favorite way to preserve the pads or fruit please leave a comment.

Remember to Label Those Jars!

“Label, label, label!” This was one of the most important lessons I learned in my Master Food Preserver training. You’ll note, from the jars above, that I’m not very good about this. When were those jars canned and what’s in them? I have no idea. They were probably the result of some late night canning frenzy two years ago. At the time I probably thought to myself, “I’ll label them in the morning.”

Not only should the jars be labeled, but it would also have been nice to have some notes on the recipe I used and where the fruit was sourced from. To this end I’ve started a preservation diary in a useful program called Evernote.

Perhaps I should get a tattoo on my forearm that says, “Label, label, label.”

Using Kosher Salt for Making Pickles

Naive me, I purchased a box of Morton’s kosher salt for a pickling project. I thought that kosher salt lacks the anti-caking agents that cause cloudy and sediment filled jars of pickles. No blue ribbon for me at the county fair:

Morton salt has anti-caking agents. But I can follow them on Facebook (why I would want to do that would be the topic of another post). Diamond Salt, on the other hand does not have anti-caking agents:

So, when pickling, be careful selecting your kosher salt–some contain anti-caking agents, others do not.

Another precaution when using kosher salt in food preservation projects comes from the University of Wisconsin Cooperative Extension’s guide to Homemade Pickles and Relishes (pdf):

Kosher pure flaked salt requires special care if used for pickling. Flaked salt weighs less per volume than canning and pickling salt, so you need about 50 percent more—11⁄2 cups of flaked salt equals about 1 cup of canning and pickling salt. If you use kosher salt for fermented pickles, you must weigh out the proper amount.Weigh out 73⁄4 ounces (220 grams) of flaked salt, and you will have the equivalent of 1 cup of canning and pickling salt.

This same publication also notes how easy it is to find pickling salt and how hard it is to find kosher salt. It’s just the opposite here in Los Angeles.

So what kind of salt do you use for pickling and fermenting? What’s the easiest to find where you live?

See the University of Wisconsin’s other tested food preservation recipes here.

Loquat Leather Recipe

Our neighborhood is full of loquat (Eriobotrya japonica) trees. For years I’ve been trying to figure out a way to use them. Loquats, a warm climate relative of the apple tree, produce tons of fruit all at once that do not keep well fresh. Thus the need to preserve the fruit. Unfortunately, they are also a chore to process–small large seeds and skins that are difficult to peel. They also vary widely in quality, since many in the neighborhood are probably seeds planted by birds and squirrels rather than grafted specimens.

But at last, I’ve found a use for them that’s relatively low-labor and yields a tasty result: loquat leather. Here’s the recipe I came up with:

2 cups loquats (no need to peel)
2 teaspoons lemon juice
2 teaspoons agave syrup
1 teaspoon triple sec

Remove seeds. Place loquats in a blender with the lemon juice, agave syrup and triple sec. Dehydrate at 135º until, as the Colorado Extension Service puts it, “translucent and slightly tacky to the touch, but easily peeled from the pan.”

Tips: Chef Ernie Miller suggested using a blender is rather than a food processor for this recipe. Also, try to spread the puree thicker towards the edges of the dehydrator sheet and you’ll get a more uniform result. Finally, the triple sec is optional, but some sort of flavor addition gives your fruit leather a more “adult” taste.

Fellow Master Food Preserver trainee Emily Ho is working on a loquat soda syrup and has also made some loquat jelly.