
This weekend Kelly and I had our first adobe encounter. We were lucky to have been invited to attend a workshop led by Kurt Gardella and Ben Loescher. Kurt also teaches both live and online classes that you can find out about on his website, www.kurtgardella.com. We’ll post announcements for future classes, because I haven’t had so much fun in a long time! This past weekend’s workshop focused on making bricks and building an adobe garden wall. If you want to learn about adobe, Kurt and Ben are the folks to go to. And, lest we forget, adobe is the traditional building material of the Southwest United States and many other parts of the world. Adobe needs just people power and locally available materials.

What follows, after the jump, is a pictorial essay of our adobe experience.

We missed the first day of the workshop, but pieced together what Kurt and Ben went over. One of the first steps is to determine the clay/sand content of your soil and to do that you do a jar test. When you mix some soil with water in a jar and let it sit, the clay settles on top, the silt below that, and the sand on bottom. You can measure the sample and determine percentages.

At the workshop, held in the high desert town of Landers, CA the sand and clay were sourced locally and from the site.

The clay got sifted through 1/4 inch hardware cloth to get out chunky bits that can lead to weaknesses in the bricks.

To make both the bricks and the mortar, water is mixed with a half a coffee cup of asphalt. The asphalt helps the bricks and mortar resist water. Traditionally, prickly pear cactus soaked in water and fermented was used before the modern convenience of asphalt.


A couple of handfuls of straw were added to each wheelbarrow full of mortar and brick mix to add strength.

Here’s the consistency of the mortar.

To make a brick you press the clay/sand/straw/water/asphalt mix into a form made out of 2 x 4 lumber. The nice thing about adobe bricks is that you can custom size them for your project, though there are traditional sizes.

Before you build anything, however, you have to test your bricks. Here you can see different sand/clay mixtures drying in the sun. You can also make a brick out of whatever soil you have on hand and see how it holds up.

The first test Kurt did was drop one on a corner from about waist high. It didn’t break and thus passed the test.

Another test is standing on a brick. Even though the brick we used weren’t really finished drying, they still passed. For a building that will be inspected you will probably have to send bricks to an engineer for more precise tests.

This is the way you stack bricks for drying. Depending on the climate, it may take several weeks before they are ready to use.

And you have to be careful how you transport them. This is the right way to stack bricks when moving them in a truck. If you stack them flat you risk a lot of broken adobe.

Adobe bricks are heavy. To move them out of the truck we formed a big bucket brigade. Here Kurt demonstrates an advanced technique where you toss a brick to the adobe worker next to you.

Ben explained different types of foundations and how adobe construction can meet even California’s stringent building code. And, yes, if you build it right (vertical rebar and a bunch of other details) an adobe building will stand up well in an earthquake.

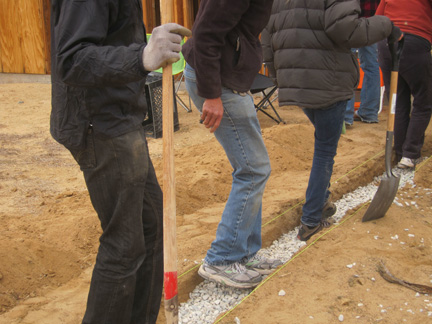
To begin our garden wall we placed a “story pole” on each end of the wall to keep everything plumb and on the level.

Since it was just a garden wall and not a building, we did a simple gravel foundation beginning with this trench.
And some gravel-compacting line dancing.

Kurt dry-laid the bricks to emphasize that you should size structures to the dimensions of your bricks to avoid, as much as possible, cutting bricks.

When laying bricks we used our thumbs as a guide to space the mortar joints.

Kurt showed a couple of different ways of cutting adobe. One way was just scoring with a machete.

A light tap and the brick broke neatly in two. This brick is still a little moist in the center–good enough for a garden wall, but not dry enough for a building.

Next, Kurt showed how to shovel the mortar (again, made out of the exact same sand/clay/water/straw/asphalt mixture as the bricks and in the same proportions).

After you dump the mortar, you roughen it a bit with the end of a shovel to make it easier to press the brick into the mortar bed.

Here Kurt presses a brick into the mortar and lines it up with the line attached to the story poles

He also checks with a torpedo level. Kurt explained that you can’t “develop a close personal relationship with each brick.” That is, you have to keep the wall level as a whole unit and not get caught up in overusing the level on each brick. He also explained the work flow. The master mason sets the level of the end bricks and the apprentices fill in the center of the wall. When everyone knows their task, with the master providing guidance, things move along smoothly.

This spoon-like object is what you use for “pointing” or creating the groove in the mortar between adobe bricks.

You can also use a bent piece of plastic electrical tubing as a pointing tool. You only point if the wall will not be plastered. If you plaster, irregularities in the joints help the first layer of plaster adhere.

With a lot of people working, the wall went up fast.

Kurt demonstrates an alternate way of keeping the wall plumb and level.

He also showed how you would integrate doors and windows into and adobe structure.

Nearing completion, the wall is looking so good that I want to rush home and build one myself.

Kurt brought along an assortment of tools that you would use for plastering, including some really nice Japanese trowels. He also explained, that for the first plaster coat, you can also just use your hands. Such is the sculptural quality and plasticity of adobe. You never stucco adobe. Adobe is plastered with adobe and/or lime/adobe mixtures. Typically, plastering is done in three coats, a rough coat, a leveling coat and a finish coat. Screen your materials with progressively finer screens as you go. The materials for the finish coat should be quite fine, say fine enough to pass through 1/8″ screen.

We ran out of bricks and did not complete the wall. It also began to wobble a bit, a sign that it’s time to stop. Four or five courses for a structure is good for a day. Let it dry and it will be ready to continue the next day.

At the end of the workshop we went into a little “homesteader’s” cabin on the property. The deal with homesteader cabins is that back in the 1950s that the government would give you a five acre parcel if you built a shack with the minimum dimensions of 12 by 16 feet. So people built tiny shacks to just those dimensions!

Kurt teared off some nasty wood paneling in the shack to show how you could retrofit a building with adobe. Here he is starting to fill the space between the interior studs with adobe. The idea is that the adobe will insulate the walls, providing vital insulation in a harsh desert climate. This may not work as well in more humid places. Here the thick layer of mud will dry fairly quickly. Elsewhere it might encourage mold.

Next we nailed some reed fencing material over the adobe-filled studs and started to plaster the wall with the same adobe we used to fill the wall. The reed fencing gives the adobe something to hold on to. Here again, as with the garden wall, the interior wall would be given three progressively smoother coats.
The miracle of all of this is that it is dirt. The insulation is dirt, the bricks are dirt, the mortar is dirt and the plaster coats are dirt. Nothing could be simpler. There’s an art to it, to be sure, but its amazingly elegant in its essence.

As the sun set over the high desert landscape we concluded our building and headed over to Pappy and Harriet’s for some beer and BBQ. I’m really looking forward to working with adobe again someday soon.


