It’s Official: Erik is Insane

Our parkway garden

It’s true. Erik has gone insane trying to protect his baby. His squash baby.

A little background:

We’ve long gardened in two raised beds in the parkway in front our house (the parkway being the space between the sidewalk and the street). This is officially city property, though we are responsible for maintaining it. It gets great morning light, so it’s a valuable growing space. It’s also fun to garden out in public, so we can talk to our neighbors and get all the fresh gossip, and show little kids what food looks when its growing.

The drawback to a public garden, of course, is that it is defenseless. This means that dogs and cats and sometimes people tromp through the beds, scattering freshly planted seeds and smashing delicate seedlings. If the plants survive, then they become subject to theft. Now, we don’t mind sharing food. The parkway isn’t really ours, after all, so we figure what grows down there is fair game. Generally we either grow things down there that are easy to share–like beans or cherry tomatoes–or things people aren’t likely to pilfer–like greens.

This all changed this year, because Erik decided to plant squash down there. Not just any squash, but this fantastical Italian winter squash called Lunga di Napoli. It’s a green skinned squash, rather like a butternut in shape and texture, except it can reach a meter in length.

At the time of planting, I did the wifely, “Honey, are you sure that’s a good idea?” thing. It’s just not a good idea to plant high-investment crops in the parkway. He assured me he knew it was a risk, but he wanted to try, and we didn’t have space to plant it anywhere else. “No big deal,” he said. Back then he was reasonable.

Since then, our parkway has turned into a dense jungle. *** Note: We love our tolerant neighbors!!!! *** There’s not only squash growing in those two small beds, there’s also scarlet runner beans, strangely hairy cucumbers, volunteer tomatoes and giant lamb’s quarters going to seed. The giant squash tendrils are spreading across our driveway and walk. Sure, it’s better to be lush than bare, but it looks crazy. Grey Gardens type crazy. In my more optimistic moments I think of it as a “food forest.” I tried to take pics, but it’s hard to capture the wildness of the space.

Very like the jungle swallowed the ruins of Palenque on the Yucatan peninsula, our Scarlet Runner bean long ago swamped its trellis.
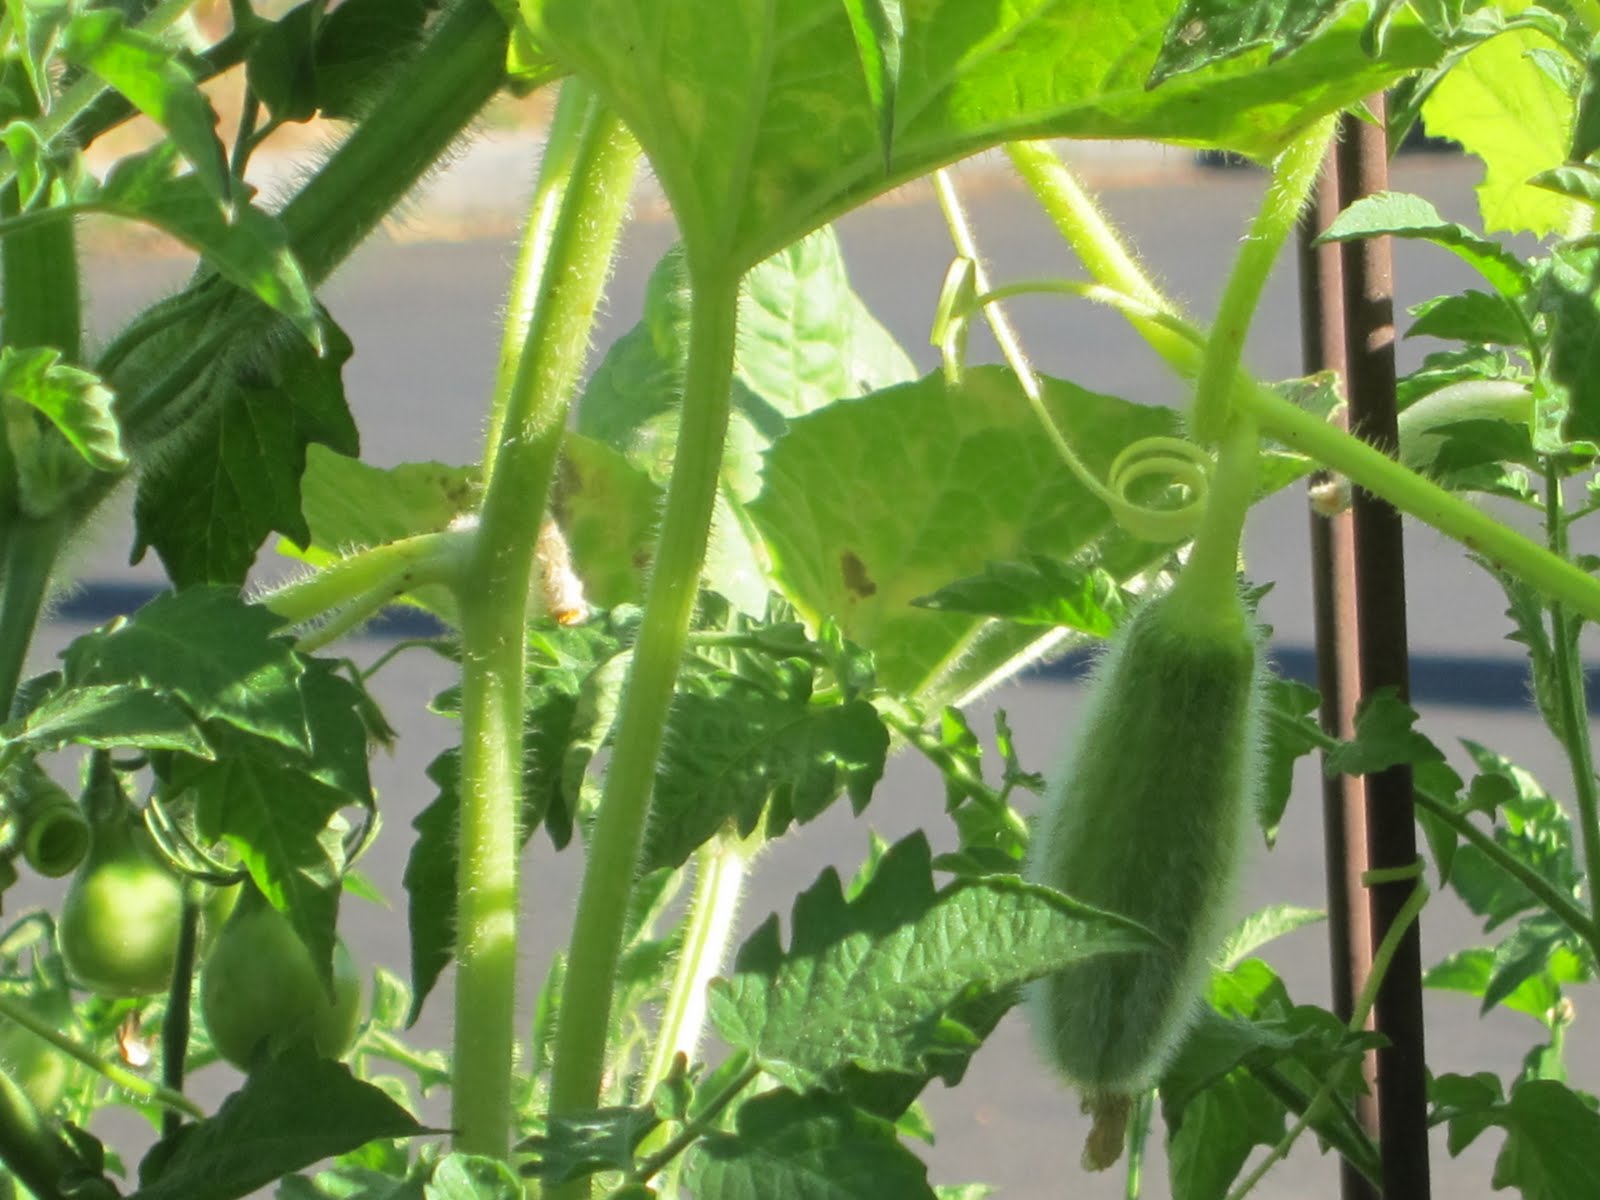
Hairy cucumber and tiny tomatoes growing together. The beds have their moments of beauty.

Back to the squash. It only bore two fruits. Erik began to obsess over them as soon as they appeared. How would they ever live to maturity? He just knew a thief would take them at zucchini size, and then they’d never reach their potential. Suddenly, it was of utmost importance to him that these squash reach their full one meter length. I trembled with dread and ill foreboding.

The remaining Squash Baby, currently measuring 20 inches or so.

One morning the inevitable happened. Erik stomped into the house, crying, “The %$#$!*s took my squash! They took my squash!” The smaller of the two squashes was gone, picked long before its time. After a brief period of depression, which he spent either cursing the unjust nature of the universe or reiterating his desire to chop down all the trees in our backyard, so as to maximize secure growing space (which is not going to happen as long as I’m around!), Erik began to scheme.

And now, we are the proud proprietors of Garden Guantanamo. The remaining squash baby –and it really is baby sized, and growing fast–soon I will have to refer to it as the squash toddler–is wrapped in layers of chicken wire and spiked deep in the earth. But that was not enough. He’s also surrounded the entire parkway with a cordon of bright yellow rope (invoking police tape?) and most alarming of all, fashioned little signs that say “Warning: Experimental/Not For Human Consumption/No Es Comida” and staked them at 3 foot intervals on all sides.

Lousy pic of one of the signs, obscured by windblown lamb’s quarters.

I’ll admit I’ve put up my share of signs in my time (Keep Door Closed, Turn Off Lights, Don’t Eat the Cake in the Fridge, etc.). But age brings wisdom, and I’ve learned that there are two kinds of people in the world: those who read signs and those who don’t. And the great irony is that those who read signs don’t need the signs in the first place. And those who need the signs never, ever read them.

In other words, I don’t think the signs are going to work. And I’m dreading my neighbors asking me what’s experimental about our food.

In the meanwhile people, pray for Erik and his squash baby. And I’ll keep you updated.

Raw Milk Talk With Mark McAfee of Organic Pastures on the Homegrown Evolution Podcast

Image from the Organic Pastures website


In the second episode of the Homegrown Evolution podcast we present a talk by Mark McAfee, founder and CEO of Organic Pastures Dairy, a raw milk dairy in California. The talk was recorded on August 28th, 2010 and was sponsored by Altadena Heritage and the Arroyo Food Co-op.

McAfee had slides, but I think the talk is self explanatory without them for the most part. When he mentions his neighbor’s farm he showed a slide of a typical concentrated dairy operation: a lot of cows packed together in muddy pens. By contrast, the cattle on Organic Pastures’ land grazes on green grass. Another point that might need to be clarified is that when McAfee mentions the two kinds of raw milk he is referring to his own milk, meant for consumption raw and most other dairies whose milk is only raw for the brief period between when it leaves the cow and when it is pasteurized.

Click on the player above to hear the podcast. You can also subscribe to the Homegrown Evolution podcast in iTunes or download an mp3 of the podcast via archive.org here:

http://www.archive.org/download/HomegrownEvolutionPodcast2RawMilkTalkByMarkMcafee/HEPodcast2.mp3

A big thanks for letting us record this talk goes out to the folks at Altadena Heritage who, incidentally, sponsor some amazing events. Check their website for details. And also thanks to Mark McAfee who is open and transparent in his business and operations. Unlike his competition, you can visit his farm and see where your milk comes from.

We’re raw milk fans but realize there’s considerable difference of opinion on the subject. Let us know where you stand on raw dairy–leave a comment! And listen to McAfee’s talk.

Blue Garlic A-OK


Mrs. Homegrown here:

Note the lovely blue tinge of the garlic in my latest pickling adventure. Turns out that there’s a few reasons garlic might turn blue or green when prepared, but whatever the case, the coloring is harmless. What most likely happened here is that the garlic I used wasn’t fully dried, so it reacted with the vinegar in the pickling mix. I remember noting how moist the garlic cloves were as I worked with them that day.

If you want to read up more on this topic, and learn some of the science behind it (I’m too lazy to retype all the big words), check out this garlic fact sheet from What’s Cooking America. Scroll down to the bottom of the page.

By the way, the pickles I’m making are tourshi–Armenian pickles. If they work out, I’ll share the recipe.

New Homegrown Evolution Events Calendar Widget Thngy

Never mind this post. I’m in the process of creating a Google calendar for the site. Stay tuned.
I’ve created an events listing widget for events we’re either involved with or simply think are cool. You will find this widget along the right side of this page and at http://twtvite.com/hgevolve. Click on an event and you’ll get a map and the ability to add the listing to your busy calendars. You can also Facebookasize it and tweet it. Right now we’ll focus on Southern California happenings, but will consider expanding it nationally (internationally?) with the release of our new book Making It: Radical Home Ec for a Post-Consumer World in the spring.

The fist event up is a lecture on raw milk by dairyman Mark McAfee, taking place today in Altadena. I’m still figuring out how to use this application–it shows us as one of the organizers, but that’s not the case. We just think you should go!

Thanks to Stephen Box, on whose blog I spotted twtvite. Vote for Box!

Bean Fest, Episode 2: Falafel and Babaganoush Recipes

Welcome back to Bean Fest 2010, our ongoing celebration of the humble dried bean.

Last week we got a lot of great tips and hints in the comments. If you haven’t read those, I’d encourage you to take a peek. We also got a couple of recipes via email that we’re going to test out. Thanks, ya’ll! Again, if anyone has a favorite bean recipe, please send it this way ([email protected]).

One lesson to take away from last week is that beans do quite well in solar ovens, crockpots and the newer pressure cookers, and that if you eat a lot of beans, one of these devices would be a useful investment. I really wish I had any one of those items! We have a light, homemade solar cooker–as opposed to a more sturdy, enclosed solar oven–which is handy for grains, but really doesn’t have enough ooomph for consistent bean cooking. And we’re lacking in both space and money for new kitchen gadgets. So around here we’re stuck cooking beans on the stovetop. Seems everyone has their own bean cooking methodologies. This is mine, for what its worth:

  • Pre-soak beans for about 8 hours. Oversoaking can lead to mushy beans.
  • Rinse soaked beans and place in a heavy pot with 2 inches of water covering them. Simmer until done–however long that takes. Sometimes the bean gods are merciful, sometimes they are not. Never cook beans on a deadline. Cook them when you have plenty of time and other things to do around the kitchen.
  • Don’t salt ’til they’re almost done, because salt toughens the skins.

There seems to be a split in camps between people who a) cook the beans first, unseasoned, then incorporate them into a dish, b) throw onions & etc. into the water with the beans and let it all boil together, and c) people who do a saute of the onions & etc. at the bottom of the pan before adding the beans. I don’t know if any of these methods are better than the others, and admit to doing all three.

This Week’s Recipe: Falafel

The first lesson in food photography is not to consume your subject before you even get around to taking the picture. These few falafels were all we had left when we realized we needed to take a pic for this post.

I was thinking that a lot of people are just plain intimidated by cooking dried beans, so perhaps it would be fun to start out with a bean recipe that allows you to just skip all that trauma. Back in the day, Erik and I would sometimes make falafel out of that powdery stuff you buy in bulk bins. It tended to be salty and dry, but it was quick food. We were amazed to discover how easy it is to make real falafel–and how good the result is. Unlike bulk bin stuff, this falafel is moist and light and tender.

The secret is that it is made with raw chickpeas. They are soaked and ground up–but not cooked. This gives the falafel great texture and fresh flavor. You should not substitute canned or cooked beans in this recipe. If you do, the balls won’t hold together very well. If you must use canned beans, you’ll need to add some bread or cracker crumbs, and possibly even an egg, to create a dough which will hold together.

The other thing about this recipe is that it is very, very flexible. I’d encourage you to adapt this any way you think best.

We make this in our food processor. If you don’t have one, I’d suspect it could be done in batches in a mortar. If you don’t have a mortar and pestle, then you’d have to come up with some way to squish the beans. Perhaps in a bag with a rolling pin? The greens and the rest could be minced and stirred into the bean mash.

You’ll need:

(This quantity will make wraps for 4)

  • Dried chickpeas (aka garbanzos), 1 cup
  • Chopped greens/herbs: about 3 generous fistfuls. We usually use 2 handfuls of parsley and 1 handful of mint. But if we don’t have that, we improvise. Any flavorful green would work: mint, parsley, cilantro, chives, basil, flavorful wild potherbs, etc. Arugula works too, and even less flavorful greens, like spinach, will do in pinch.
  • Garlic, 2 or more cloves
  • Onion, about 1/2 of a reasonably sized onion, chopped (optional, could also be replaced with green onion)
  • Salt, about a teaspoon
  • Spices to taste. Here things get really individual. Spice as you please. We usually add about a teaspoon of cumin and a couple of big pinches of cayenne pepper.

Soak the beans for about 8 hours. You can put them out to soak at breakfast to make falafel for dinner. The one cup of beans will expand to 2 cups when soaked.

Toss the beans, garlic, onion, salt and spices into the food processor, along with a glug of olive oil. Whirl until you can’t see whole beans anymore. Add another glug of olive oil and all the greens. Let it whirl until the greens are cut down to speck size. The mix should be a pleasant spring green. Taste and add more salt or whatever you think necessary. Don’t mix it until it turns to smooth paste. Stop while it still has a little texture. Add olive oil to smooth it out, as necessary. When its done, it will be wet and light, but you should be able to easily roll the mix into balls.

At this point it would be fantastic if you could let the mix rest in the fridge for an hour or two for the flavors to blend and the mix to stiffen up, but you don’t have to.

Roll up a bunch of balls, or small patties, if you’re a patty person. We make balls that are smaller than golf balls. More like big gum balls. Or mountain state hail.

At this point you can deep fry or pan fry the balls. You could probably bake them, too, if you want to be righteously healthy, but we can’t advise you on time and temp.

We usually cook them via a method I call “half-assed deep frying.” Being somewhat too guilty minded (and cheap) to actually cook up a whole vat of hot oil and fry the falafel like a good falafel should be fried, I pour about a half inch of oil (I use grapeseed) into my littlest cast iron frying pan and heat that till it sizzles when I drop a bit of falafel mix into it. Then I put the balls in, about 5 or 6 at a time. The oil covers them about half way. When the bottoms are golden, I flip them and cook the other side. It doesn’t cost much oil. And while it doesn’t give that perfect crispness of true submersion deep frying, it tastes pretty darn good.

Serve your falafels wrapped in some sort of flat bread along with salad fixins, especially chopped tomatoes and onions. Good toppings include yogurt, tahini, hummus and baba ganoush.

Do you know how to make baba ganoush? Baba ganoush is eggplant spread, a close cousin to hummus, but lighter, and to my mind, better.

A Quick Baba Ganoush Recipe

All you need is eggplant, garlic, tahini , olive oil and lemon.

Take one huge eggplant or a few smaller ones, prick a few holes in them so they don’t explode and put them in a 400-450 degree oven on a baking sheet for about 45 minutes, or until they wrinkle and go flat on the bottom. Then cut them down the middle and scoop out the flesh into a mixing bowl. The skins could go to chickens, worms or compost.

From here, you could mix everything in a food processor or blender, or just use a fork if you don’t mind a more stringy texture. Even if I use power tools, I try to keep the baba ganoush a little lumpy. Stir in tahini to taste. To me, that means that if I have 2 cups of eggplant goop, I’d probably add 1/4 cup of tahini.

Mince up your garlic fine and stir that in next. How much garlic depends on how much bite you want the baba to have. 1 clove minimum, much more theoretically. Add salt to taste, and pepper, or hot pepper, if you like. Add a swirl of olive oil to give it some richness. The finishing touch is fresh lemon juice, and it’s an absolute must. Try adding about half a lemon’s worth of juice, see how that tastes, and go from there.

Baba ganoush tastes best if its allowed to chill for a couple of hours before serving. It’s pretty easy to whip up a batch of falafel mix and baba ganoush at the same time, and then put it all in the fridge until dinner time. Then it only takes a few minutes to fry up the falafel, and you’re good to go.