Hexayurt

SurviveLA reader jbjhill, responding to our rant about designing for a world dominated by 4 x 8 building materials, sent a link to this unique yurt-shaped emergency shelter which can be built out of 4 x 8 sheets of nearly anything (the globe shaped thing on the right is an inflatable satellite dish). Designed by 
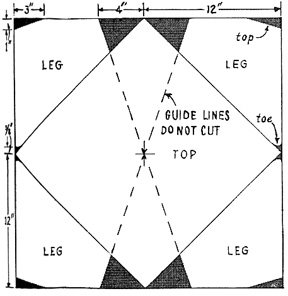
software engineer Vinay Gupta, who is working on this project full time, the “Hexayurt” costs somewhere between $200 and $500 to build, and requires only six cuts for each unit. The Hexayurt stacks flat for easy deployment in emergencies.

Gupta has a suggested “Infrastructure Package” which includes heat, lights, water purification, and a composting toilet bringing the cost up somewhat, but still much less than FEMA’s $30,000 trailers.

While not the most thrilling video (at least as compared to this), thanks to the wonders of youtube you can watch Gupta assemble an 8 foot Hexayurt:

Street Signs and Solar Ovens

If SurviveLA put together a museum show it would, pretty much, look like an exhibit currently at the Craft and Folk Art Museum entitled “Street Signs and Solar Ovens: Socialcraft in Los Angeles” which is on view until December 31st. Curated by the Journal of Aesthetics and Protest, this timely show focuses on objects that demonstrate creative, low-tech solutions to the environmental and political mess we find ourselves in.

We were particularly struck by the display case full of soda cans transformed by LA survivalist Christopher Nyerges into a variety of uses including lamps and stoves (see SurviveLA’s earlier post on creating a Pepsi can stove). Nyerges also contributed two improvised solar ovens, one made out of a discarded pizza box.

Other highlights include a functioning still by Alison Wiese, the stunning knitted clothing of Lisa Auerbach, items from the Path to Freedom urban homestead and contributions from the fine folks at C.I.C.L.E.

So, get on your bike, head down to the Craft and Folk Art Museum, and see this provocative show!

Craft and Folk Art Museum Hours:
Tuesday, Wednesday, Friday 11am – 5pm
Thursday 11am – 7pm
Saturday-Sunday 12pm – 6pm

Museum Admissions:
$5.00 adults
$3.00 students/seniors
Free for children 12 and under
Free admission on the first Wednesday of every month.

Location:
5814 Wilshire Boulevard
Los Angeles, CA 90036

Kent’s Composting Tips and Secret Weapon

Today in our continuing dialog on composting, a guest post from Los Angeles Bicycle Coalition board member, Kent Strumpell who we met up with at this week’s inspiring LACBC awards gala:

I’m sure there are more correct procedures, but this is what I’ve found works.

I use a compost bin that has direct soil contact. I think this allows the introduction of soil organisms and serves to drain the pile if it gets too wet. I’ve done this same process with free standing piles as well.

I start with a small pile of dry leaves and add a load of kitchen scraps. I also add a couple shovels-full of rich soil to get things started, particularly with some worms and bugs to propagate the new pile. I’m not fastidious about what goes in, so the occasional fish and chicken scraps and leftover cat food gets into the mix, even oily stuff, but mostly it’s the usual veggies, fruits, paper napkins, etc. Though experts say no fats should go in, I’ve yet to see (or smell) a problem.

Each time I add new kitchen scraps, I add 1-2 shovels-full of dry leaves and some water if needed, turning and mixing the old and new stuff with a cultivator or shovel to aerate the pile. The proportion of dry to wet material is important. There should be enough dry leaves so the compost is kinda’ fluffy and moist, not soggy, but the dry material shouldn’t overwhelm the wet either.

Now the secret. I cut a piece of black 6 mil vinyl to approximately cover the pile and lay this directly on top of the compost (anything similar will work). I’ve found this helps keep the pile moist when I’m not able to check on it (sometimes for a week or two) and the bugs and worms seem to thrive underneath this membrane. I got the idea after noticing that I’d find rich bug habitat under boards, etc. laying around my yard. My compost piles teem with worms, sow bugs and other critters, all working hard for me. If you do a free standing compost pile, cut the plastic big enough to cover to the ground and hold it in place with rocks or bricks.

I add my scraps about once or twice a week. I don’t use the pile to consume large quantities of leaves, I just add enough of them to keep things in balance. It easily keeps up with my kitchen scrap production and gives me a rich, dark compost about like coffee grounds when it is done. I draw finished stuff off at the bottom occasionally. Or, if I want to use the whole batch, I stop adding to it for a few weeks so it can digest everything.

Build Your Own Furniture

We live in a 4 by 8 world. This is why we can’t get all that excited about things like geodesic domes, straw bale and rammed earth houses. All of these innovative architectural ideas may have great potential, but when it comes time to buy supplies at the lumber yard, the overly creative builder will soon realize the difficulty of utopian designs in a world of 4 by 8 sheets of plywood and drywall. That geodesic shape is hip, but what do you do with the rest of the plywood sheet once you cut it out?

The same limitation applies to making furniture. Thankfully a generation of designers back in the 60s and 70s left a few highly useful and groovy how-to books on making your own suburban-workshop-modernist furniture with a humble 4 x 8 sheet of plywood. The amazing art/architecture collective Simparch tipped us off to the world of plywood modernism how-to books and we at Homegrown Evolution recommend the stunning Sunset Magazine produced Furniture You Can Build, which is sadly way out of print and very expensive on Amazon, but available at the L.A. Public Library. Most of the designs in this book would work well with found materials and scraps. What we appreciate most about this book and others like it, that we will discuss in future posts, is the economical use of common materials.

A good example of this efficiency are these handsome stools — one sheet of plywood will make eight stools. Here are the instructions from the Sunset book:

Simple, versatile, and inexpensive — that’s the quickest way to summarize the virtues of these handy plywood stools, They could hardly be easier to build and are surprisingly inexpensive. Except for the nails and glue, every part of the eight stools shown in the picture at the top left came from one standard 4 by 8-foot panel of 1/2-inch plywood, the same as the panel shown behind them. As the cutting pattern shows, a 2-foot square of plywood yields one stool, and only the shaded areas are wasted.

Each stool is 17 inches square and stands approximately 10 1/2 inches high. If you wish to use a cushion, you can glue and nail a 1/2 by 1-inch hardwood frame around the top’s edges, which will give a 1/2-inch high rim to keep the cushion in place.

To start, draw the cutting pattern carefully on heavy paper and transfer it to each 2-foot plywood square with carbon paper or pin pricks. If making several stools, you can have the lumber yard cut your plywood to uniform 2-foot squares. Cut the legs and top from each square with a saw.

As the underside view shows, each leg abuts on and is nailed to the inner end of the next leg. Assemble with glue and just two 4-penny nails in each leg. Before the glue dries, turn the assembled legs right side up on a smooth surface and attach the top, As you glue and nail on the top (use 6-penny finishing nails), the legs will level themselves evenly. Finish the stools as you prefer: with paint, varnish, or stain wax.

Bitter Greens

Today we continued our winter planting in our illegal parkway garden adding arugula, a green that America has suddenly discovered after last month’s factory farming spinach nightmare. We also added a tough and bitter leaf chicory from our friends at Grow Italian. Hopefully, by succession planting we should have a winter and spring full of green, if somewhat bitter vegetables.

How do we prepare these bitter greens around the compound? Very simply — in a pan with garlic, olive oil, salt, and pepper. Sometimes we add some Parmigiano Reggiano. Fresh, strong tasting vegetables don’t need much else.