Survival Gardening

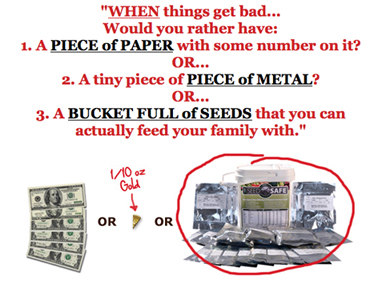
One of many survival garden pitches.

Listen to AM radio for more than a few minutes and you’re bound to hear an ad touting seeds and “one acre survival gardens.” The implication is that hordes of foreclosed zombies will soon empty the shelves of the local Walmart and leave us all bartering for gas with our carefully stored heirloom pole bean seeds.

But it does raise the question of how much space you need to grow all your own food. It’s been on my mind since attending John Jeavons’ three day Grow Biointensive workshop where we spent a fair amount of time, calculator in hand, figuring out how many calories you can squeeze from small spaces.

What gets left out in the “survival garden” sales pitches is that, if you want real self-sufficiency, you’ve also got to maintain the soil fertility that you deplete by harvesting. To do that you need to grow all your own compost. For this, Jeavons suggests what he calls “carbon and calorie crops” things like corn and wheat where you get both something edible and a lot of biomass for your compost pile. In Jeavons’ 4,000 square foot “sustainable one person mini-farm” scheme, 60% of your growing area is devoted to these compost and calorie crops. The remainder is planted in 30% high calorie root crops, such as potatoes, with just 10% of the garden devoted to the usual tomatoes and greens.

The residents of Biosphere 2, using Jeavons’ techniques claimed that enough food could be grown for one person on as little as 3,403 square feet. Jeavons has shown that you could use less space, but you better like eating a lot of potatoes.

In reality, there’s probably too many variables, such as climate, to get an exact figure on how much space you need to grow enough food for one person. And let us not forget the novice survival gardener’s experience (I’m amused at the thought of those one acre survival gardeners busting open that paint can full of seeds for the first time having never gardened before). And if you want livestock, the acreage requirements jump considerably.

But considering that it takes, according to Jeavons, between 15,000 and 30,000 square feet for commercial agriculture to provide the same calories as Jeavons’ 4,000 square foot mini-farm, we’d do well to pull out those calculators on occasion. With just 176 square feet of vegetable beds at the Root Simple compound, our goal is self-reliance, not self-sufficiency. Do you think our post-apocalyptic overlords will feed us in exchange for blogging for them?

Concord grape, newborn and amazing

Mrs. Homegrown here:

This lovely thing is a newborn, unfurling Concord grape leaf. I had no idea it would be so beautiful. Why the crazy pink? Why does it look like it was dipped in sugar?

Even more amazing is that this event, though spectacular, is tiny. The Concord grape in question is a presently a 10-inch high stick, newly planted bare root stock, almost invisible. Only the flash of color caught my attention today and drew me to it to inspect. That this stick is suddenly bearing sugary pink wonders seems like a miracle.

Wish us luck with this grape. It is meant to shade our back porch. However, we’re beset by the sharpshooters, and the disease they carry (ever wonder why SoCal doesn’t grow wine?) which killed the first vine we planted, and then proceeded to kill the second one we planted, even though that one was supposed to be resistant to that blight–leaving us without summer shade on the porch for…how many years now? Fingers crossed that this grape will thrive, and grow from 10 inches high to 10 feet high and spreading.

Juicing Cane

At Camp Ramshackle, the plants that thrive are the ones that don’t require too much attention. Our sugar cane, started as a six inch start, is case and point. I harvested a stalk to add to lemonade.

I first removed the thick tough skin.
Once the skin was peeled, I sliced the cane stalks in half.

Resident child labor juiced the stalks. Despite the mechanical help of the juicer it was an arduous task.

Our yield was meager at best. We savored a few drops & dumped our juiced cane into our lemonade. The juicing of the lemons went much more smoothly.

Harvesting and Drying Calendula

Mrs. Homegrown here:

Okay, so in a previous post I talked about growing Calendula. This post I’m going to talk about harvesting and drying it. The next post I’ll do on the topic will be about making a skin-healing salve from the dried petals, olive oil and beeswax.

When to harvest: 
Start harvesting your Calendula as soon as the first flush of flowers is in full bloom. Don’t try to “save” the flowers. The more you harvest, the more flowers each plant will put out.  After the first cutting, you can probably return to harvest more every 3 days or so.
The ideal time to harvest is in the morning, before it gets warm, but after the dew dries. You want them all fresh and perky and at their peak. This is traditional wisdom. However, I believe it’s better to harvest when you can than not at all, so I harvest at all times of day.
A side note regarding seeds:
If you don’t harvest the heads, they die back on their own, and then they’ll go to seed fast. If you don’t like the idea of Calendula volunteering all over your yard the following year, you’ll want to collect all the heads before they die back. However, you may also want to monitor them carefully and collect ripe seed for planting the next year (you want to collect the seed when it’s brown, not green).  And if you want to keep track of such things, if you make a point of saving seed only from the plants with the best blooms, your favorite colors, etc., over generations you can breed your own line of Calendula.
Alien beauty. A seed head in its early stages. The seeds are the green things that look like bugs.
What parts to harvest:
I harvest the flower heads only, though I understand that the foliage has much the same properties as the flowers. If I were short on plants, and knew I’d get few flowers, I’d harvest and dry the leaves to make up that lack. Given a choice, though, I prefer the flowers, just because they’re good for cooking and decoration as well as my salves. People used to eat Calendula leaves (they’re known as “pot marigolds” because they used to go into the cooking pot), but I’ve tasted them, and I don’t think I’ll be making them part of my diet unless I have to.
To harvest, I either pinch off the heads or cut off the heads with scissors. This often leaves a long, beheaded stem behind. That stem can be trimmed back to the first set of leaves, for the sake of aesthetics. Or not. (ETA: A commenter recommends that you always cut the stem back to the first set of leaves, so the stem does not become a conduit for rot. Makes sense.)
How to dry:
Bring the flower heads indoors, into an area out of direct sunlight. Don’t wash the heads.

Spread the heads out face down on a dishtowel or a sheet or newspaper or for fancy, an old window screen stretched between two chairs. I find laying out the heads an oddly satisfying activity.
Of course, if you have a dehydrator you could use one of those. Calendula should never be subjected to high heat, so oven drying is out of the question. Set your dehydrator to 90-95 degrees F.  
If you’re air drying, turn the flowers over every so often. Keep them out of direct sunlight.
They’ll shrink quite a bit as they dry, so you’ll have room to keep adding fresh specimens as they come in.
When are they dry enough?:
They must be completely and absolutely dry before they go into storage. Believe me when I say this is important. A couple of years ago I was impatient and put a few chamomile buds which must have been not-quite-dry in to a jar with the rest of my (painstaking) chamomile harvest. The next time I opened that quart jar I got a big nasty whiff of mold. I almost cried.
So–the flowers must be dry. They should be fragile, crispy and very dry, like crepe paper. Make a habit of feeling them at different stages of drying to develop sensitivity in your finger tips. You’ll notice that when they’re not quite dry they’ll *look* dry but when you touch them they are a bit cool compared to a truly dry flower. In other words, you can feel the water in them. Leave those for another day or so.
The green part, the flower head to which the petals are attached, dries more slowly than the petals themselves, because it has a greater mass. Be cautious of this. If you’re going to store the heads whole, then you need to allow extra time for the green parts to dry.  Which brings me to the next item:
To pluck or not to pluck:
There isn’t a right or wrong here. Everybody does it different. 
If you plucked all the petals off the heads when you first brought them indoors, those petals would dry very fast. But that, in my frank opinion, would be a pain. It would be like playing a game of “He loves me, He loves me not” that lasted for hours.
If you want to leave the petals on the heads that’s fine. The heads (green parts) have medicinal properties too, so you can use them whole. The only thing is that you must make sure those heads are completely dry before you store them, as I said above.
What I do is is wait until the petals are dry, then I pluck them from the heads, to avoid the whole “is the head still damp?” issue. When the petals are dry, they come off the head very easy. In fact, the ease with which they come off the head is an indicator of their dryness. If they’re resistant at all, they’re not dry. To work in bulk, you can take a whole bunch of dry heads and put them in a bowl and rub them between your hands. The petals will fall off. The heads will collect at the bottom of the bowl, because they are much heavier than the petals. Or you can strip them by hand. When they’re dry, this only takes a single gesture.
Only the driest petals go in the jar. All that debris around the jar is stuff that’s not dry enough yet.
Can you use the flowers fresh?:
Yes. And no. Depends. The next step in this series of posts is the making of an oil infusion.  I never put anything “wet” in oil, because of the slight chance that botulinum toxin might develop in the oil.  Herbalists who I respect put fresh matter in oil nonetheless, and I envy them, because I suspect they’re getting more out of the plant by doing so. But I’m not going to take that risk–or write about it if I do. This is just safer. 
You can use the flowers fresh other ways. You can make them (and the foliage) into a tea, which you could use as a skin wash for sunburn or irritation–or drink. Fresh flowers could go into your bathwater to make a soothing bath. Fresh flowers can also be soaked in alcohol to make a tincture.  
Storage:
I keep my very dry herbs in sealed mason jars in a dark cupboard. You don’t want to expose any dried herb to sunlight for any length of time. I use jars because I don’t take any chances with pantry moths (it’s amazing what they’ll get into). The risk with jars, as I’ve said, is that if the herbs aren’t perfectly dry, you’ll get mold. This is why other people opt to keep their dried herbs in paper bags–bags breathe a bit, so lessen the chance of mold. This is a good option, too.
I try to switch out my dried herbs every year–at least the ones I grow. Some of the things in my cupboard are older than that. I think some herbs keep their properties longer than others, but in general you should try to use them in a year or so. Like spices, the are best fresh, but usable, if not as potent, as they age. 

Label and date all your herbs. Even if you think you’ll never forget, somehow or another you will, and at some future find yourself standing at your cupboard, holding a jar full of strange plant matter and saying to yourself, “What is this?”